34
SMD2499FS
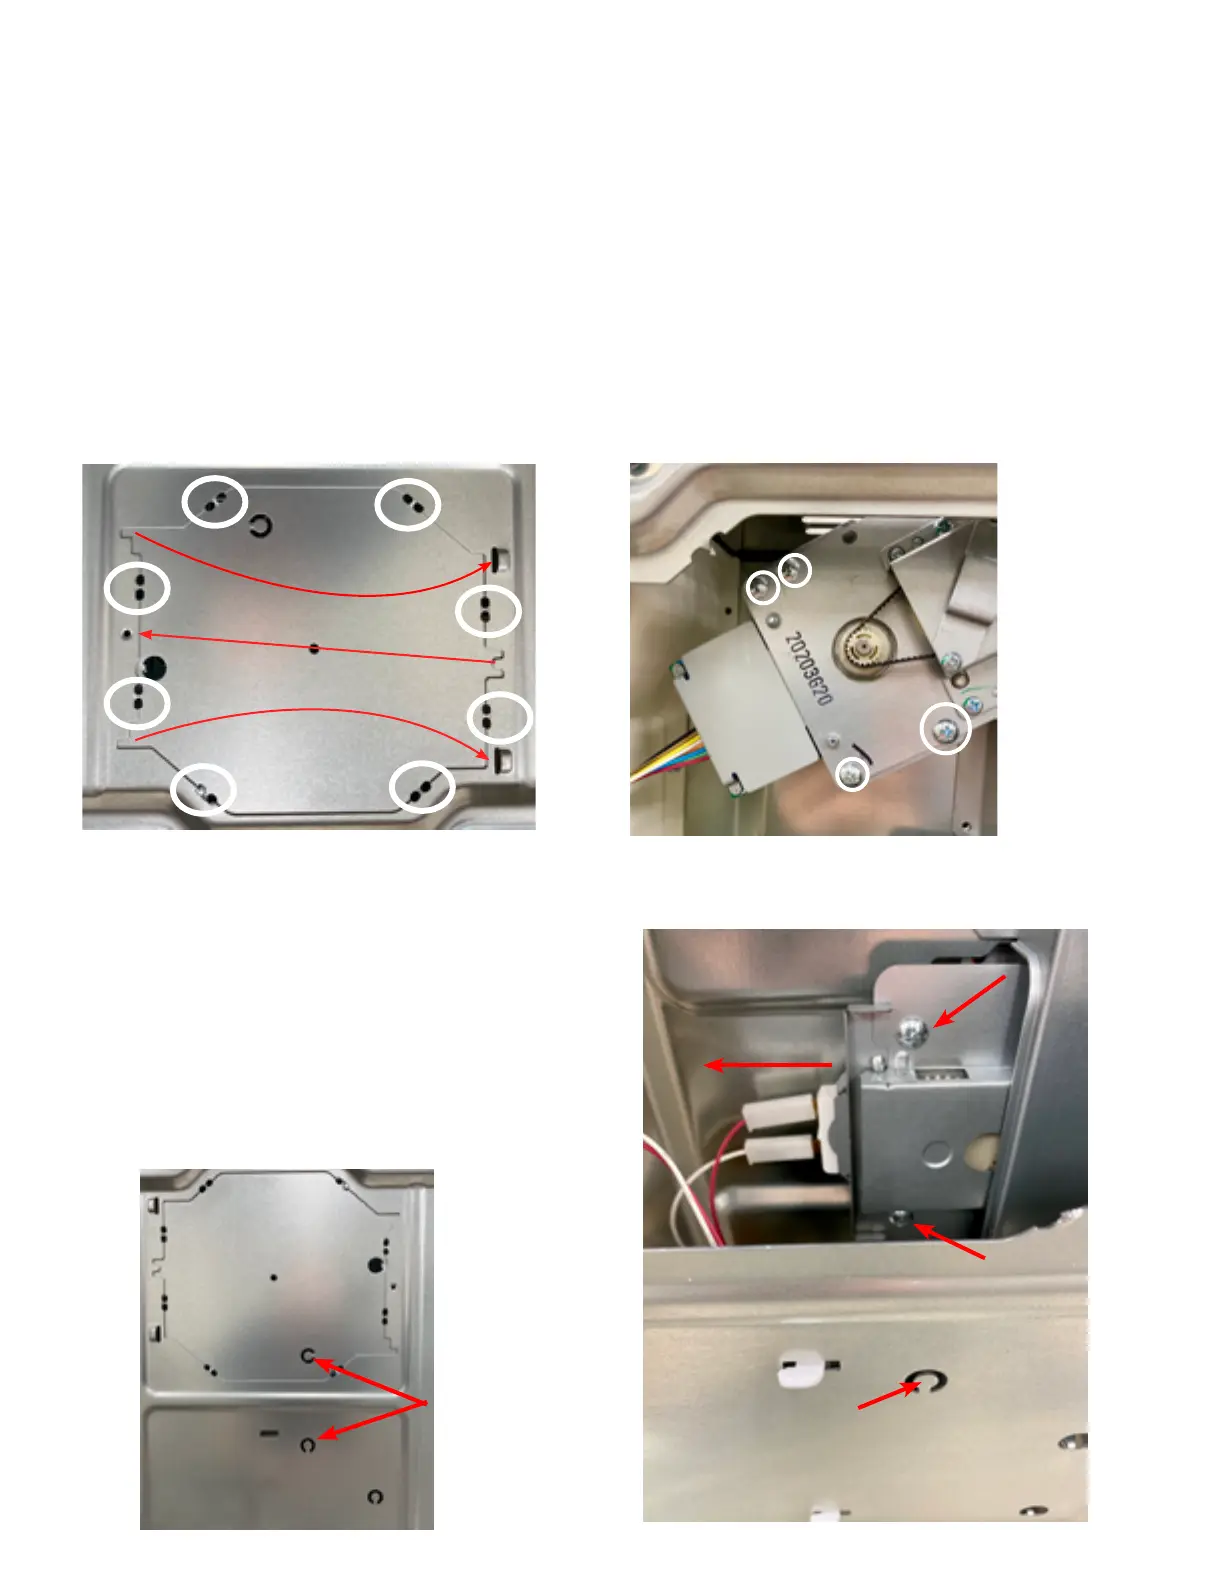
1. Turn the Drawer up on its back.
2. There are two ways to remove Bottom Stir Motor.
a. Remove Left Outer case & use access holes
(Fig. G-4)
b. Follow "Auto Drawer Gear Removal" (Fig. G-1 & G-3)
3. Unhook the (2) wires connected to the Stir Motor.
4. Bend access hole so that the bottom screw is visible.
5. Remove the (2) screws holding the Stir Motor and gently pull
sideways (Fig. G-3).
6. Proceed in reverse to reinstall the new Stir Motor.
(This procedure can be performed without removing the outercase)
1. If you are just replacing the Auto drawer Gear, it will not be necessary to follow the "Convection Microwave Drawer
Disassembly" as previously stated.
2. Turn the Drawer up on its back and knockout the Auto Drawer Gear hole cover (Fig. G-1).
3. Remove the (4) screws holding the auto drawer gear to the bottom cavity angle (Fig. G-2).
4. Unhook wiring connector to Auto Drawer Gear motor.
5. Disengage (pull) Auto Drawer Gear motor from rack gear.
6. The Auto Drawer Gear motor is now free.
Installation:
1. Proceed in reverse to reinstall the Auto Drawer Gear motor making sure that the gear teeth are engaged before tightening
the screws.
2. After Auto drawer Gear is reinstalled, insert the hole cover in reverse order so that it can be secured with a XOTS740P08000
common screw. (Fig. G-1)
Fig. G-1
AUTO DRAWER GEAR REMOVAL / INSTALLATION
BOTTOM STIR MOTOR REMOVAL
Fig. G-2
Fig. G-3
Bend Access Hole
Fig. G-4
Bend Access Holes