5
Wireless Tips to Improve System Performance
If you encounter wireless interference or dropouts, try the following suggestions:
• Replace the transmitter batteries
• Choose a different frequency channel
• Reposition the antennas so there is nothing obstructing a line of sight to the transmitter (including the audience)
• Avoid placing transmitter and receiver where metal or other dense materials may be present
• Move the receiver to the top of the equipment rack
• Remove nearby sources of wireless interference, such as cell phones, two-way radios, computers, media players, and
digital signal processors
• Keep transmitters more than two meters (6 feet) apart
• Keep the transmitter and receiver more than 5 meters (16 feet) apart
• Keep them away from large metal objects
• During sound check, mark trouble spots and ask presenters or performers to avoid those areas
Getting Good Sound
Correct Microphone Placement
• Hold the microphone within 12 inches from the sound
source. For a warmer sound with increased bass
presence, move the microphone closer.
• Do not cover grille with hand.
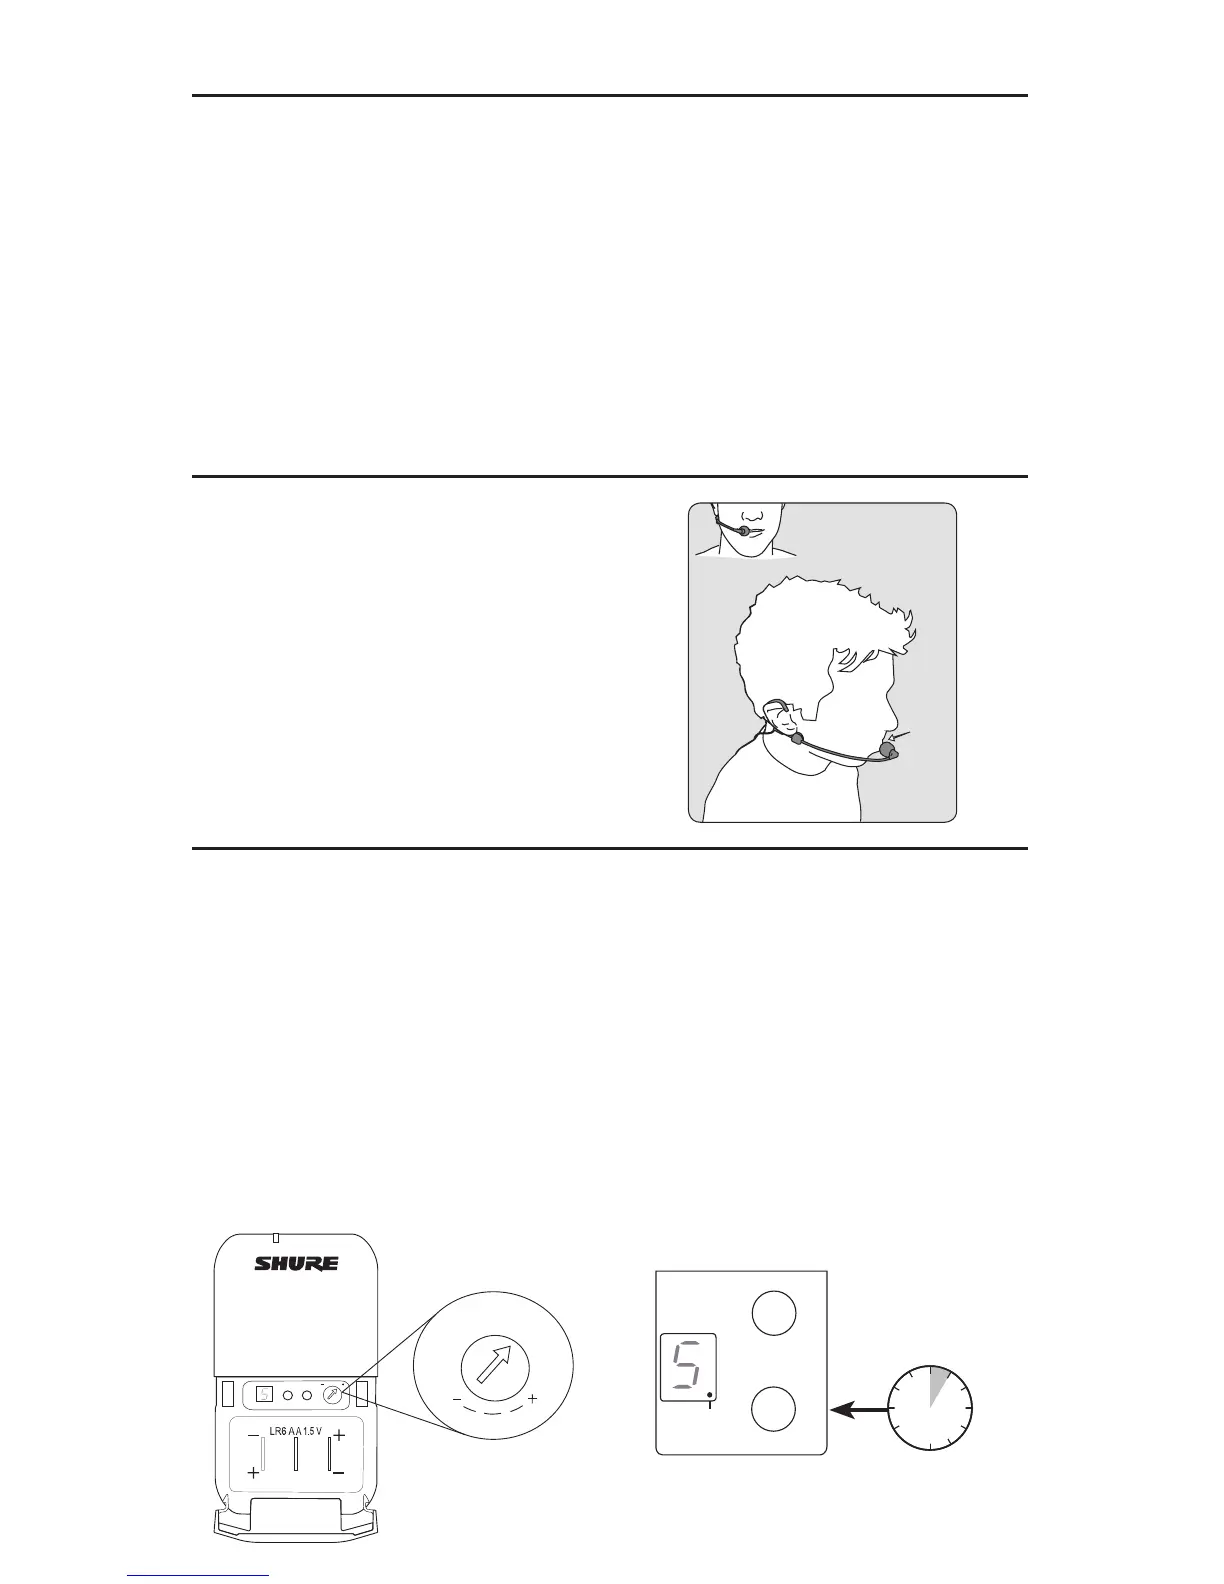
Wearing the Headworn Microphone
• Position the headworn microhpone 13 mm (1/2 in.)
from the corner of your mouth.
• Position lavalier and headworn microphones so that
clothing, jewelry, or other items do not bump or rub
against the microphone.
Adjusting Gain
Monitor the audio LED indicator on the receiver front panel when setting the transmitter gain.
• Green: normal levels
• Red: excessive sound levels (overload).
BLX1
Use the thumb wheel on the inside of the bodypack bat-
terydoortoadjustthegainup(+)ordown(−)untildesired
level is reached. For instruments, turn gain to minimum
setting. For lavaliers, increase the gain as desired. The
audio LEDs on the receiver should illuminate when you
speak into the microphone or play your instrument. The
red LED should only illuminate infrequently when you
speak loudly or play your instrument loudly.
BLX2
The BLX2 features two gain level settings, default and
attenuated (-10 dB). The default setting is used for most
situations. If the receiver audio LED flickers red often, set
the microphone to attenuated. Use the channel button to
change the gain setting.
1. Hold down the channel button for 5 seconds.
A dot appears on the lower right-hand corner of the
LEDdisplay,whichindicates−10dBgainsettinghas
been activated.
2. To change the gain back to default, hold the channel
button again for 5 seconds, or until the dot disappears.

 Loading...