G85139-H1751-U529-D1G85139-H1751-U529-D1
© Siemens plc 1999© Siemens plc 1999
Make sure that the input power supply is isolated before making or changing any connections toMake sure that the input power supply is isolated before making or changing any connections to
Ensure that the motor is configured for the correct supply voltage. Single/three phase 230 V unitsEnsure that the motor is configured for the correct supply voltage. Single/three phase 230 V units
must not be connected to a 400 V three phase supply.must not be connected to a 400 V three phase supply.
When synchronous machines are connected or when coupling several motors in parallel, theWhen synchronous machines are connected or when coupling several motors in parallel, the
inverter must be operated with voltage/frequency control characteristic (P077= 0 or 2) and slipinverter must be operated with voltage/frequency control characteristic (P077= 0 or 2) and slip
compensation must be disabled (P071 = 0).compensation must be disabled (P071 = 0).
This equipment is suitable for use in a circuit capable of delivering not more than 100,000This equipment is suitable for use in a circuit capable of delivering not more than 100,000
symmetrical amperes (rms), for a maximum voltage of 230 / 460 V * when protected by asymmetrical amperes (rms), for a maximum voltage of 230 / 460 V * when protected by a
time delay fuse *.time delay fuse *.
* As detailed in section 8.* As detailed in section 8.
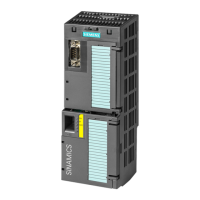
: the power terminals are directly available beneath the inverter. For the control terminals lift: the power terminals are directly available beneath the inverter. For the control terminals lift
the front cover the front cover
of the inverter. of the inverter.
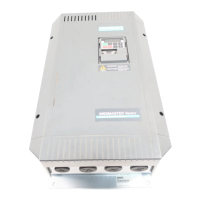
Frame size B:Frame size B:
use a small bladed screwdriver (use a small bladed screwdriver (
as shown in Figure 2.2.2as shown in Figure 2.2.2
) to release the terminal cover of) to release the terminal cover of
the inverter and allow it to the inverter and allow it to
swing down to hang beneath the swing down to hang beneath the
Frame size C:Frame size C:
use a small bladed screwdriver (use a small bladed screwdriver (
as shown in Figure 2.2.3as shown in Figure 2.2.3
) to release the gland plate and the) to release the gland plate and the
fan housing; allow them both to swing down to hang beneath the inverter.fan housing; allow them both to swing down to hang beneath the inverter.
Connect the cables to the power and control terminals in accordance with the information supplied in thisConnect the cables to the power and control terminals in accordance with the information supplied in this
Ensure that the leads are connected correctly and the Ensure that the leads are connected correctly and the
equipment is properly earthed.equipment is properly earthed.
The control, power supply and motor leads must be laid separately. They must not be fed throughThe control, power supply and motor leads must be laid separately. They must not be fed through
the same cable conduit/trunking.the same cable conduit/trunking.
High voltage insulation test equipment must not be used on cables connected to the inverter.High voltage insulation test equipment must not be used on cables connected to the inverter.
Use screened cable for the control cable, Class 1 60/75Use screened cable for the control cable, Class 1 60/75
C copper wire only. Tightening torque for the fieldC copper wire only. Tightening torque for the field
wiring terminals is 1.1 Nm.wiring terminals is 1.1 Nm.
A small bladed screwdriver, max. 3.5 mm will be required to operate the control terminal WAGO cable clampA small bladed screwdriver, max. 3.5 mm will be required to operate the control terminal WAGO cable clamp
connectors as shown inconnectors as shown in
To tighten up the power and motor terminalTo tighten up the power and motor terminal
screws use a screws use a
mm cross-tip screwdriver.mm cross-tip screwdriver.
When all power and control connections are complete:When all power and control connections are complete:
lower the flap in lower the flap in
the front cover of the front cover of
the inverter.the inverter.
Frame size B :Frame size B :
lift and secure the lift and secure the
terminal cover to the iterminal cover to the i
Frame size C :Frame size C :
lift and secure the lift and secure the
gland plate and the gland plate and the
fan housing to the fan housing to the
 Loading...