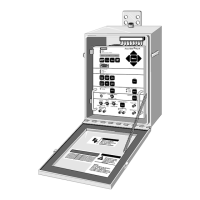
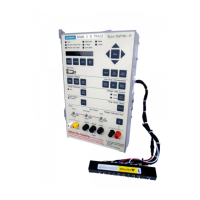
4 Setting Up the MJ-XL Control Panel
16 Siemens Power Transmission & Distribution, Inc.
4 Setting Up the MJ-X
L
Control Panel
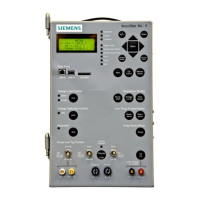
4.1 Setup—Overview
MJ-X
L
Control Panel setup procedures allow you to cus-
tomize the control panel to your needs and to the environ-
ment in which it is installed. You can describe specific
regulator parameters and power-flow conditions, and
define automatic-mode operation. Previous generation
controllers used dip switch settings and jumpers for this
purpose. With the MJ-X
L
Control Panel, simply use front
panel touch-keys and the display screen to define the
operating environment. Also, the MJ-X
L
communication
facilities in conjunction with the MJXplorer software can
be used to set up the MJ-X
L
Control Panel.
The setup process for the MJ-X
L
Control Panel consists of
several steps:
Configuration
In this step, use the <CONFIGURE> Menu to describe
the regulator and the power distribution system.
Setpoints
In this step, use the <REGULATOR> Menu to define
Automatic Mode setpoints (voltage level, bandwidth, time
delay, etc.).
Logging Requirements
In this step, use the <LOG SETUP> Menu to define data
logging requirements (what values you want logged, how
often, under what conditions, etc.).
Security Definition
In this step, use the <PASSWORD> Menu to define pass-
words and to activate security protection.
Communications Definition
In this step, use the <COMMUNICATIONS> Menu to
define communications parameters (baud rate, unit
address, etc.).
This chapter describes each of the setup parameters, and
explains how they are defined. Chapter 7 contains addi-
tional detail and background information to help you make
the proper selections.
Table 4.1 The <CONFIGURE> Menu
DATA ITEM DESCRIPTION VALID INPUTS DEFAULT INC
TapChngr Tap Changer Type SIEMENS, GE, LTC, LTC.5, COOP SD, or COOP DD SIEMENS - - -
Type Regulator type STRAIGHT or INVERTED STRAIGHT - - -
Syst System wiring configuration WYE, DELTA LAG, DELTA LEAD WYE - - -
DeltaPwr Delta power configuration OPEN or CLOSED OPEN - - -
Utility Pol Utility winding polarity NORM, REV NORM - - -
U2 PT Utility winding turns ratio 1500 to 65,500:100 to 150 7200:120 1 Volt
P2 PT Potential Transformer turns ratio 1500 to 65,500:100 to 150 7200:120 1 Volt
CTratio Current Transformer turns ratio 50 to 7200:0.0 to 9.5 200:0.2 1:0.1
Meter Volts Transformer side used for Metering SEC, PRI SEC - - -
I Threshold % Tap change minimum current 0% to 10% 1% 1%
I Shift Current shift for reverse power flow 0° to 359° 0° 1°
I Load Max Max. Load Current (for Overcurrent) 0% to 350% 350% 1%
I FullLoad Regulating Device Full Load Rating 50 to 7200 350 1 Amp
PwrFlow Power flow modes F LOCK, R LOCK, IDLE R, BI-DIR, NEUT R, CO-GEN F LOCK - - -
PT Threshold Tap change low voltage limit 0 to 134 90 - - -
Time Time of day HH:MM:SSA/P - - - - - -
Date Date NN/NN/NN - - - - - -
Format Date format MO/DA/YR or DA/MO/YR MO/DA/YR - - -
Dmd Type Method for determining Demand THERMAL or WINDOW THERMAL - - -
Dmd Time Demand Period length (minutes) 1 to 999 30 1 Minute
DmdSubperiods Number of Demand subperiods 1 to 99 (For Sliding Window mode only) 6 1
Reset Min/Max? Reset all min/max readings N or Y N - - -
Min/Max t.o. Min/Max display timeout (seconds) 1 to 99 15 1 Second
Screen t.o. Return to <METER> Menu (min.) 1 to 99 5 1 Minute
Function t.o. Return to previous Menu item 1 to 99 10 1 Second
Basis volts Controller nominal voltage level 115, 120, or 125v 120 - - -
R Limit Raise Limit (for Alert Only) 10, 8¾, 7½, 6¼, 5 10 - - -
L Limit Lower Limit (for Alert Only) 10, 8¾, 7½, 6¼, 5 10 - - -
Tap Alert Enable or disable tap alerts ENABLE or DISABLE ENABLE - - -
TapPosHold Hold tap position value indefinitely PERM. or TEMP. TEMP. - - -
Vers Microprocessor software version NN.NNNN - - - - - -
Memo1 User-supplied text Up to 10 Characters All blanks - - -
Memo2 User-supplied text Up to 10 Characters All blanks - - -
 Loading...