65
AUTO BRACKETING
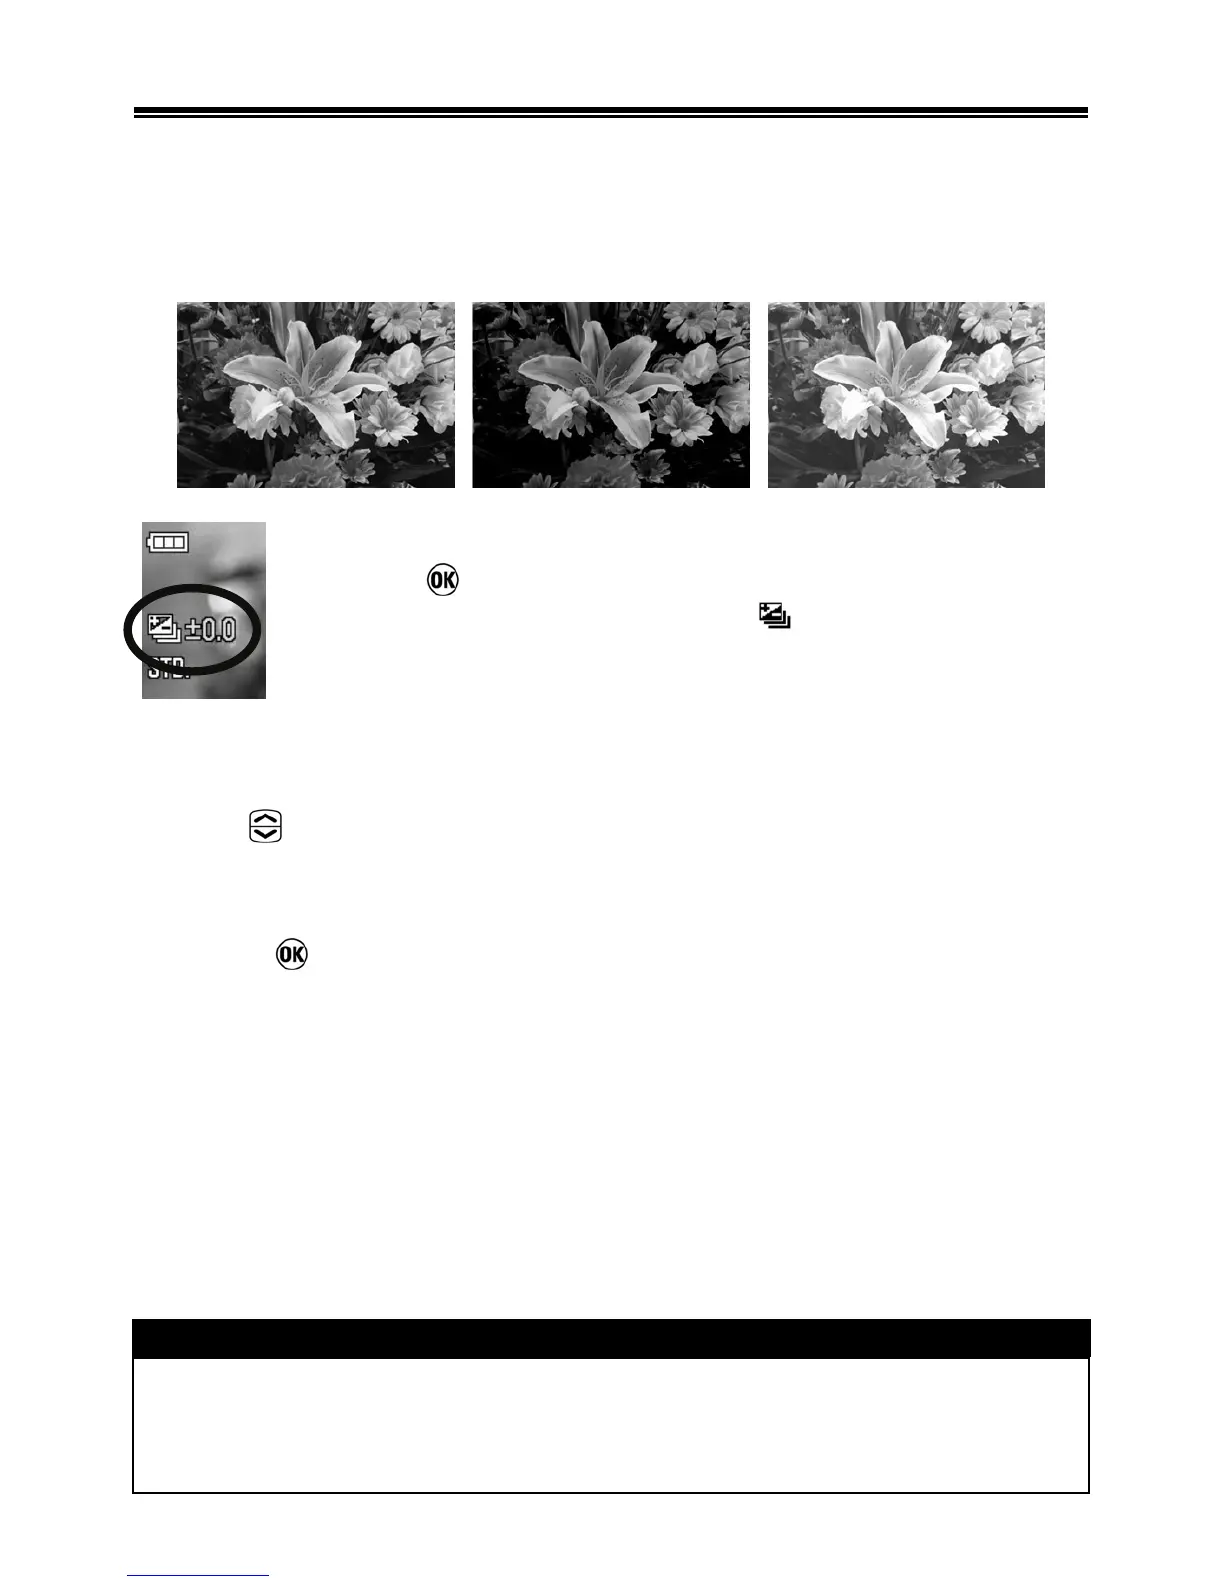
This function of the camera lets you take a sequence of pictures of
the same subject at three different exposure levels; Appropriate
Exposure, Under Exposure and Over Exposure. If it is difficult to
determine the proper exposure, please use this function.
1
Press the button.(The bracketing amount will change into
the Allocate function guide. The icon and the green
bracketing amount will be displayed on the left corner on the
LCD monitor.
•
It is not possible to set the Auto Bracketing mode if you pop-up the built-in flash.
2
Use the buttons to set the bracketing amount.
● It can be set in 1/3 stop increments up to ±3
3
Press the button to apply the exposure. (The bracketing amount will
change from green into white. The Allocate function guide will disappear.)
The camera will take three pictures in the following sequence; Appropriate
exposure, under exposure and over exposure.
The exposure bracketing can be used with 4 different modes.
P
Mode ; Both shutter speed and aperture value will be changed.
A
Mode ; Only shutter speed will be changed.
S
Mode ; Only aperture value will be changed.
M
Mode ; Only shutter speed will be changed.
TIP
• Three frames will be taken continuously by pressing the shutter button.
When the Drive Mode is set to the Self Timer, only 1 frame will be taken
each time the shutter button is pressed.

 Loading...