CHAPTER V ARC CALIBRATION
25
CHAPTER VI FIBER STRIPPING AND PUT INTO HOLDER
26
ARC Calibration: According to the local ground elevation, temperature, moderate and other environmental
factors to match the most suitable discharge ARC, in order to obtain the bestsplicing effect, we strongly
recommend you to do arc calibration when it is the first time to use the new machine, the seasonal
changes, the use place changes, or you replaced the electrodes;discharge correction should be done after
changing the type of fiber (such as single mode and multi-mode switching)
The procedure for ARC Calibration is as follows:
Step 1: Please turn on
the splicer machine, then
login Signalfire 2 on your
phone, connect the Bluetooth,
open the Arc Calibration
(See picture)
Step 2: After open the ARC Calibration, the icon
of Normal Mode "will change to the icon for"
ARC fiber,place the fiber to fiber holder and
close the o Calibration ". Then please strip
and cleave the windshield cover, the splicer
machine will perform the ARC calibration
automatically. (See picture)
Step 3: There is flash on the display screen
and slight burst from the ARC, the fiber head
is burning into a spherical shape the action
stops after the screen icon" "change
back to" "icon , it shows the ARC
calibration is successful. If the icon does not
change back to the Normal mode “ “ icon
the screen fiber still flashes,please
re-cleave the fiber and repeat the above
steps until the Arc calibration is successful.
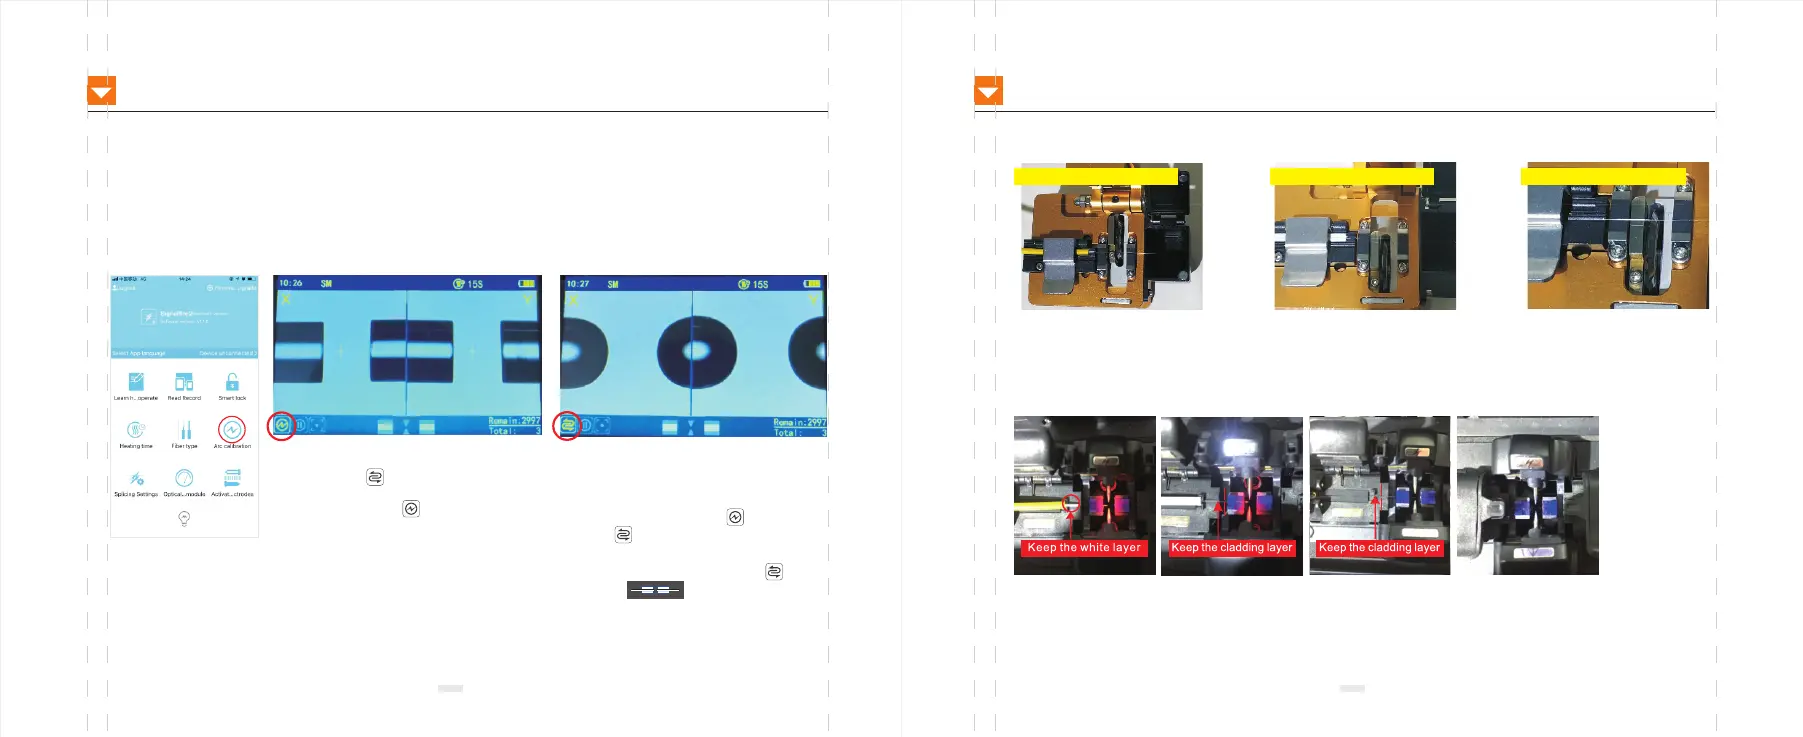
Cleave fiber instructions:
With the yellow plastic laye as the
boundary, the scale is between 13 to
18. the white skin layer should be
longe than the vellow layer of 5mm,
placed it in the scale 10-12 or so(near
the ubber pad about 2mm or less)
Scale is between 13 to 18
To the cladding layer, the scale is
between 10 to 12
Instructions for put fiber into holder:
Jumper fiber(pigtail fiber)
Rubbe insulated fiber
Bare fiber
Gtail Fiber/jumper Fiber
Gtail Fiber/jumper Fiber
Rubber insulated fiber
Rubber insulated fiber
Cable/bare fibeCable/bare fibe
Remark
1.Please make sure you place the fiber into the blue V-groove, the tip of the fiber is close to the center of the electrode. If the fiber is too far
from the electrode center, it will remind you to re-place it.The recommended distance between the left and right ends of the optical fiber is
between 2 and 4mm.
2.The tip of the fiber must not exceed the center of electrode.

 Loading...