6
Setup
This monitor works with platforms running at horizontal
frequencies between 30 and 121 kHz.
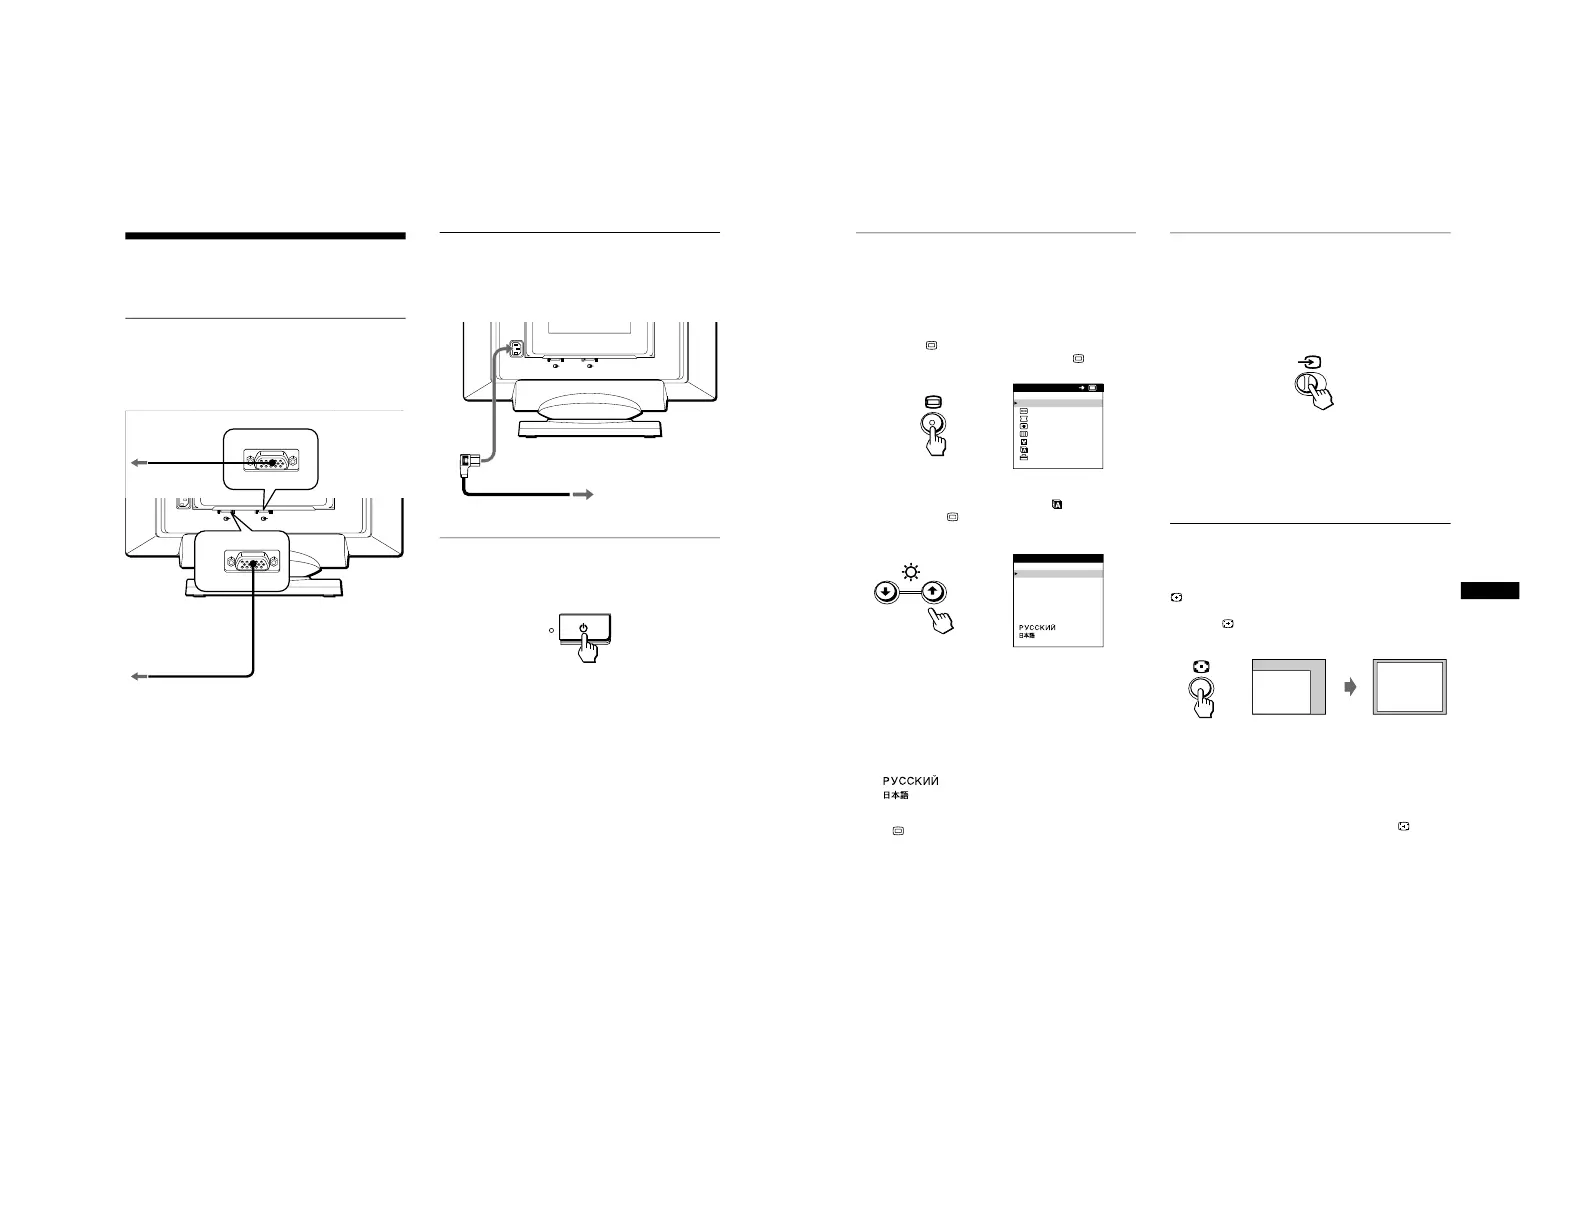
Step 1:Connect your monitor to
your computer
With the monitor and computer switched off, connect the video
signal cable to the video input connector of the monitor and to the
video output of the computer.
Notes
• Do not touch the pins of the video signal cable connector as this might
bend the pins.
• When connecting the video signal cable, check the alignment of the
HD15 connector. Do not force the connector in the wrong way or the
pins might bend.
Step 2:Connect the power cord
With the monitor and computer switched off, first connect the
proper power cord for your local power supply to the monitor,
then connect it to a power outlet.
Step 3:Turn on the monitor and
computer
First turn on the monitor, then turn on the computer.
The installation of your monitor is complete.
If necessary, use the monitor’s controls to adjust the picture.
If no picture appears on your screen
• Check that the monitor is correctly connected to the computer.
• If NO INPUT SIGNAL appears on the screen, follow the on-
screen messages (page 16).
• If you are replacing an old monitor with this model and OUT
OF SCAN RANGE appears on the screen, reconnect the old
monitor. Then adjust the computer’s graphic board so that the
horizontal frequency is between 30 – 121 kHz, and the vertical
frequency is between 48 – 160 Hz.
For more information about the on-screen messages, see “Trouble
symptoms and remedies” on page 17.
Selecting the on-screen menu
language (LANGUAGE)
English, French, German, Spanish, Italian, Dutch, Swedish,
Russian and Japanese versions of the on-screen menus are
available. The default setting is English.
1
Press the button.
See page 9 for more information on using the button.
2
Press the m/M buttons to highlight LANGUAGE
and press the button again.
See page 9 for more information on using the m/M buttons.
3
Press the m/M buttons to select a language.
• ENGLISH
• FRANÇAIS: French
• DEUTSCH: German
• ESPAÑOL: Spanish
• ITALIANO: Italian
• NEDERLANDS: Dutch
• SVENSKA: Swedish
• : Russian
• : Japanese
To close the menu
Press the button once to return to the main MENU, and twice to return
to normal viewing. If no buttons are pressed, the menu closes
automatically after about 30 seconds.
To reset to English
Press the
0
(reset) button while the LANGUAGE menu is displayed on
the screen.
Selecting the input signal
You can connect two computers to this monitor using the video
input 1 (y1) and video input 2 (y2) connectors. To select one
of the two computers, use the t switch.
Move the t switch.
The selected connector appears on the screen for 3 seconds.
“INPUT 1” (video input 1 connector: y1) or “INPUT 2” (video
input 2 connector: y2) appears on the screen.
Note
If no signal is input to the selected connector, NO INPUT SIGNAL
appears on the screen. After a few seconds, the monitor enters the power
saving mode. If this happens, switch to the other connector.
Automatically sizing and centering
the picture
You can easily adjust the picture to fill the screen by pressing the
(auto sizing and centering) button.
Press the button.
The picture automatically fills the screen.
Notes
• This function is intended for use with a computer that provides a full-
screen picture. It may not work properly if the background color is dark
or if the input picture does not fill the screen to the edges.
• Pictures with an aspect ratio of 5:4 (resolution: 1280
×
1024, 1600
×
1280) are displayed at their actual resolution and do not fill the screen
to the edges.
• The displayed image moves for a few seconds when the button is
pressed. This is not a malfunction.
 Loading...