40
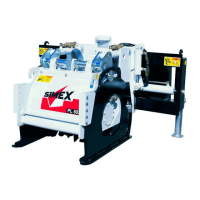
10.3 Tool replacement (teeth)
The teeth are held in
the tooth holder by a
retainer spring.
special spanners (ref.
"2") supplied with the
machine as shown in
the figure.
key with a hammer and
remove the tooth (ref.
"1").
N.B. the bent extractor, which is generally easier to use, cannot be used if the rear section of the tooth is
inaccessible. An open-ended spanner can always be used, as long as the rabbeting on the tooth into which it
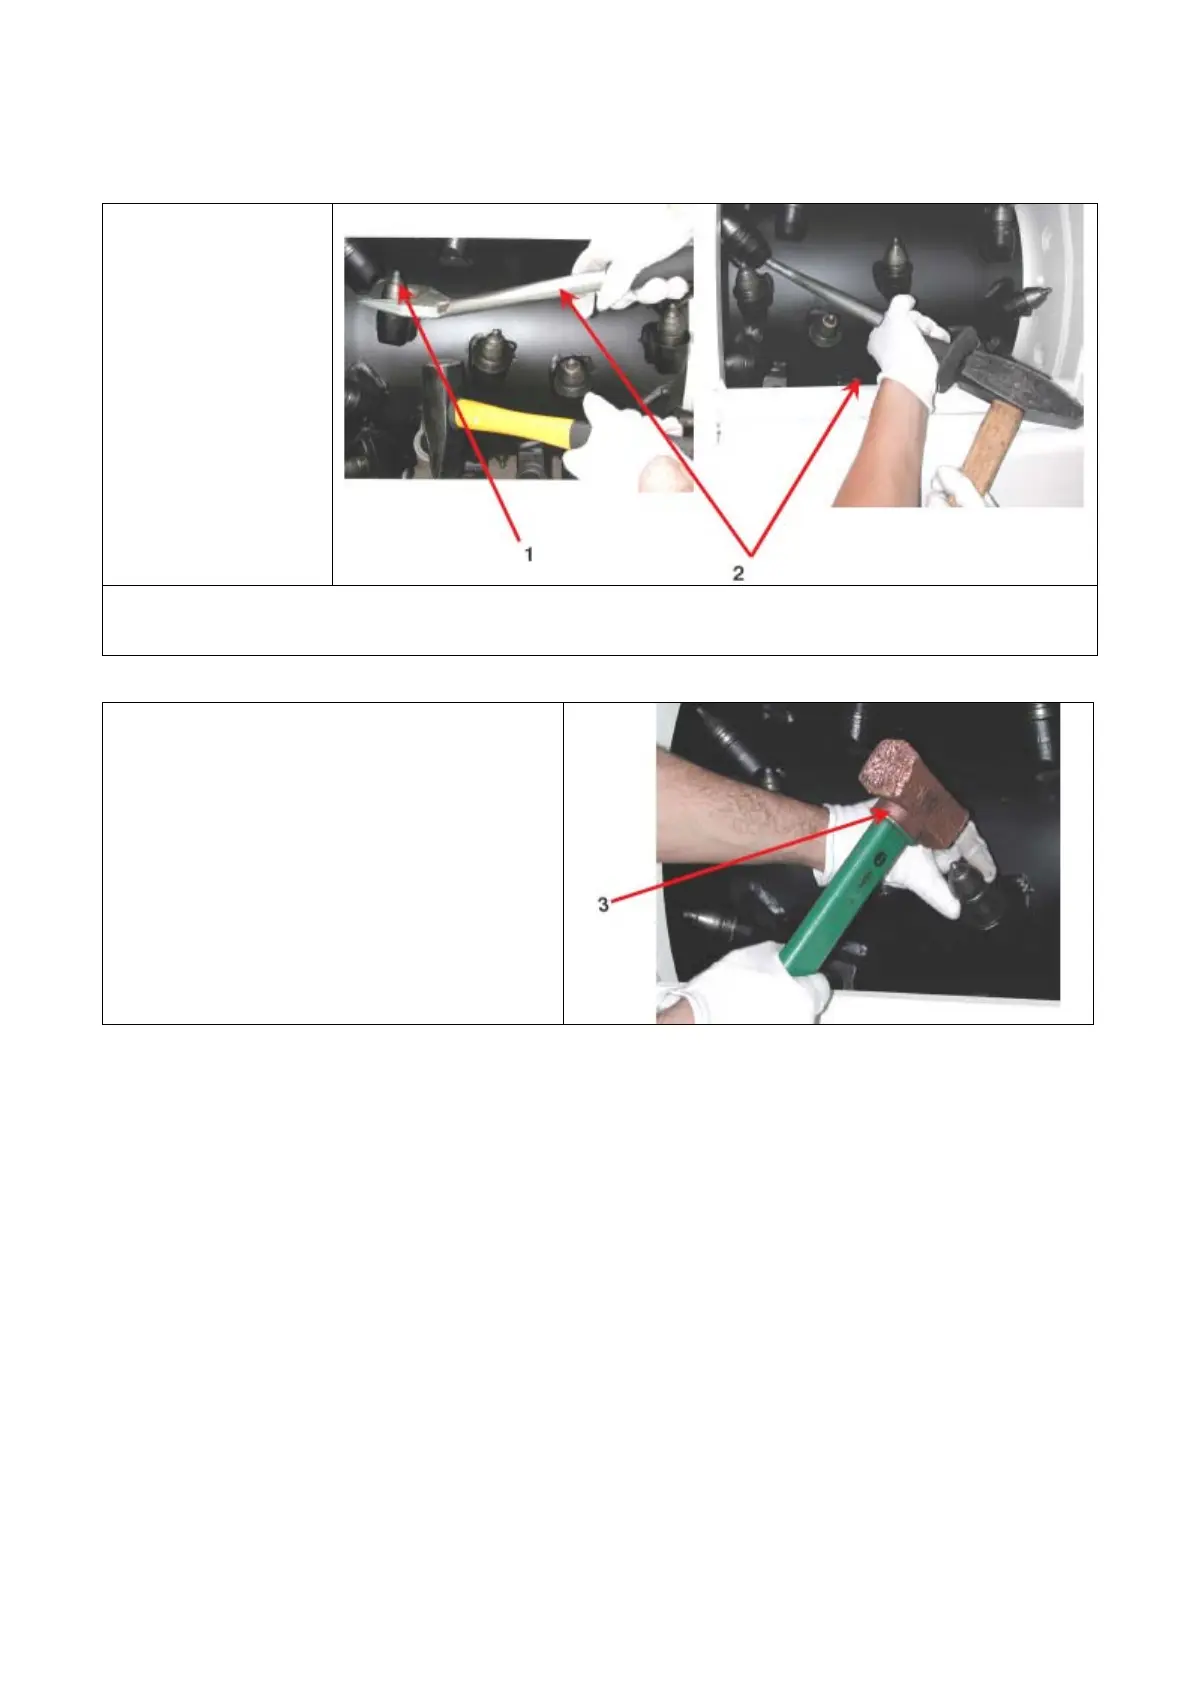
Fitting stage:
Before fitting new tools, clean and lubricate the
seat with diesel fuel. Next, fit the tool in manually,
tapping its tip with a copper hammer as show in
the figure (ref. "3"), until the tooth’s shank is fitted
fully in the tooth holder.
10.4 Machine cleaning
Use legally approved, neutral detergents. Clean the machine with a high pressure jet of water.
10.5 Structural integrity assessment
Clean the machine carefully prior to the inspection. Inspect the bearing framework visually to check its
integrity, focusing particularly on the welding. If you notice any weakening or small cracks, contact an
authorised dealer to have it examined more closely.
10.6 Nut and bolt tightness test
Check all the nuts and bolts are securely fastened and, if any parts have worked loose, tighten them. For
tightening torques, see table in chapter 17.