The second line from the top shows the name of the selected channel in the scan
group.
The next line shows the channel type, i.e. ‘Member’ if it is a normal member of the scan
group, ‘Priority’ if it is the priority channel, or ‘Skipped’ if the channel is currently
skipped from the scan group.
Use the ▼ /▲ keys to scroll through and select a channel from the scan group list.
Press the ‘M’ or Back key to return to the Scan Group Edit screen.
Press the ‘Reset’ function key (if configured) to return to the default screen display.
Press the OK key and the action selection pop-up menu will be displayed.
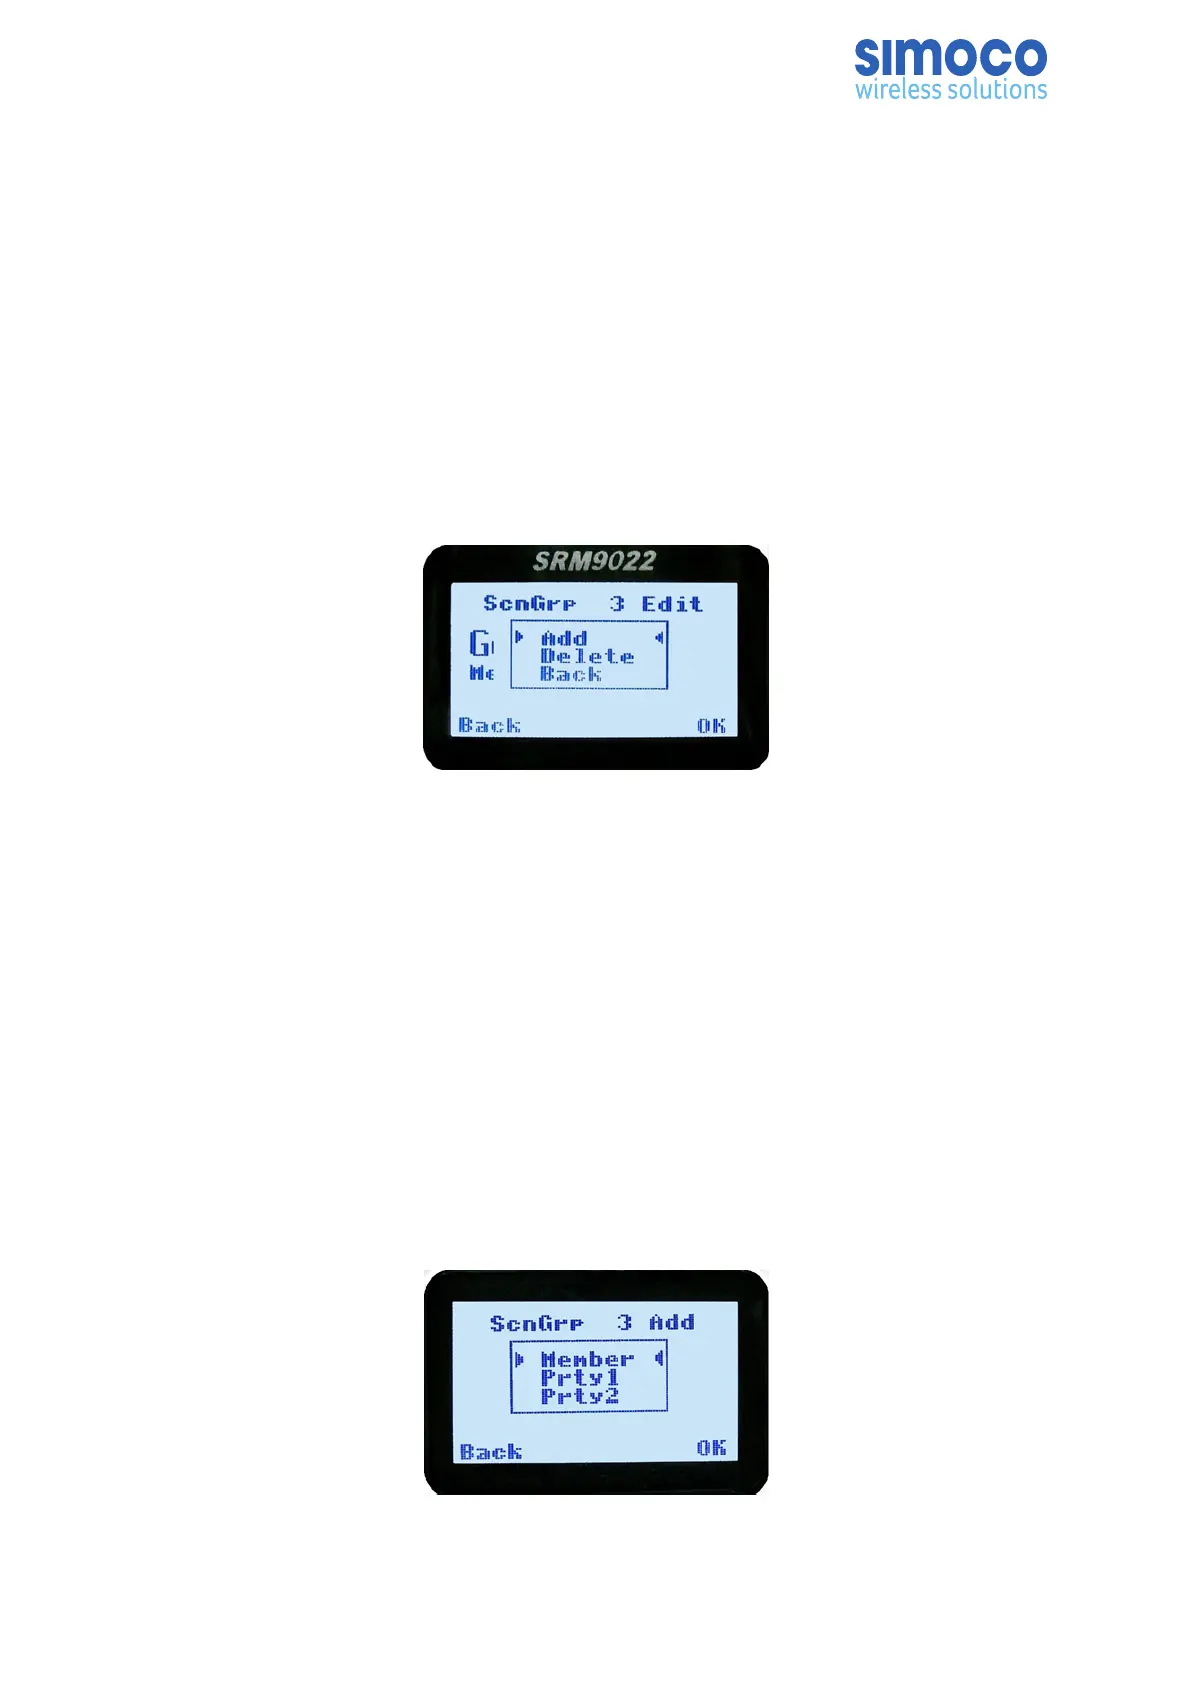
The Scan Group Edit pop-up menu selections are:
• Add – to add a channel to the scan group.
• Delete – to delete the currently selected channel from the scan group.
• Back – to return to previous menu screen.
Use the ▼ /▲ keys to select the required option.
With the ‘Delete’ option selected, press the OK key to remove the selected channel
from the scan group and to return the radio to the default screen. If scanning is
enabled on the current channel, scanning will start. The deletion is permanent.
With the ‘Add’ option selected, press the OK key to display the Scan Group Add –
Priority Level screen.
Doc Number: TNM-U-E-0055 ISSUE 4.0 Page 59