Installing motherboards into 2975-91xx Back Boxes (Non-4100U/4100ES)
Mount the NIC card to 2975-91xx Master Controller Bays (4100) or, for the 4100U/4100ES, mount the NIC card to 2975-94xx CPU Bays. This section
describes mounting into 4100 Master Controller Bays.
Installing into a 2975-91xx Master Controller Bay
Use the following guidelines when installing into a master controller bay.
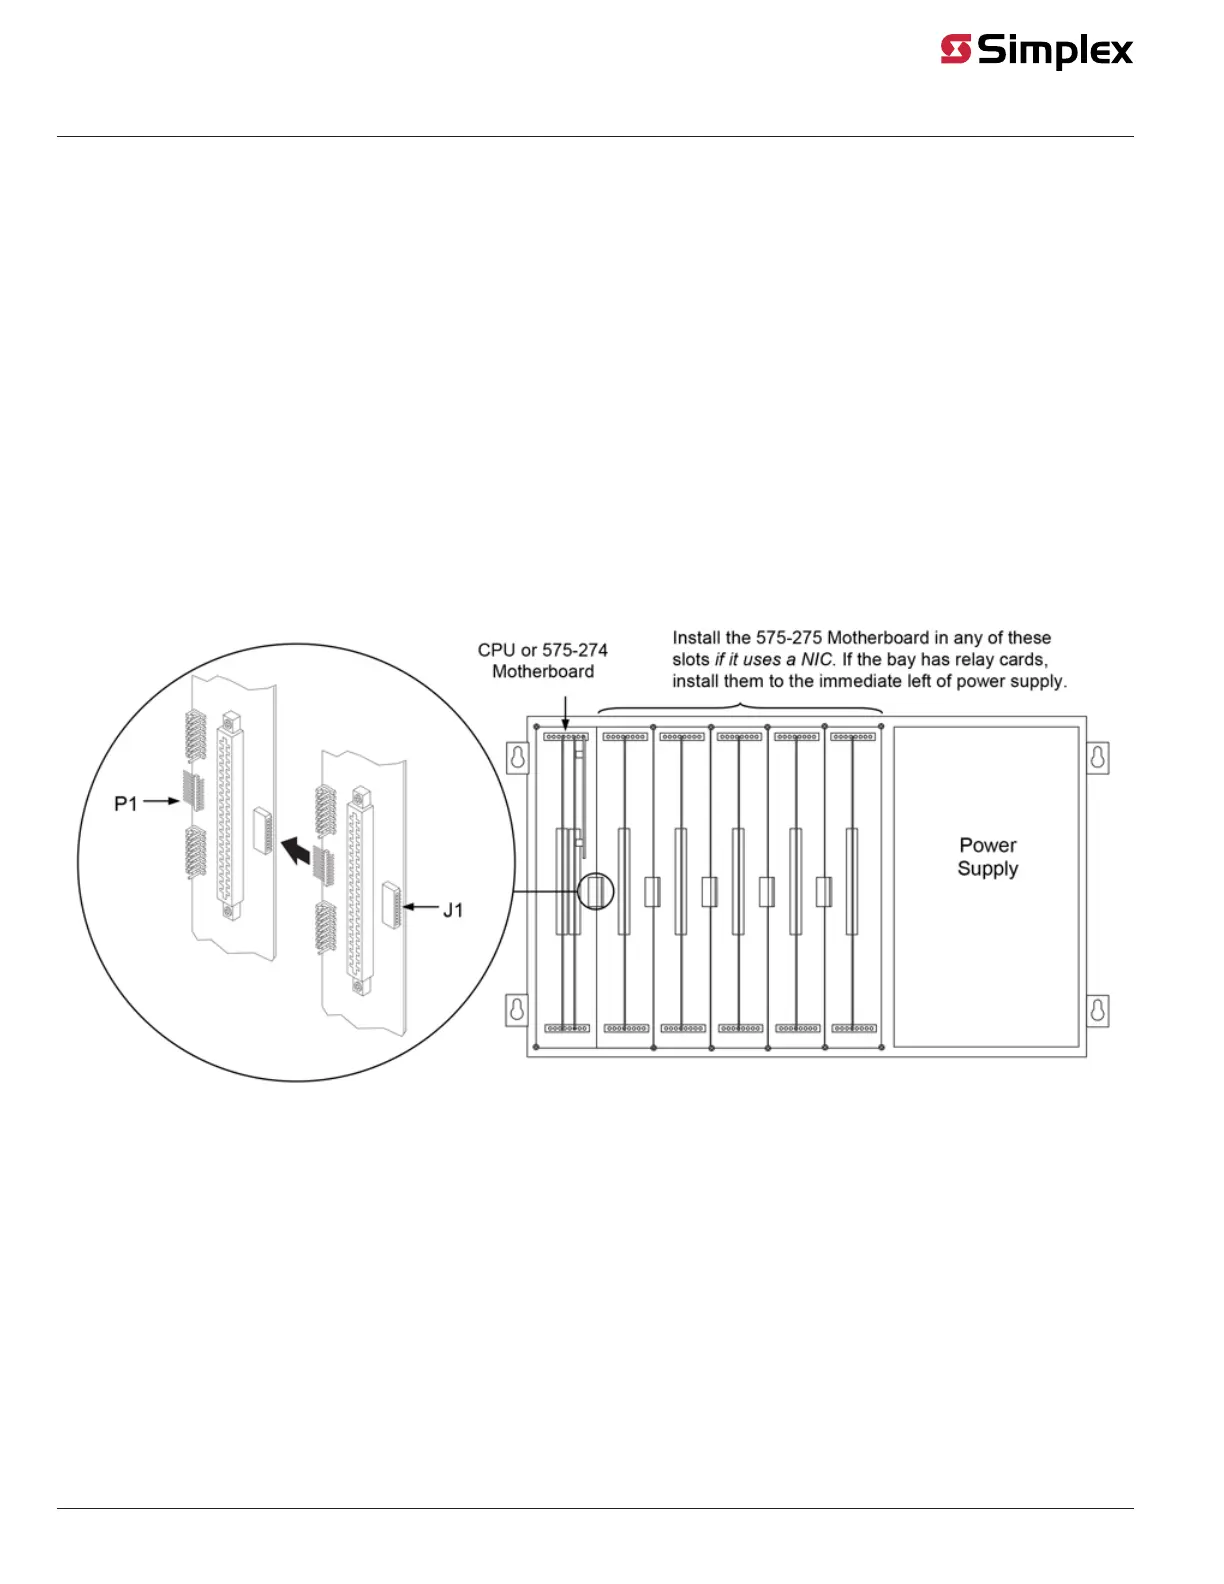
1. If the 565-274 Master Motherboard is used, install it in the leftmost position of the bay. If the 565-274 Master Motherboard is not used, install the
CPU motherboard in the leftmost position of the bay.
2. Install the power supply in the rightmost position of the bay.
3. Install relay cards in the slots immediately to the left of the power supply. This is necessary to allow for the proper routing of non-power limited
wiring (120 VAC wiring connected to the relay card).
4. If used, install the Class B motherboard (565-275) to the left of the relay cards. If a physical bridge is used with the Class B motherboard, it must
be to the right of any motherboards using NICs. This allows for earth ground detection via the physical bridge.
Installing the motherboard
1. Position the motherboard.
a. 565-274 Master Motherboard: if it is not already installed, orient with the connector labeled J3 on the right and the header labeled P1 on
the left.
b. 565-275 Class B Motherboard: orient with the connector labeled J1 on the right and the header labeled P1 on the left.
2. 565-275 Class B Motherboard only: Slide the motherboard to the left until the pins are completely inserted in the connector of a previously
installed motherboard.
3. Secure the motherboard to the chassis with four torx screws.
Figure 14: Installing the motherboard into a 4100 Master Controller Bay
page 14 579-182 Rev. V
4100/4120-6014, 4100-6078 NICs and 4100/4120-Series Media Modules Installation Instruction