38
Simrad RS10 Operation and Installation Manual
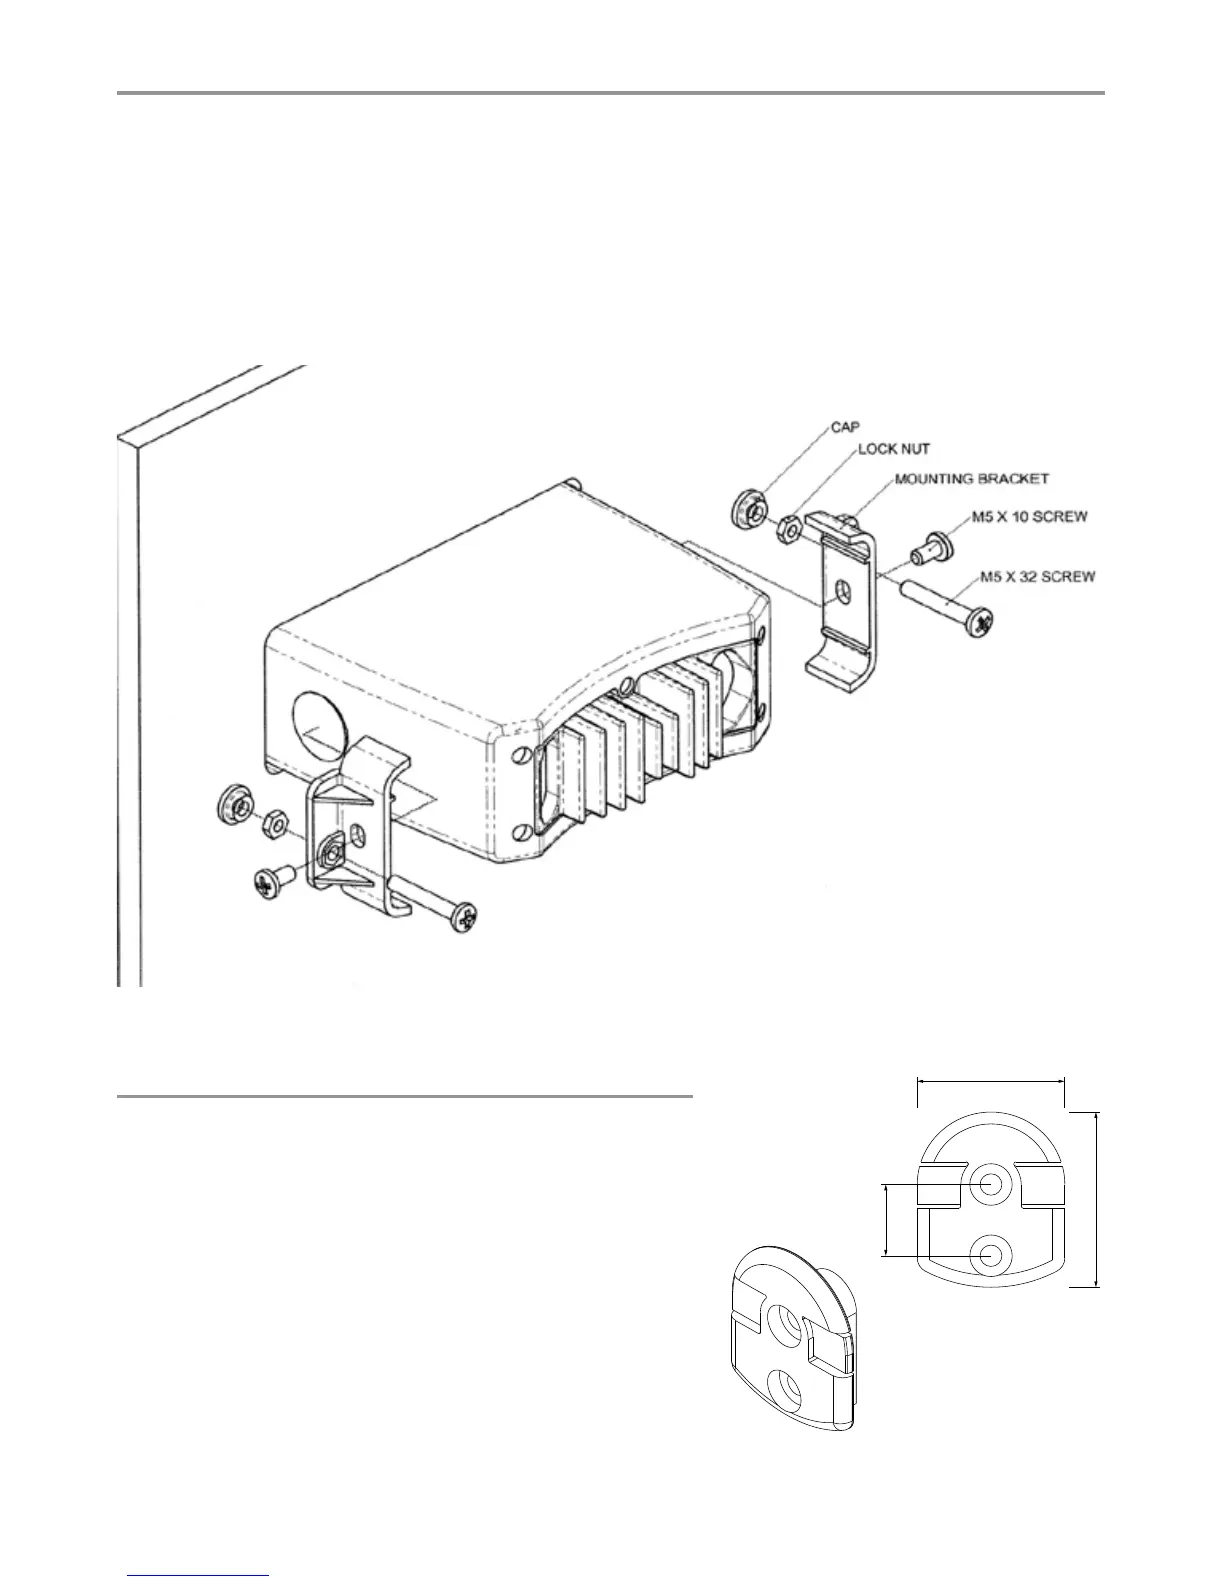
7-6 Recessed Installation
Tape the installation template onto the chosen location site.1.
Cut out the area marked by the solid dark line. (The dashed line indicates the total area that will be 2.
covered by the radio fascia after installation.) Drill the 4 mounting holes.
Remove the installation template and slide the radio into the cavity.3.
Screw each M5x32 screw through the screw hole in the mounting bracket, then attach the stopper. 4.
If your bulkhead exceeds 0.51” (13mm), the stopper can be discarded if necessary.
Tighten the M5x32 screws until the radio is held rmly against the rear of the bulkhead.5.
7-7 Install the Microphone Bulkhead Mount
Hold the microphone bulkhead mount at the chosen 1.
location and use a soft pencil to mark the screw hole
positions on the mounting surface.
Ensure that the
microphone curly cable will comfortably reach this
location BEFORE you drill.
Drill the two pilot screw holes where marked.2.
Use a short length Philips screwdriver and the set of 3.
two at screws, spring washers, plain washers, and
nuts to secure the microphone bulkhead mount at
the location site.
Hang the microphone on its mount.4.