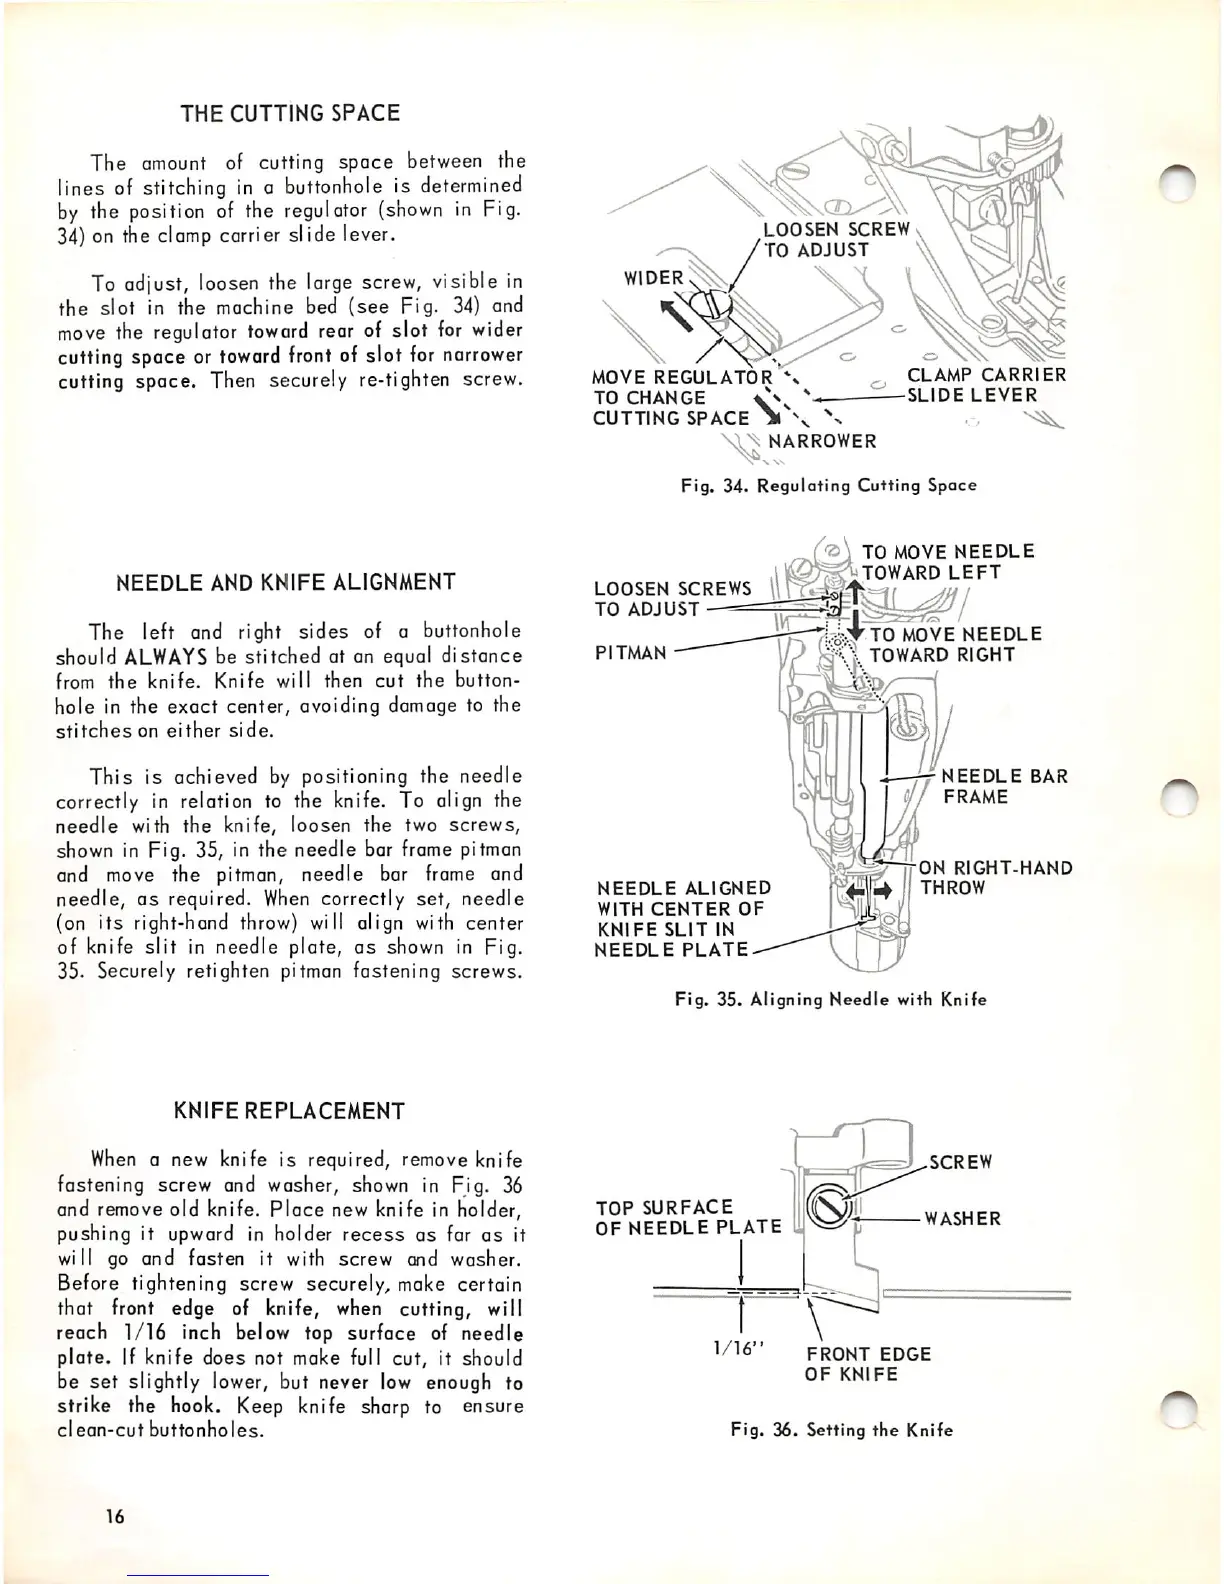
THE
CUTTING
SPACE
The
amount
of cutting space
between
the
lines of stitching
in
a
buttonhole
is
determined
by
the position of the
regulator
(shown
in
Fig.
34) on the
clomp
carrier slide lever.
To
adjust,
loosen
the large screw, visible
in
the slot in the mochine bed
(see
Fig. 34) and
move
the regulator
toward
rear of slot
for
wider
cutting space or
toward
front
of slot
for
narrower
cutting space. Then securely re-tighten screw.
NEEDLE
AND
KNIFE
ALIGNMENT
The left and right sides of a buttonhole
should
ALWAYS
be stitched at an equal distance
from
the
knife. Knife will then
cut
the
button
hole in the exact center, avoiding damage to the
stitches
on
either
side.
This is achieved by positioning the needle
correctly in relation to the
knife.
To
align
the
needle
with
the
knife, loosen the two
screws,
shown in Fig. 35, in the needle bar frame pitman
and
move
the pitman, needle bar
frame
and
needle, as required.
When
correctly
set,
needle
(on
its
right-hand throw) will align with center
of knife
slit
in needle plate,
as
shown in Fig.
35. Securely retighten pitman fastening screws.
KNIFE
REPLACEMENT
When
a new knife is required,
remove
knife
fastening screw and washer,
shown
in Fig.
36
and remove old knife.
Place
new knife in holder,
pushing it upward in holder
recess
as for as it
will go and fasten it with screw and washer.
Before tightening screw securely,
moke
certain
that front edge of knife,
when
cutting, will
reach 1/16 inch below top surface of needle
plate. If knife does not moke full cut, it should
be
set
slightly lower, but never low enough to
strike the hook. Keep knife sharp to ensure
clean-cut
buttonholes.
16
WIDER
LOOSEN
SCREW
TO
ADJUST
MOVE
REGULATOR
%
TO
CHANGE
CUTTING
SPACE
- ^
NARROWER
CLAMP
CARRIER
-SLIDE
LEVER
Fig.
34.
Regulating
Cutting Spoce
to
MOVE
NEEDLE
^TOWARD
LEFT
'H
!
LOOSEN
SCREWS
TO
ADJUST
PITMAN
TO
MOVE
NEEDLE
i
TOWARD
RIGHT
NEEDLE
ALIGNED
WITH
CENTER
OF
KNIFE
SLIT
IN
NEEDLE
PLATE
NEEDLE
BAR
!!/
FRAME
ON
RIGHT-HAND
THROW
Fig. 35. Aligning
Needle
with Knife
TOP
SURFACE
OF
NEEDLE
PLATE
1 \
1/16"
front
EDGE
OF
KNIFE
Fig.
36. Setting
the
Knife
SCREW
WASHER