REGULATING
OIL
FLOW
TO
HOOK
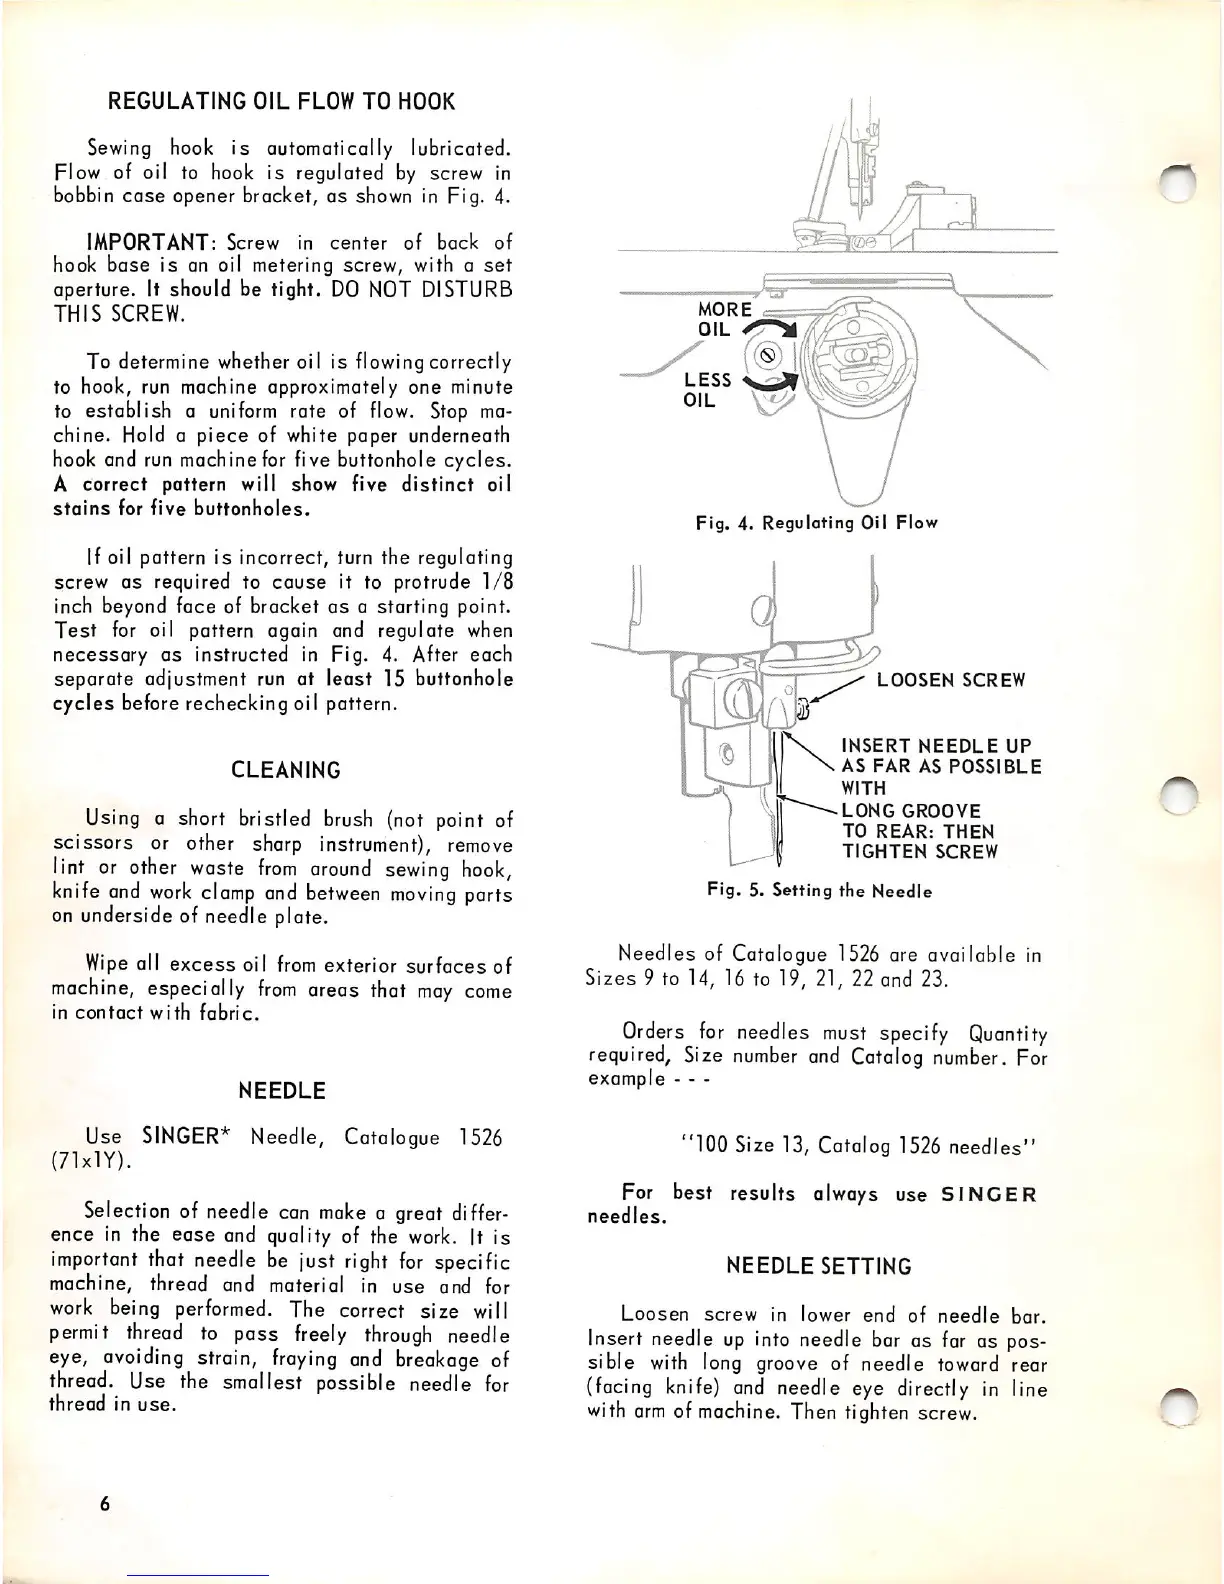
Sewing hook
is
automatically lubricated.
Flow of oil to hook is regulated by screw in
bobbin
case
opener bracket, as shown in Fig. 4.
IMPORTANT:
Screw
in
center
of
back
of
hook base is an oil metering screw, with a
set
aperture. It should be tight.
DO
NOT
DISTURB
THIS
SCREW.
To determine whether oil is flowing correctly
to hook, run machine approximately one minute
to
establish
a uniform rate of flow. Stop ma
chine. Hold a piece of white paper underneath
hook and run machine for five buttonhole cycles.
A correct pattern will show five
distinct
oil
stains
for
five
buttonholes.
If oil pattern is incorrect, turn the regulating
screw
as
required to
cause
it to protrude
1/8
inch beyond face of bracket
as
a starting point.
Test
for oil pattern again and regulate
when
necessary
as
instructed in Fig. 4. After each
separate adjustment run at least 15 buttonhole
cycles
before rechecking oiI pattern.
CLEANING
Using a short bristled brush (not point of
scissors or other sharp instrument),
remove
lint or
other
waste
from
around
sewing
hook,
knife
and
work
clamp
and
between
moving
ports
on underside of needle plate.
Wipe
all
excess
oil
from
exterior
surfaces
of
machine,
especially
from
areas that
may
come
in
contact
with
fabric.
NEEDLE
Use
SINGER*
Needle, Catalogue
1526
(71xlY).
Selection of needle can
make
a great
differ
ence
in
the ease and quality of the
work.
It is
important
that needle be just
right
for
specific
machine, thread and material In
use
and for
work being performed. The correct
size
will
permit
thread
to pass
freely
through
needle
eye,
avoiding
strain,
fraying
and
breakage
of
thread. Use the smallest possible needle
for
thread
in
use.
MORE
OIL
ir^sr
Fig. 4. Regulating Oil Flow
LOOSEN
SCREW
INSERT
NEEDLE
UP
AS
FAR
AS
POSSIBLE
WITH
LONG
GROOVE
TO
REAR:
THEN
TIGHTEN
SCREW
Fig.
5.
Setting
the
Needle
Needles of Catalogue 1526 are available in
Sizes 9 to 14, 16 to 19, 21, 22 and 23.
Orders
for
needles
must
specify
Quantity
required.
Size
number
and
Catalog
number.
For
example - - -
"100 Size 13, Catalog
1526
needles"
For best results always use
SINGER
needles.
NEEDLE
SETTING
Loosen
screw
in lower
end
of
needle
bar.
Insert needle
up
into
needle bar as far as pos
sible
with
long groove of needle toward rear
(facing
knife)
and
needle eye directly
in
line
with
arm
of machine. Then tighten screw.