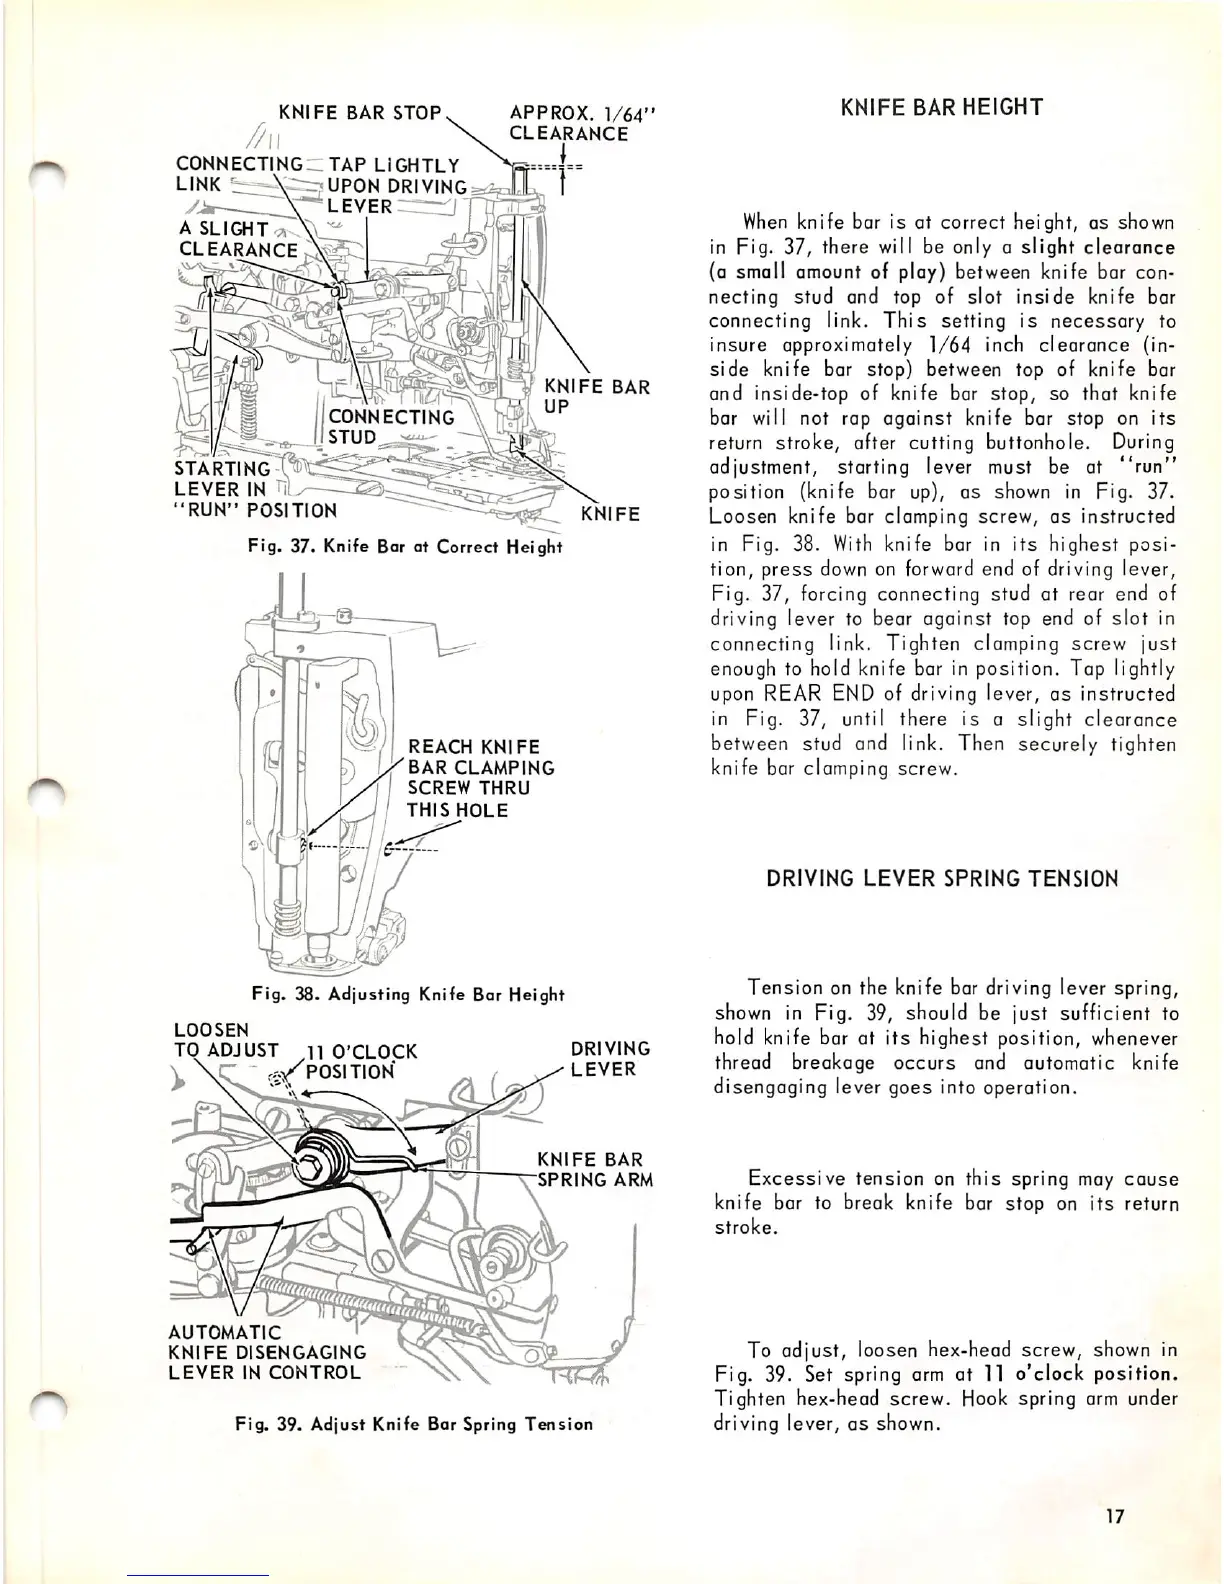
KNIFE
BAR
STOP
/^ll
CONNECTlNGnTAP
LIGHTLY
LINK
^init^r^UPON
DRIVING
./>-—LEVER
A
SLIGHT
^
CLEARANCE
STARTING^'^^
LEVER
IN
nl.
"RUN"
POSITION
CONNECTING
STUD
APPROX.
1/64"
CLEARANCE
I
KNIFE
BAR
UP
KNIFE
Fig. 37. Knife Bar at Correct Height
REACH
KNIFE
BAR
CLAMPING
SCREW
THRU
THIS
HOLE
Fig. 38. Ad|usting Knife Bar Height
LOOSEN
TO
ADJUST
^11
O'CLOCK
r-.>;^POSITION
DRIVING
LEVER
AUTOMATIC
KNIFE
DISENGAGING
LEVER
IN
CONTROL
KNIFE
BAR
SPRING
ARM
Fig. 39. Adjust Knife Bar Spring Tension
KNIFE
BAR
HEIGHT
When
knife bar is at correct height, as shown
in Fig. 37, there will be only a slight clearance
(o small
amount
of play) between knife bar
con*
necting stud and top of slot inside knife bar
connecting link.
This
setting is necessary to
insure approximately
1/64
inch clearance (in
side
knife bar stop) between top of knife bar
and inside-top of knife bar stop, so that knife
bar will not rap against knife bar stop on
its
return stroke, after cutting buttonhole. During
adjustment, starting lever must be at
"run"
position (knife bar up), as shown in Fig. 37.
Loosen knife bar clamping screw, as instructed
in Fig. 38.
With
knife bar in
its
highest posi
tion, press down on forward end of driving lever,
Fig. 37, forcing connecting stud at rear end of
driving lever to bear against top end of
slot
in
connecting link. Tighten clamping screw just
enough to hold knife bar in position. Tap lightly
upon REAR
END
of driving lever, as instructed
in Fig. 37, until there is a slight clearance
between stud and link. Then securely tighten
knife bar clamping screw.
DRIVING
LEVER
SPRING
TENSION
Tension on the knife bar driving lever spring,
shown in Fig. 39, should be just sufficient to
hold knife bar at its highest position, whenever
thread breakage occurs and automatic knife
disengaging lever goes into operation.
Excessive tension on this spring may cause
knife bar to break knife bar stop on its return
stroke.
To adjust, loosen hex-head screw, shown in
Fig. 39. Set spring
arm
at
11
o'clock position.
Tighten hex-head screw.
Hook
spring
arm
under
driving lever, as shown.
17