NEEDLE
SLOT
CLAMP
CHECK
LEFT-HAND
SOCKET
SCREW^
RIGHT-HAND
SOCKET
SCREW
HAND
RATCHET
LEVER
^ 'I
CLAMP
ARM
j.
.015"
MINIMUM
e
CLEARANCE
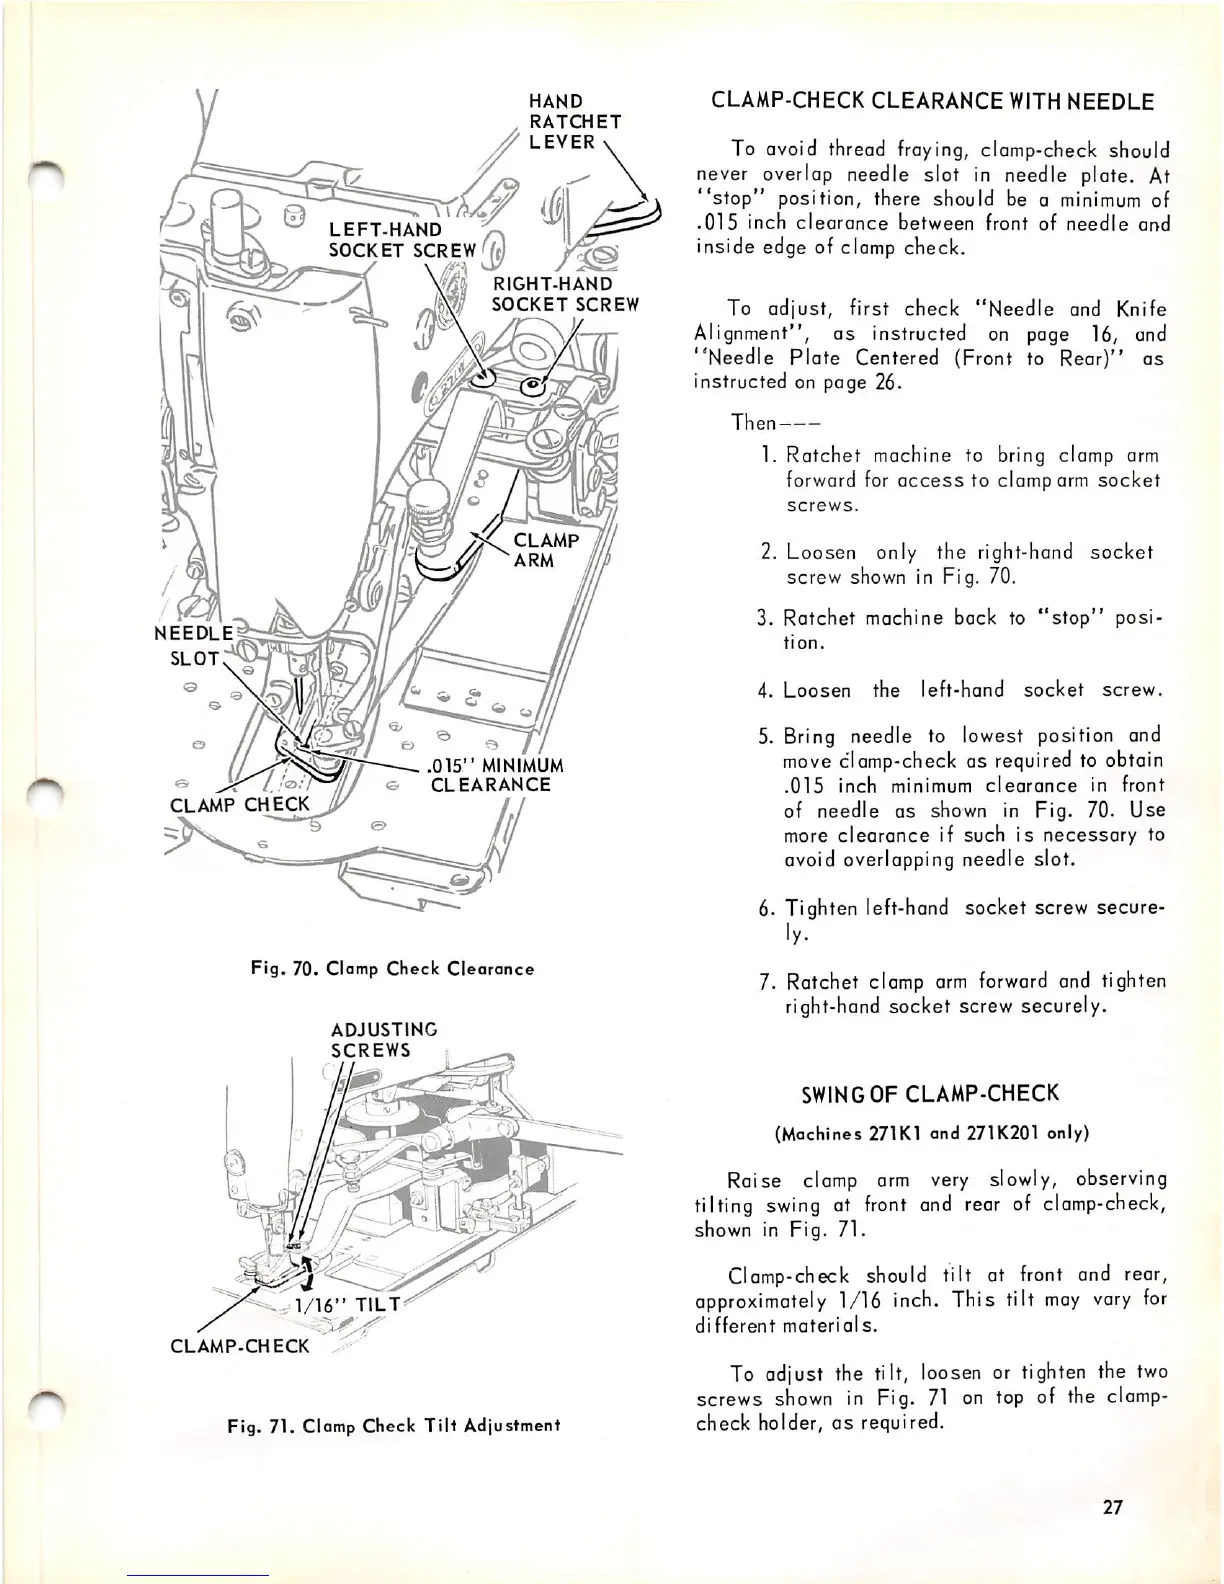
Fig.
70. Clamp
Check
Clearance
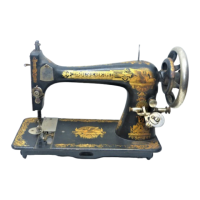
ADJUSTING
SCREWS
1/16"
TILT
CLAMP-CHECK
Fig. 71. Clamp Check Tilt Adjustment
CLAMP-CHECK
CLEARANCE
WITH
NEEDLE
To avoid thread fraying, ciamp-check should
never overlap needle slot in needle plate. At
"stop"
position, there should be a
minimum
of
.015
inch
clearance
between
front of
needle
and
inside edge of clamp check.
To
adjust,
first
check
"Needle
and Knife
Alignment", as instructed on page 16, and
"Needle
Plate
Centered (Front to Rear)" as
instructed on page 26.
Then
1. Ratchet machine to bring clamp arm
forward for
access
to clamp arm
socket
screws.
2. Loosen only the right-hand
socket
screw shown in Fig. 70.
3. Ratchet machine bock to
"stop"
posi
tion.
4.
Loosen
the
left-hand
socket
screw.
5.
Bring
needle to lowest position and
move clamp-check as required to obtain
.015
inch
minimum
clearance
in
front
of needle as shown in Fig. 70. Use
more
clearance
if such
is
necessary
to
avoid overlapping needle slot.
6. Tighten left-hand socket screw secure-
ly.
7. Ratchet clamp
arm
forward
and tighten
right-hand socket screw securely.
SWING
OF CLAMP-CHECK
(Machines 271K1 and271K2Q1 only)
Raise
clamp
arm
very
slowly, observing
tilting
swing
at
front
and
rear
of
clamp-check,
shown in Fig. 71.
Clamp-check should tilt at front and rear,
approximately
1/16 inch. This tilt
may
vary
for
different
materials.
To
adjust the tilt,
loosen
or
tighten
the
two
screws
shown
in Fig.
71
on
top of the
clamp-
check holder,
as
required.
27