8. Check the adjustment and timing of parts disturbed and correct wherenecessary, accordingto the instructions
on pages 2 through 7.
9.
Replace
thread take-up,asinstructedon
pages
15and 16.
10. Replace presserbar and presserfoot, as instructed on page 14.
11. Replacethe upper needlebar bushing,or needlebar frameand the needle bar, as insturcted on
pages
13and 24.
12. Replacethread take-up oil guard P2, Fig. 23, page 16.
13. Replaceami side shieldwick,as instructed on page16.
14. Replace ann
top
cover and tighten its four screws.
15.
Replace
face
plate
and
tighten
itsthree
screws
(ondrop
feed)
andtwo
screws
(on
compound
feed),
as
instmcted
on page 2.
THE
BOBBIN
WINDER
REMOVAL:
1.
Remove
arm
top
cover.
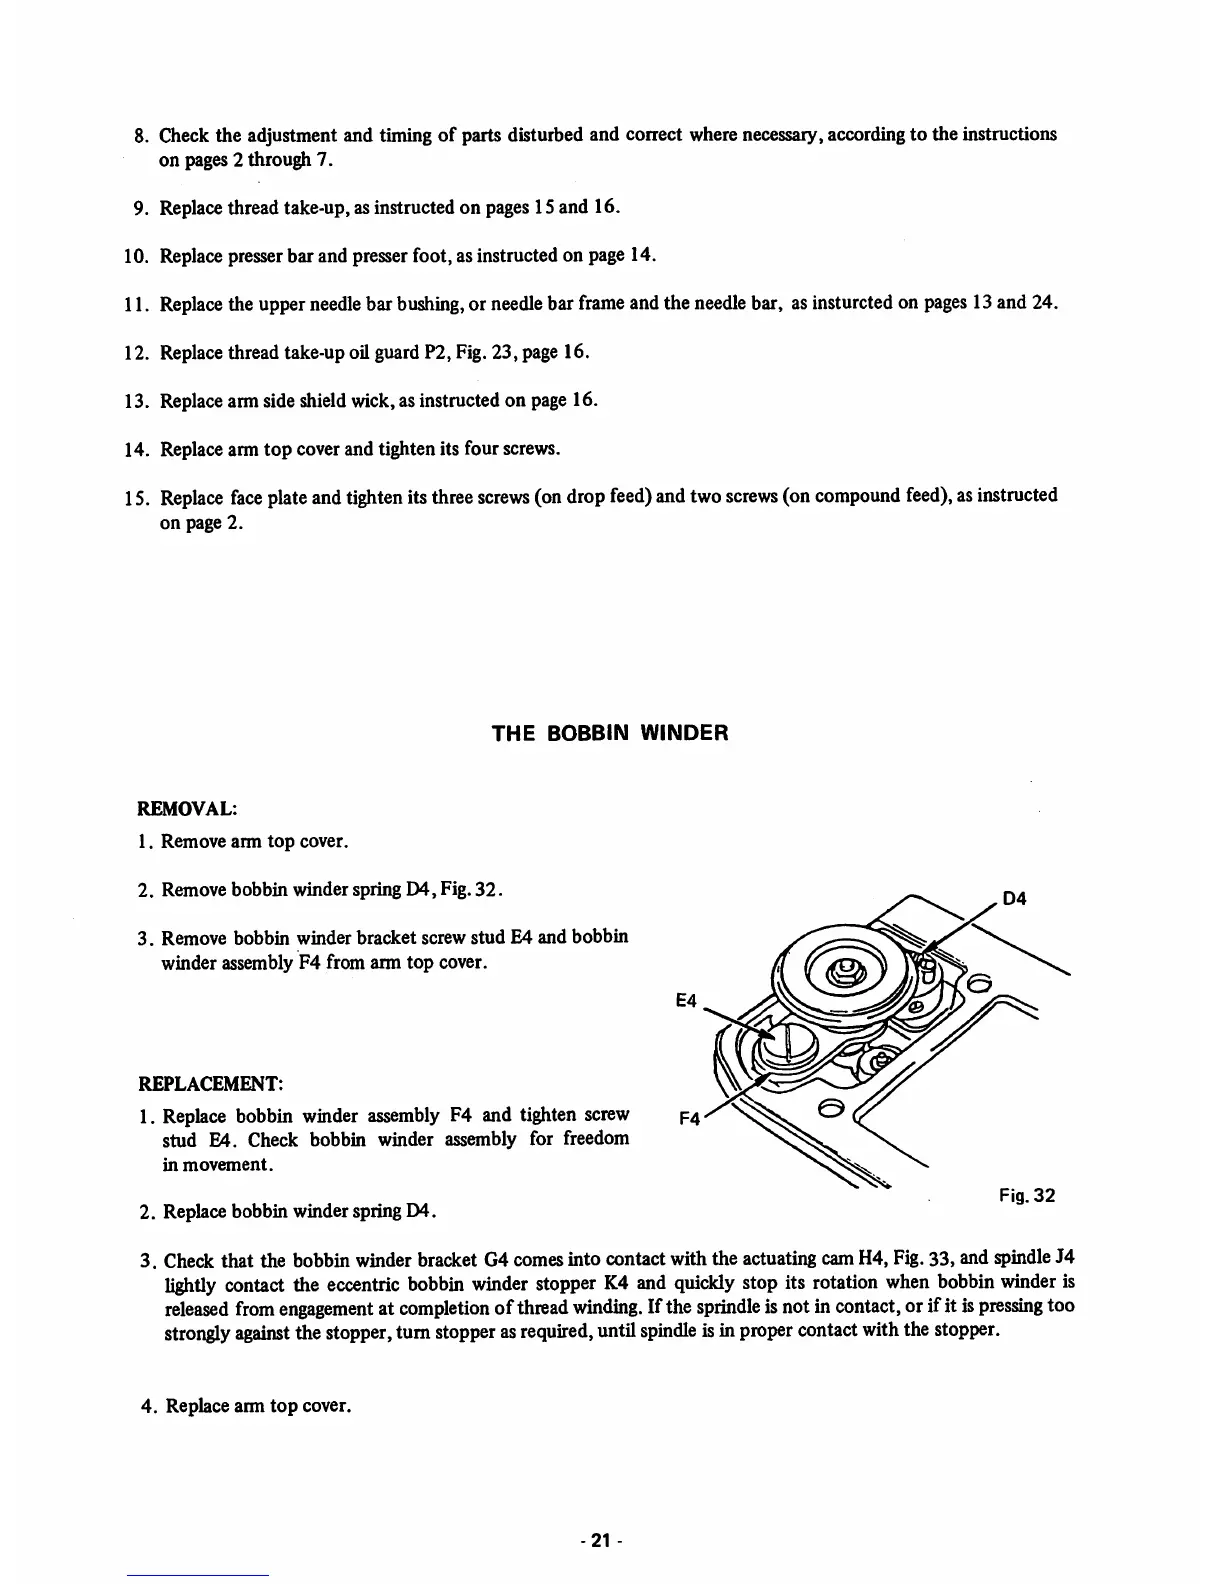
2. Remove bobbin winder spring
D4,
Fig.
32.
3. Remove bobbin winder bracket screw
stud
E4 and
bobbin
winder assembly F4 from arm top cover.
REPLACEMENT:
1. Replace bobbin winder
assembly
F4 and tighten screw
stud E4. Check bobbin winder assembly for freedom
in
movement.
2. Replace bobbin winder spring D4.
Fig.
32
3. Check that the bobbin winder bracket G4 comesinto contact with the actuating camH4, Fig.33, and spindleJ4
lightly
contact
the
eccentric
bobbin
winder
stopper
K4
and
quickly
stop its
rotation
when
bobbin
winder
is
released
from
engagement
at
completion
of
thread
winding.
Ifthe
sprindle
isnot in contact, orifit is
pressing
too
strongly
against
the
stopper,
turn
stopper
as
required,
until
spindle
isin
proper
contact
withthe
stopper.
4. Replace arm
top
cover.
21
-