Do you have a question about the Singer CG-500 and is the answer not in the manual?
Troubleshoot by checking machine connection, power, controller, and bobbin winder engagement.
Troubleshoot by checking needle condition, insertion, threading, and bobbin placement.
Troubleshoot by checking needle straightness, sharpness, size, insertion, and controls.
Troubleshoot by checking thread unwinding, winder engagement, thread securing, and spool tension.
Troubleshoot by checking machine threading, thread spool, needle size, tension, and bobbin insertion.
Troubleshoot by checking bobbin winding, insertion, threading, and bobbin case.
Troubleshoot by checking machine threading, fabric hold, needle type/size, and sharpness.
Verify presser foot attachment, lowering, and stitch length setting.
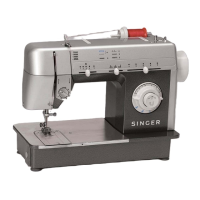
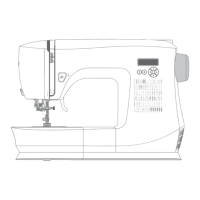
Identify key components of the sewing machine.
Guidelines to prevent fire, electric shock, and personal injury.
Connect the machine and foot control, then turn on power and light.
Select and change the needle according to fabric and thread type.
Lubricate moving parts annually, identify connections, and use SINGER oil.
Raise needle, presser foot, and remove/attach foot from shank.
Loosen screw, remove foot with shank, hook new shank, and tighten screw.
Remove lint from exposed parts using a brush and clean surfaces with a damp cloth.
Raise needle/foot, open slide plate, and slide needle plate into place.
Raise needle/foot, open slide plate, and slide cover onto needle plate.
Lift edge of extension table, slide it off the machine to convert to free-arm.
Loosen screw, remove face plate, and remove bulb from socket.
Insert new bulb, turn to lock, and replace face plate.
Practical guide to needle and thread selection based on fabric weight.
Use the same thread size and type for both needle and bobbin.
Table of needle types and sizes for different fabrics.
Remove bobbin case by turning holder and sliding it out.
Push indent to stop needle, place spool, lead thread through guides.
Place bobbin on spindle, push right, hold thread, and start winding.
Cut thread, push bobbin left, remove from spindle, trim thread.
Settings for stitch, position, width, length, foot, and needle plate.
Pull thread from bobbin, insert into case, and guide through notch.
Hold bobbin, guide thread through notch and slot, then around to other notch.
Draw thread diagonally, close slide plate, ensuring thread passes through slot.
Refer to page 26 for instructions on raising bobbin thread.
Free-arm sewing simplifies working with sleeves and tubular items.
Free-arm sewing facilitates attaching buttons on cuffs or neckbands.
Use free-arm for bartacks on pockets, pleats, and waistlines.
Place spool, lead thread through guides and around tension discs.
Pull thread up, slide into hook, and pass through take-up lever.
Adjust balance knob right if stitches are too open on the right side.
Adjust balance knob left if stitches are too open on the left side.
Return balance dial to neutral after completing all buttonholes.
Settings for stitch, position, width, length, foot, and needle plate.
Place fabric, center guides, turn dial to symbol (1), stitch to point (3).
Raise needle, turn dial to symbol (2), make stitches, remove garment.
Hold needle thread, turn handwheel, lower needle, and pull up bobbin thread loop.
Continue turning handwheel until needle rises, then pull up bobbin thread.
Open loop to find bobbin thread end.
Draw needle thread through left opening, pull both threads to back.
Settings for stitch, position, width, length, foot, and needle plate.
Cut and fit garment, baste seam, trim edge, and place seam under foot.
Cut and fit garment, baste seam, place seam under foot, press, and trim.
Set stitch width selector to straight stitch setting ( ).
Select needle position for left, center, or right.
Adjust stitch length from 0 to 5 for desired stitch size.
Press and hold button for reverse stitching.
Set stitch width selector to straight stitch setting ( ).
Select needle position for left, center, or right.
Adjust stitch length from 0 to 5 for desired stitch size.
Press and hold button for reverse stitching.
Loosen needle thread tension, sew straight stitches, pull threads, tie ends.
Sew between straight stitch rows, pull threads, and remove straight stitches.
Settings for stitch, position, width, length, foot, and needle plate.
Cut fabric squares, join with straight stitch, press, add backing, baste, and stitch.
Correct tension is crucial for seam strength and appearance.
Balanced stitch shows locked threads between fabric layers with no loops or puckering.
Excess tension causes puckering; loosen dial.
Low tension causes loops; tighten dial.
Settings for stitch, position, width, length, foot, and needle plate.
Baste garment, trim seam edge, and place seam under foot.
Trim seam edge evenly after making adjustments.
Place seam under foot so stitches align with seam line and edge.
Place fabric under presser foot, align edge with needle plate guideline.
Guide fabric gently without pulling, keeping tension even.
Secure seam ends by backstitching with reverse button.
Set stitch width selector to straight stitch setting ( ).
Select needle position for left, center, or right.
Adjust balance selector right to separate stitches or left to bring them together.
Settings for stitch, position, width, length, foot, and needle plate.
Baste backing if area is open, then sew by alternately drawing fabric.
Settings for stitch, position, width, length, foot, and needle plate.
Mark design, place batting/backing, baste layers, and stitch.
Set stitch width selector to straight stitch setting ( ).
Select needle position for left, center, or right.
Adjust balance selector right to separate stitches or left to bring them together.
Settings for stitch, position, width, length, foot, and needle plate.
Slide block right, snap on foot, check position.
Secure elastic by sewing with stretch blind hem stitch.
Settings for stitch, position, width, length, foot, and needle plate.
Insert lace after cutting fabric but before sewing together.
Raise needle, set width to straight, slide pattern selector to desired group.
Select needle position for left, center, or right.
Move width selector from straight to other positions for wider stitches.
Settings for stitch, position, width, length, foot, and needle plate.
Trim edges, cut lining, place tear right side up, sew, trim lining.
Use multi-stitch zig-zag for bartacks on belt loops.
Higher stitch length settings create more open zig-zag stitches.
Area 0-1 used for satin stitching, forming a smooth satin-like surface.
Correct tension is crucial for seam strength and appearance.
Excess tension causes puckering; loosen dial.
Low tension causes loops; tighten dial.
Settings for stitch, position, width, length, foot, and needle plate.
Use zig-zag stitch to finish fabric edges that fray.
Settings for stitch, position, width, length, foot, and needle plate.
Trace letters, center under needle, stitch outline, turn, pull threads.
Settings for stitch, position, width, length, foot, and needle plate.
Adjust tension and length for fabric; needle tension should be lower than normal.
Position fabric so zig-zag stitches align with stitching line and pierce soft fold.
Open seam by pulling fabric back to produce ladder effect and press allowances.
Set pattern, width, length, foot, and needle plate for corded satin stitch.
Set pattern, width, length, foot, and needle plate for appliqué.
Position appliqué, align needle, lower foot, and stitch edge.
Settings for stitch, position, width, length, foot, and needle plate.
Fold and press hem, baste if needed, ensuring alignment.
Position hem under foot, align soft fold with guide, lower foot, and sew.
Lower presser foot, sew, guide hem, remove pins.
| Brand | Singer |
|---|---|
| Model | CG-500 |
| Category | Sewing Machine |
| Language | English |