71
Étape3
Étape4
•Relevezl'aiguille.
•Tournezlesélecteurdelongueurpouramener
lesymbole(3)faceaupoint(•).
•Brodez(5).
•Relevezl'aiguille.
•Tournezlesélecteurdelongueurpouramener
lesymbole(4)faceaupoint.
•Brodezlepointd'arrêt(6).
•Relevezlepiedpresseur.Retirezl'ouvragede
lamachine.
•Coupezlesfils.
•Avecprécaution,coupezentrelesdeuxrangs
delaboutonnièreàl'aidedeciseauxfinsou
d'undécouseur.
Equilibragede
laboutonnière
Danscertainstissus,ilpeutapparaîtreune
différencededensitédepointentre
gaucheetdroitedelaboutonnière.
Cettedifférencepeutêtreaisémentcorrigéeen
tournantleboutonsituéaucentredu
sélecteurdelargeurdepoint.
Undéplacement,mêmetrèsfaibledecebouton
modifieladensité.
•Silespointsdudroitsonttropouverts,
tournezleboutonpoussoirversladroitejusq'à
cequeladensitédespointsaugmente.
•Silespointsdugauchesonttrop
ouverts,tournezleboutonpoussoirversla
gauchejusq'àcequeladensitédespoints
augmente.
Aprèsavoirtouteslesboutonnières,
remettezdanssapositioncentralelebouton
poussoirquivousaserviàéquilibrerles
boutonnières.
(1)
(I)
(II)
l´étape3
lecoté
lecoté
coté
coté
completé
II
I
1
5
6
22
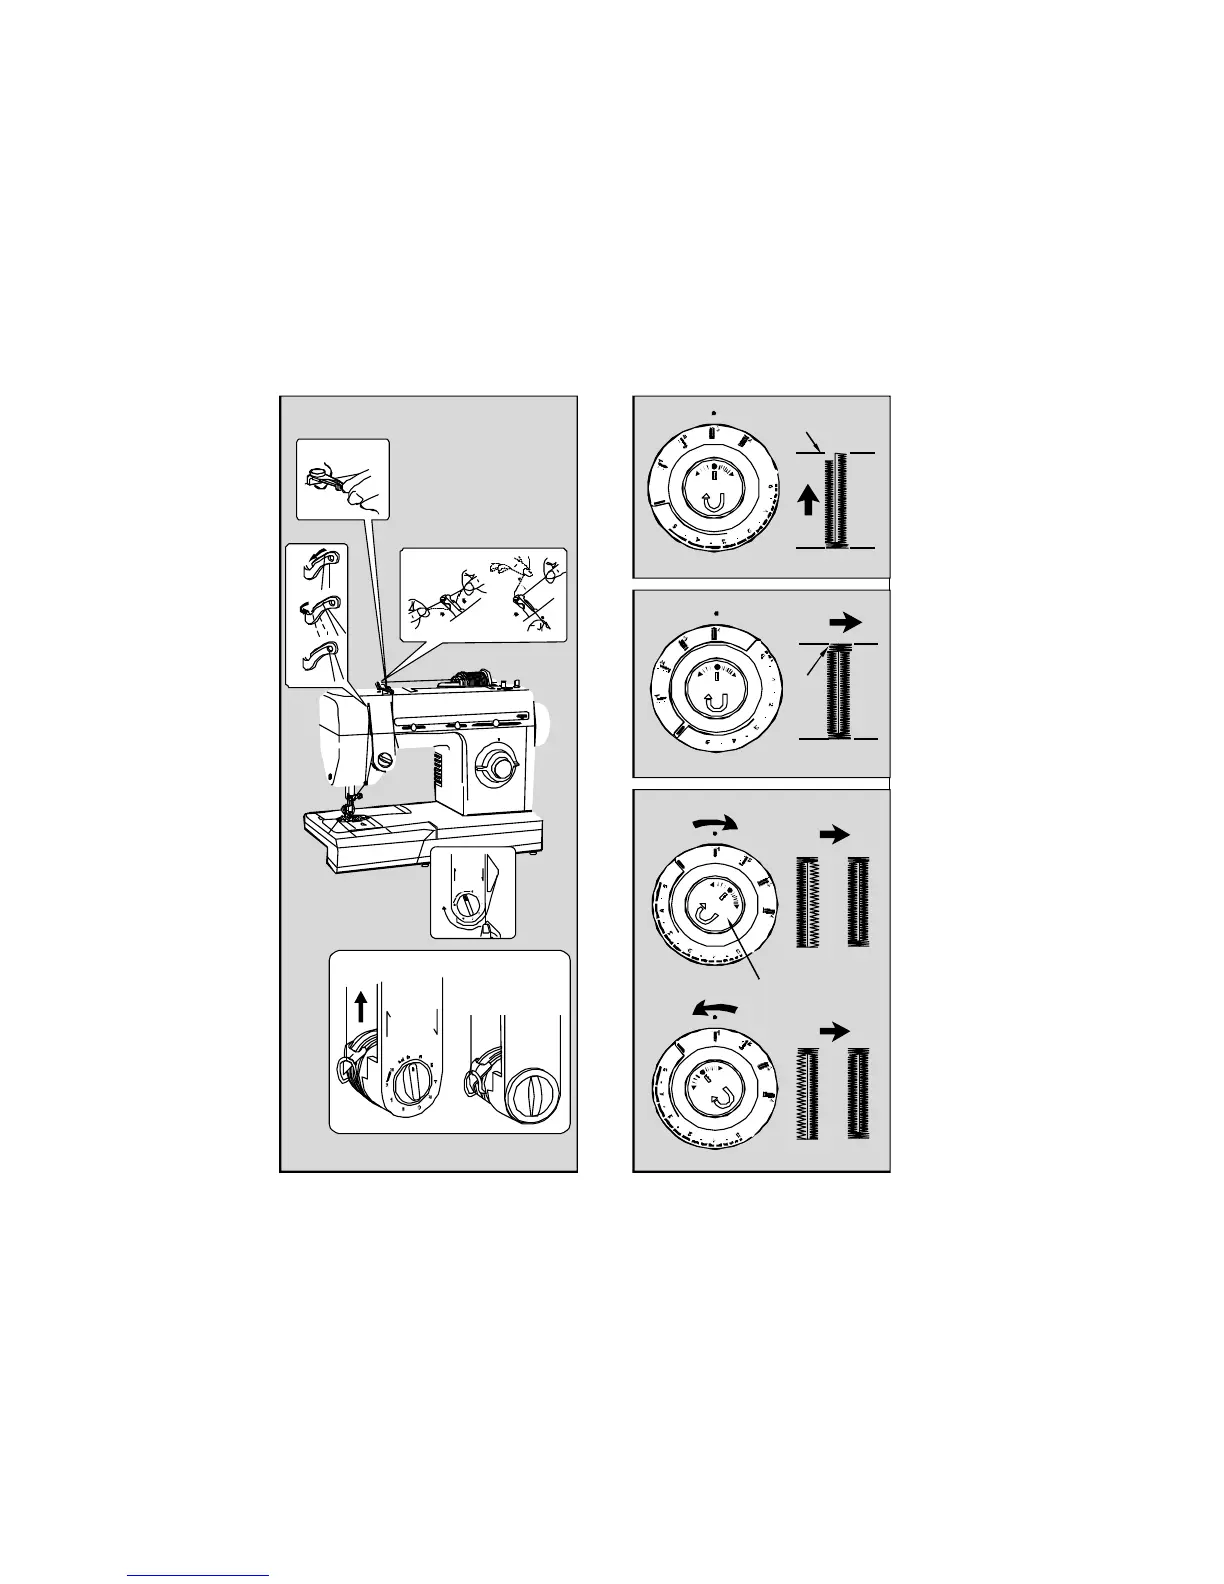
Threadingthemachine
1.Placespoolonspoolpin.Usethe
correctspoolpinholdertohold
spoolfirmlyinplace.
2.Liftthepresserfoot,andturnthe
handwheeltowardsyouuntilthe
take-upleverreachesitshighest
position.
3.Leadthreadpassingitfirstunderthe
threadguide.Nextthroughthe
upperslot,leadingthethreadtothe
rightandaround(illustration1).
4.Passthethreadthroughthesecond
threadguidebyinsertingitunder,
andthenupfromtheleftandover
thetop(illustration2).
5.Passthethreadaroundthetension,
sothatitslipsbetweenthetension
disks(illustration3).
6.Withyourright handholdingthe
spoolofthread,pullthethread
cominguptheleftsideofthe
tensionuptowardsthetopofthe
machine,allowingthethreadto
slideinsidethehook.Youwillheara
clickingsound.(illustration5).
7.Passthethreadthroughthetake-up
leverasshowninillustration6.
4
2
5
3
1
6