KNOWING YOUR SEWING MACHINE
13
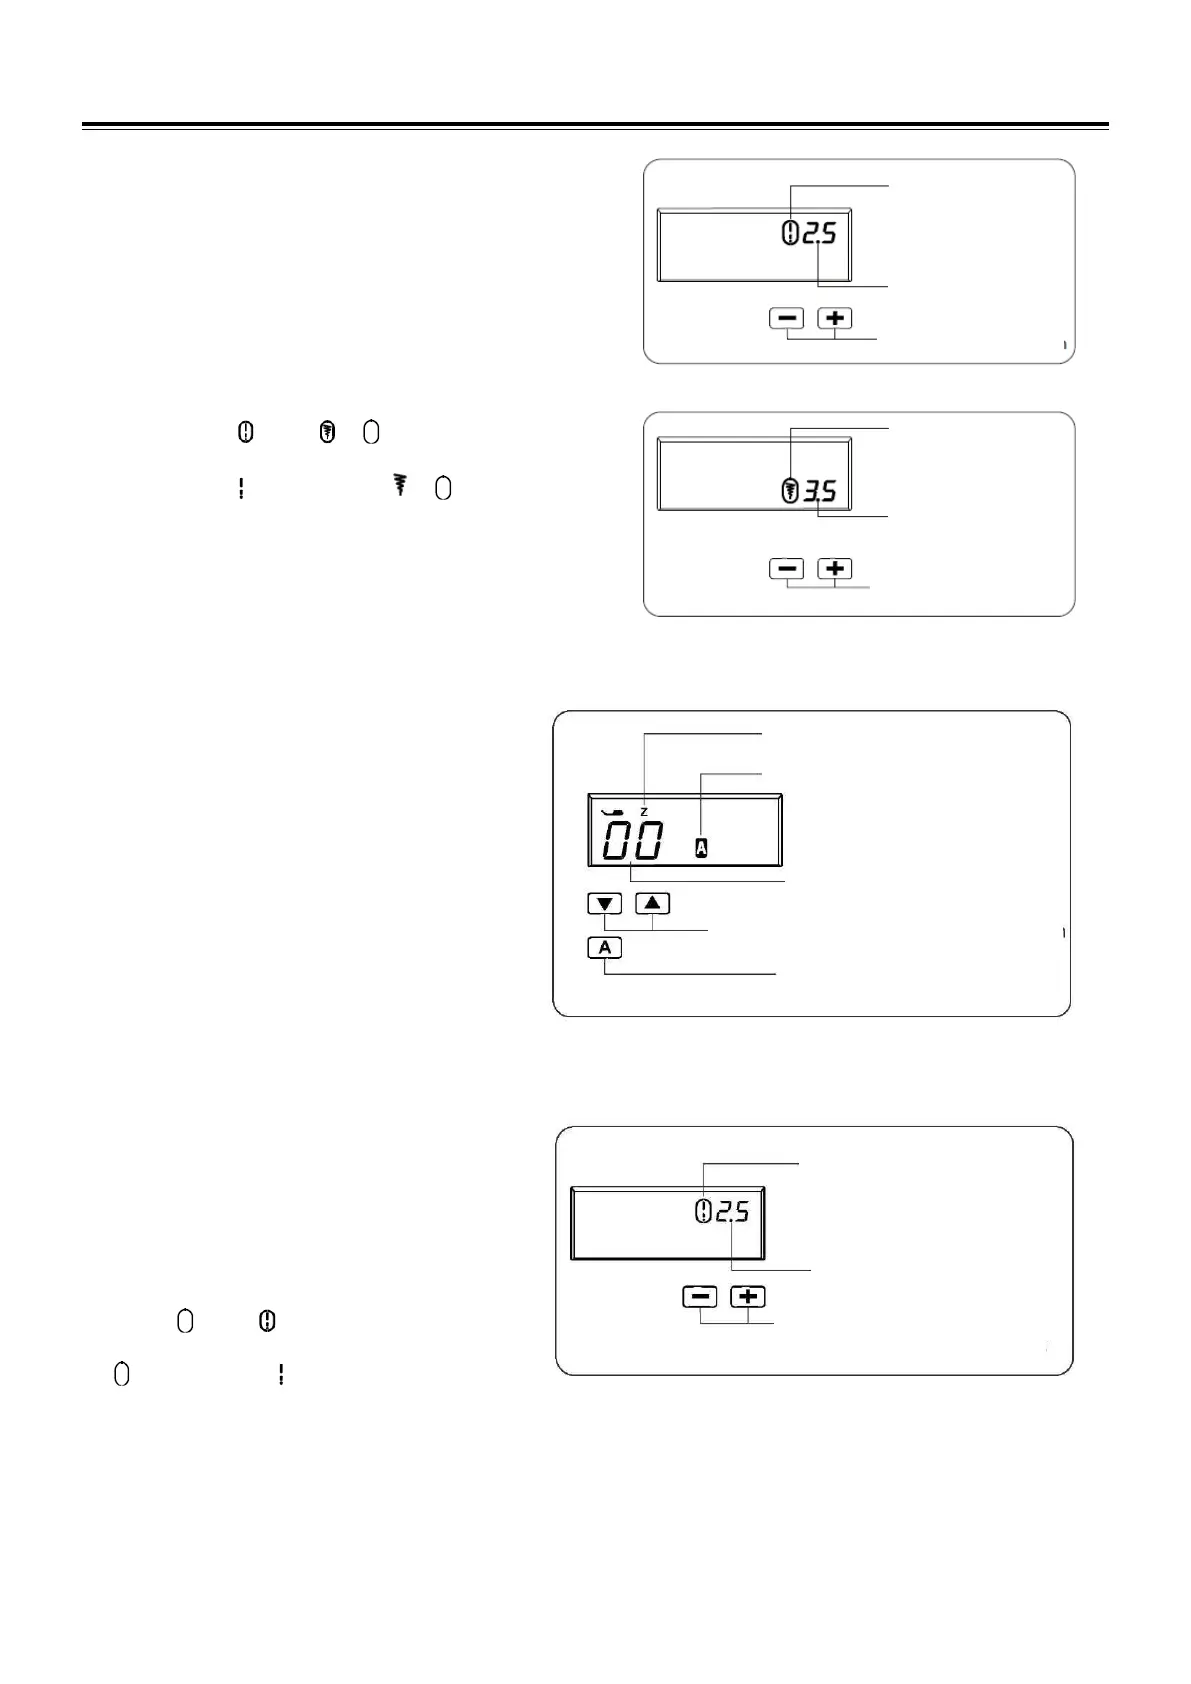
STITCH LENGTH AND STITCH WIDTH /
NEEDLE POSITION ADJUSTMENT
BUTTONS
Your sewing machine will display your stitch settings an
Auto/Default stitch Length and Width.
You can manually change the length, width or needle position
for straight stitch according to your preference pushing manual
adjustment buttons.
When the stitch length or stitch width is changed from the
default setting, around or disappears from the LCD.
When the stitch length or stitch width is reset back to the
default setting, reappears around or in the LCD.
LETTER PATTERN NUMBER
SELECTION
While the button is pushed, A will be appeared on
the LCD screen and pattern "0" is selected. The
LCD screen will display the number of the letter
pattern you wish to stitch.
Press the or side of to increase or decrease the
number by one. Long press the or side of to
increase or decrease the number by ten.
ADJUST THE SPACING BETWEEN
LETTERS
Your sewing machine will display your stitch
settings at an Auto/Default stitch Length and Width.
You can manually change the spacing between
letters according to your preference pushing manual
adjustment buttons.
When the spacing is changed from the default
setting, around disappears from the LCD.
When the spacing is reset back to the default setting,
reappears around in the LCD.
The machine sews one cycle of the pattern and
stops.
Default stitch length
indicator
Manual adjustment buttons
for stitch length
Default stitch width
indicator
Stitch width/needle
position of straight stitch
Manual adjustment buttons
for stitch width/needle
position
Presser foot indicator (Z)
Letter pattern mode indicator
Buttons for pattern number selection
Letter pattern mode button
Default Spacing indicator
Manual adjustment buttons for
spacing between letters