Sinterit Lisa printer SHORTENED USER GUIDE | 9
IMPORTANT!
• When working with powders always wear protective clothing (glasses, mask, gloves).
• For the rst use of the Sinterit Lisa Printer use only the powder (for PA 12 SMOOTH
and PA 11 ONYX) from the container labeled Print Ready Powder.
• Always pay attention to the messages displayed on the LCD screen
2
of the printer.
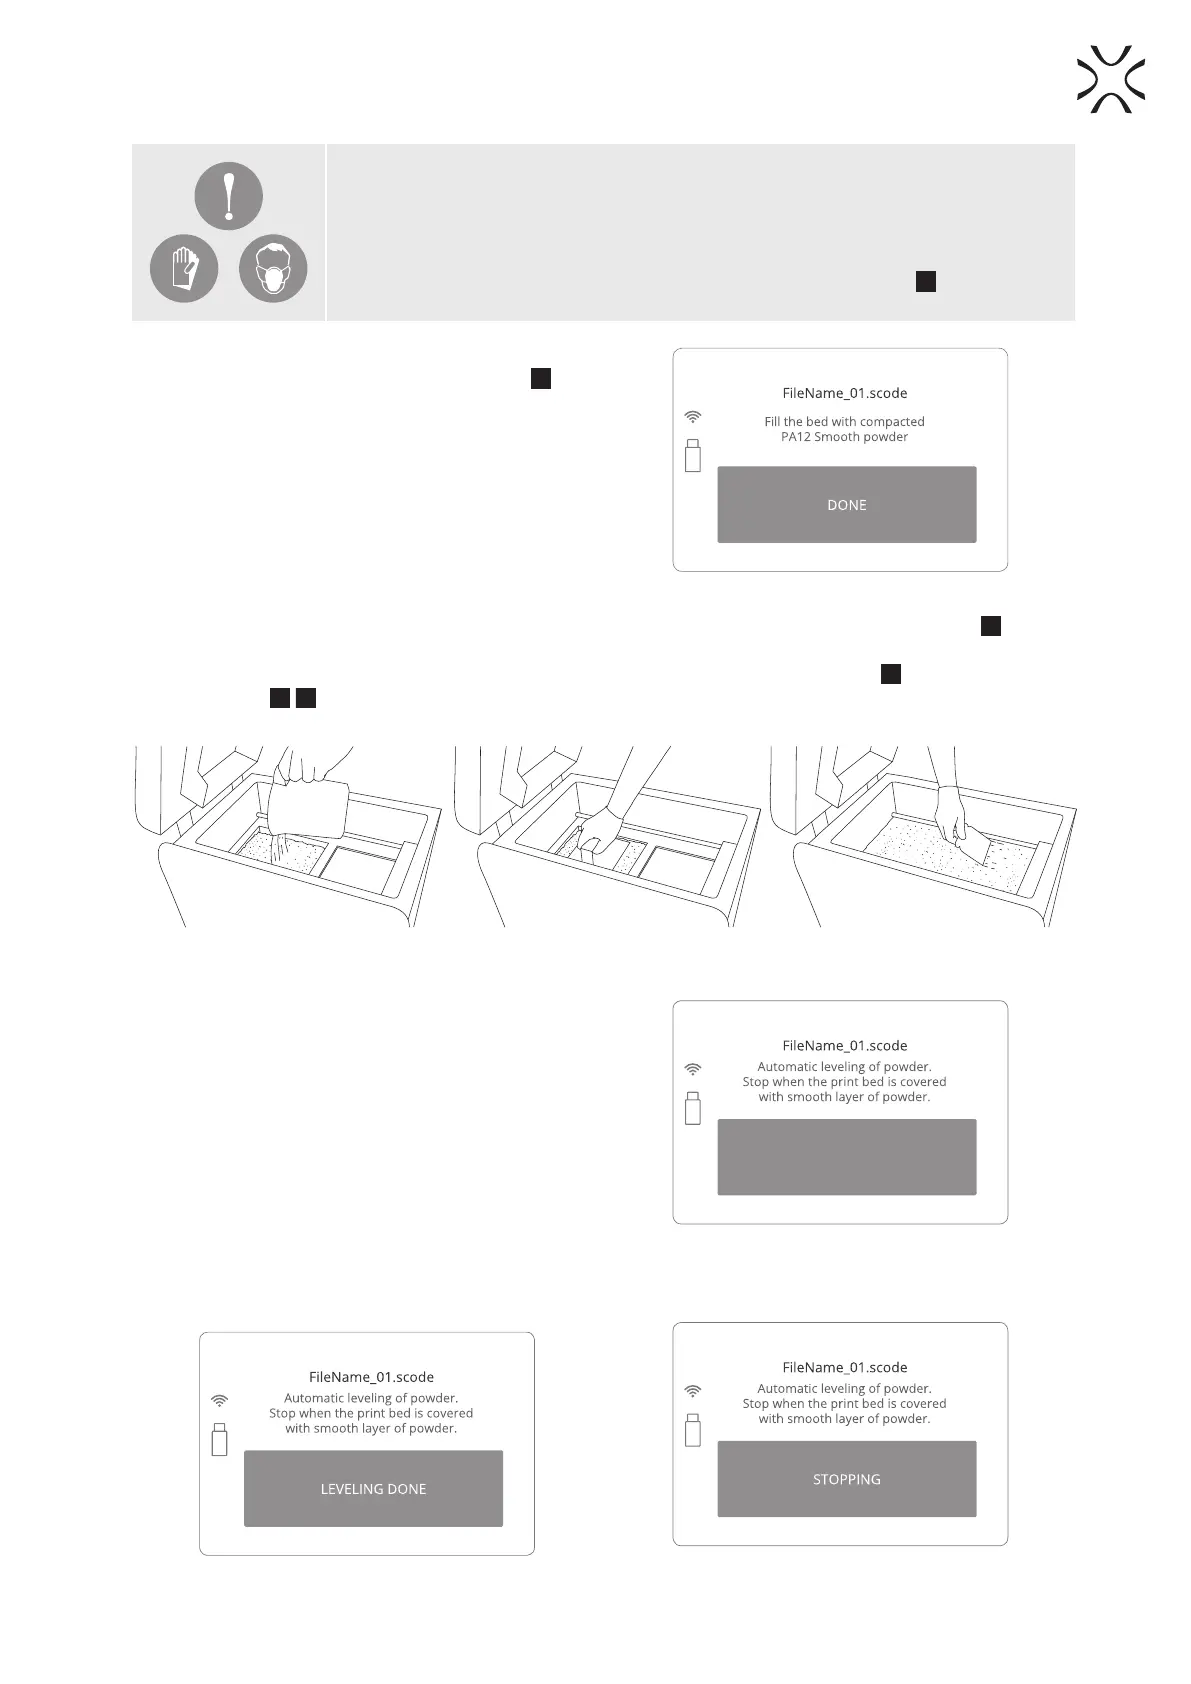
12. After the BEDs repositioning process is nished,
you will be asked to ll the FEED Bed
26
with
powder (PA 12 SMOOTH Print Ready Powder or
one from the TPU group, pour maximum 6[L] –
Image 19 and 20).
13. Press powder slowly, but decisively using
a trowel (from Box with additional accessories).
Act carefully in order for the powder not to go
airborne (it is recommended to use a spatula for
adding the powder, Images 21 and 22).
Image 19. Fill the FEED Bed screen.
14. It is also recommended to add a little bit of the chosen powder on the surface of the PRINT Bed
27
. This will
make creating the rst layer during positioning faster (Image 22). Press “DONE” button when you nish.
15. Clean any excess powder from the area around the BEDs, the RECOATER guide bar
24
and the cords of the
RECOATER
23
25
, using a paintbrush.
Image 20. Adding powder
to the FEED Bed.
Image 21. Compacting powder
by gently pressing it.
Image 22. Equal distribution
of powder on both BEDs.
16. To level the powder inside the printer, click the
„START LEVELING” button (Image 23).
START LEVELING
Image 23. START LEVELING screen.
17. Once both BEDs are covered with a smooth layer of powder, press “LEVELING DONE” on the screen (Image
24). The RECOATER will return to its default position (Image 25).
Image 24. LEVELLING DONE screen.
Image 25. Information screen while the levelling
is being stopped.