ASSEMBLY AND OPERATION
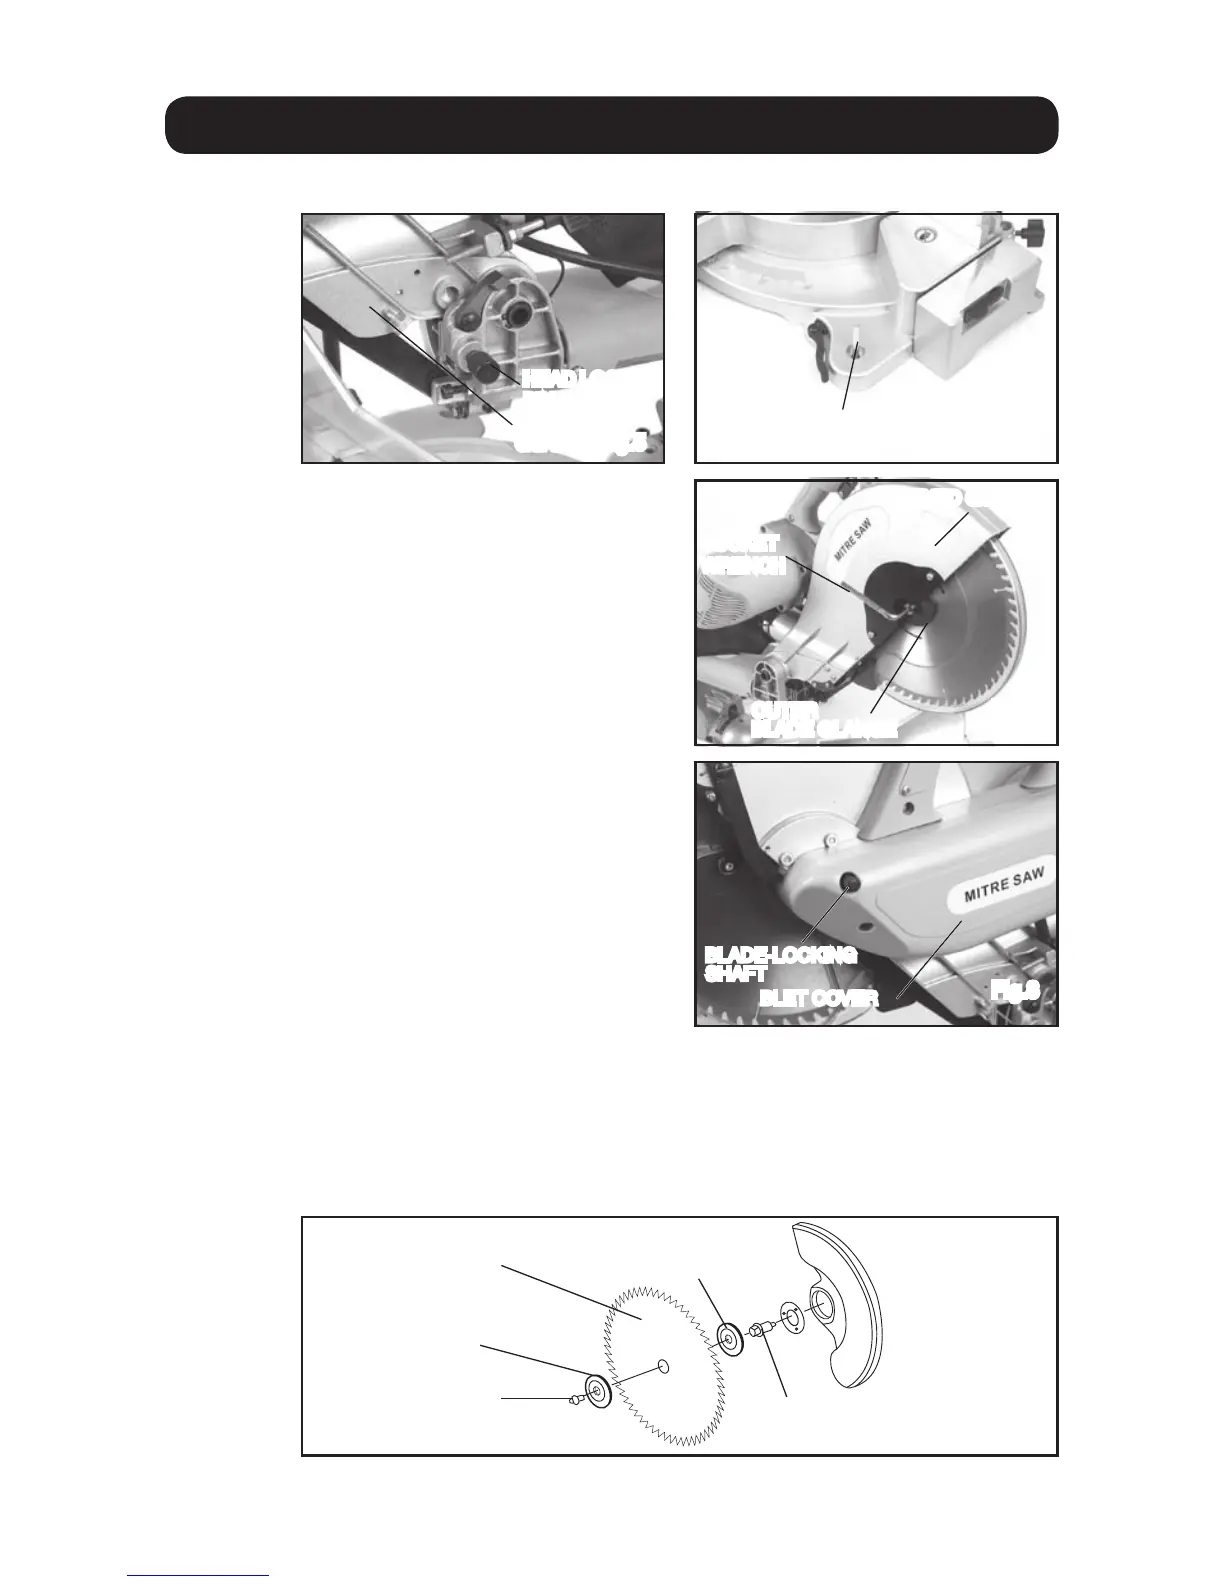
The head lock pin is provided to hold the main cutting head at it’s lowest position
whilst transporting or storing the mitre saw. (fig.5)
MOUNTING THE MACHINE
CHANGING THE SAW BLADE
Note: Always ensure that the saw is
turned off and that the plug is removed
from the mains supply before carrying
out any adjustments or maintenance.
Press the blade locking shaft which is
situated on the belt cover (fig.8)
Turn the blade slowly by hand, whilst
keeping the locking shaft pressed in,
until the shaft fully engages and the
blade cannot be turned.
Use the supplied socket wrench to loosen the blade retaining bolt (turn clockwise to loosen) (fig.7)
Remove the bolt and the outer blade flange.
Move the lower (plastic) guard away from the blade by sliding it upwards and into the fixed guard (fig.7)
Fig.5
FIXED
GUARD
Fig.6
HEX SCREW
Fig.7
Fig.8
BLADE-LOCKING
SHAFT
FIXED GUARD
SOCKET
WRENCH
OUTER
BLADE GLANGE
BLET COVER
Fig.9
SAW BLADE
OUTER
FLANGE
BLADE
RETAINING
SCREW
INNER FLANGE
OUTPUT SPINDLE
HEAD LOCK
PIN
HEAD LOCK
PIN
The saw should be used on a level,
horizontal bench or work table. Ideally it
should be bolted to the bench/table using
the 4x mounting holes and relevant bolts
etc. (fig.6). This will ensure that the saw
will not slip or move during operation,
and reduce the risk of damage or
personal injury.
The blade can now be removed.
Follow these instructions in reverse to refit the new blade.
Note: When refitting the blade, slide it over the output spindle carefully and ensure that the direction
of the blade faces the correct way (fig.9).
SOCKET
WRENCH
BLADE GLANGE
BLADE-LOCKING
BLET COVER