ASSEMBLY AND OPERATION
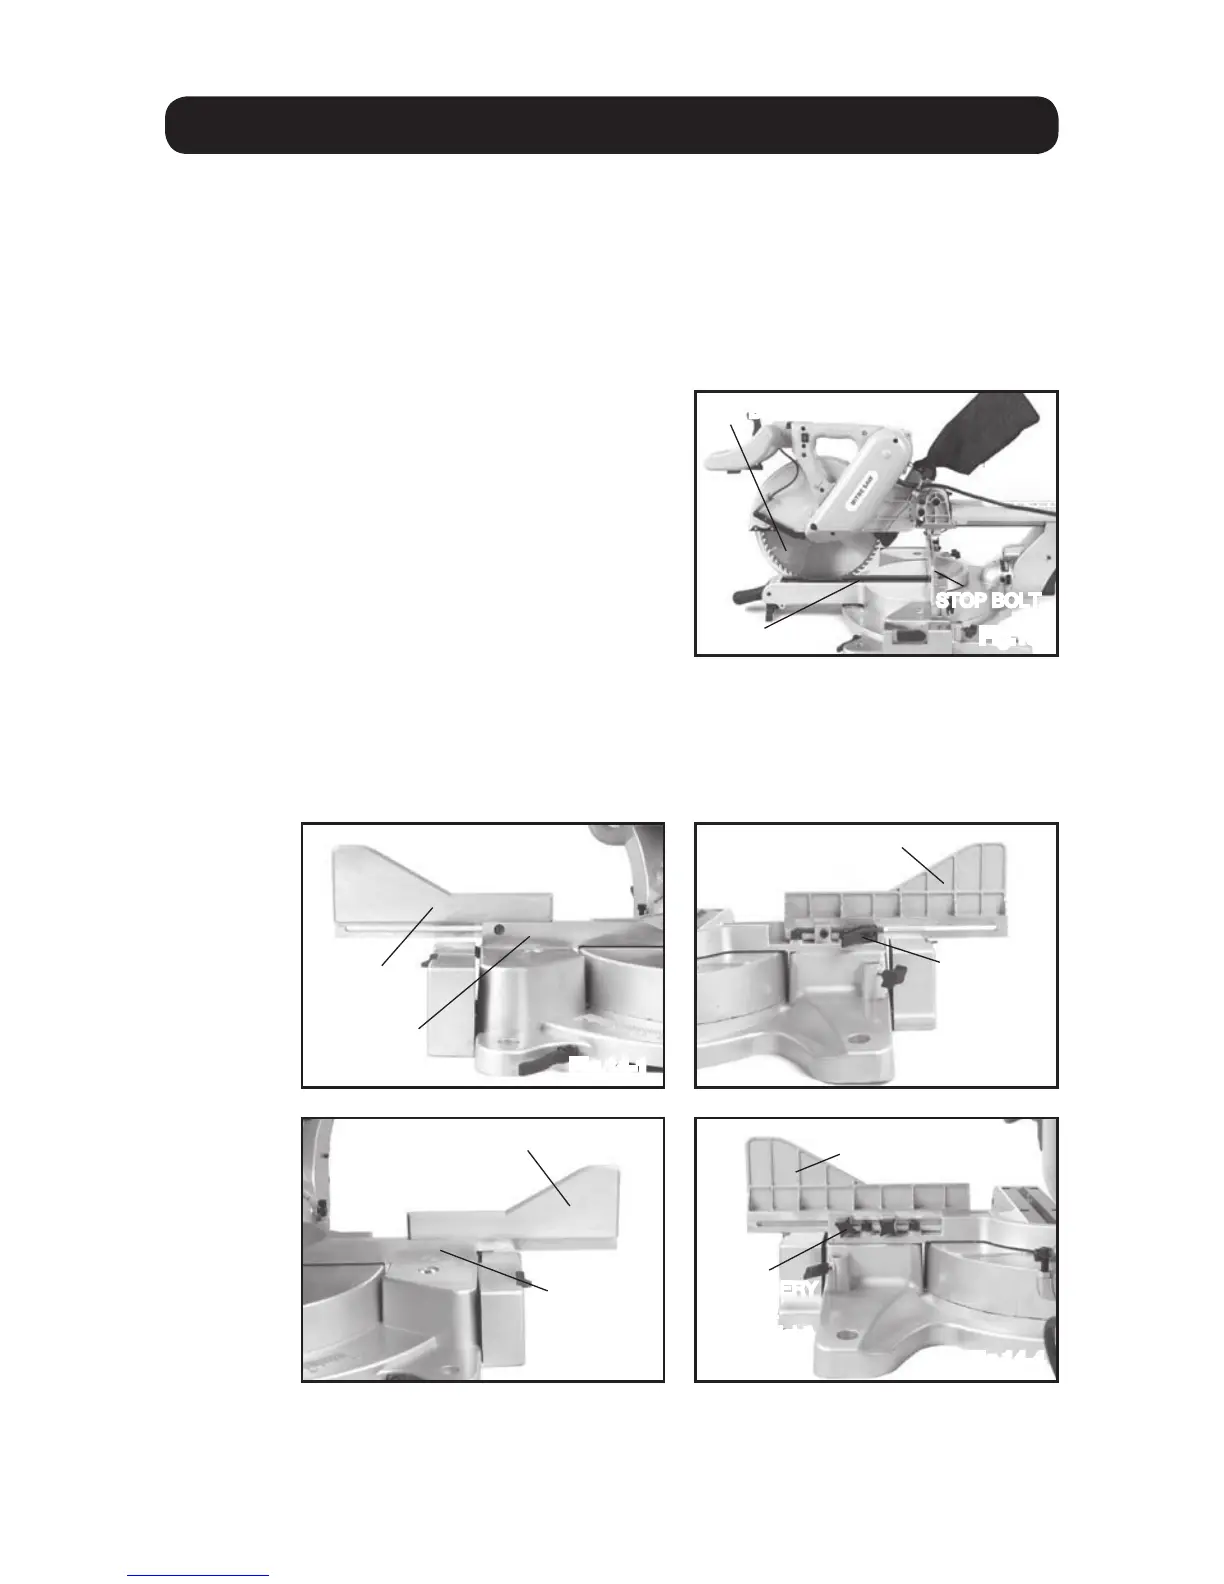
ADJUSTING THE MAXIMUM CUTTING CAPACITY
The blade height has been set in the correct position at the factory during production;
during normal operation it may need to be adjusted to ensure that the saw blade
does not come into contact with any part of the main saw table.
Ensure the saw is turned off and that the plug is removed from the mains power
supply.
Lower the saw head to it’s lowest position; the bottom of the saw blade should sit
just below the table insert. If adjustment is needed, loosen the lock nut on the stop
bolt and adjust as necessary (fig. 13).
Re-tighten the lock nut to hold the bolt in
position.
AUXILIARY FENCE
There are right and left auxiliary fence assemblies on the saw.
Fig. 14-1 & 14-2 shows how to adjust the left fence.
Fig. 14-3 & 14-4 shows how to adjust the right fence.
Note: Always ensure that the blade cannot contact any part of the fence assembly
after adjustments are made and before any cut is attempted.
Fig.13
SAW BLADE
SAW
TABLE
Fig.14-1 Fig.14-2
Fig.14-4Fig.14-3
FENCE-L
FENCE
SUBSIDARY FENCE-L
FENCE-R
FENCE
AUXILLERY FENCE-R