QuickCollect 3 - 1
User Manual
3
Using the QuickCollect Sensor
Preparing the Sensor for Use
Charging the Battery
The battery charger may only be connected to the equipment in a safe area.
The sensor is equipped with an internal lithium ion battery. Prior to using the sensor for
the first time, you must use the power supply provided to fully charge the lithium
battery.
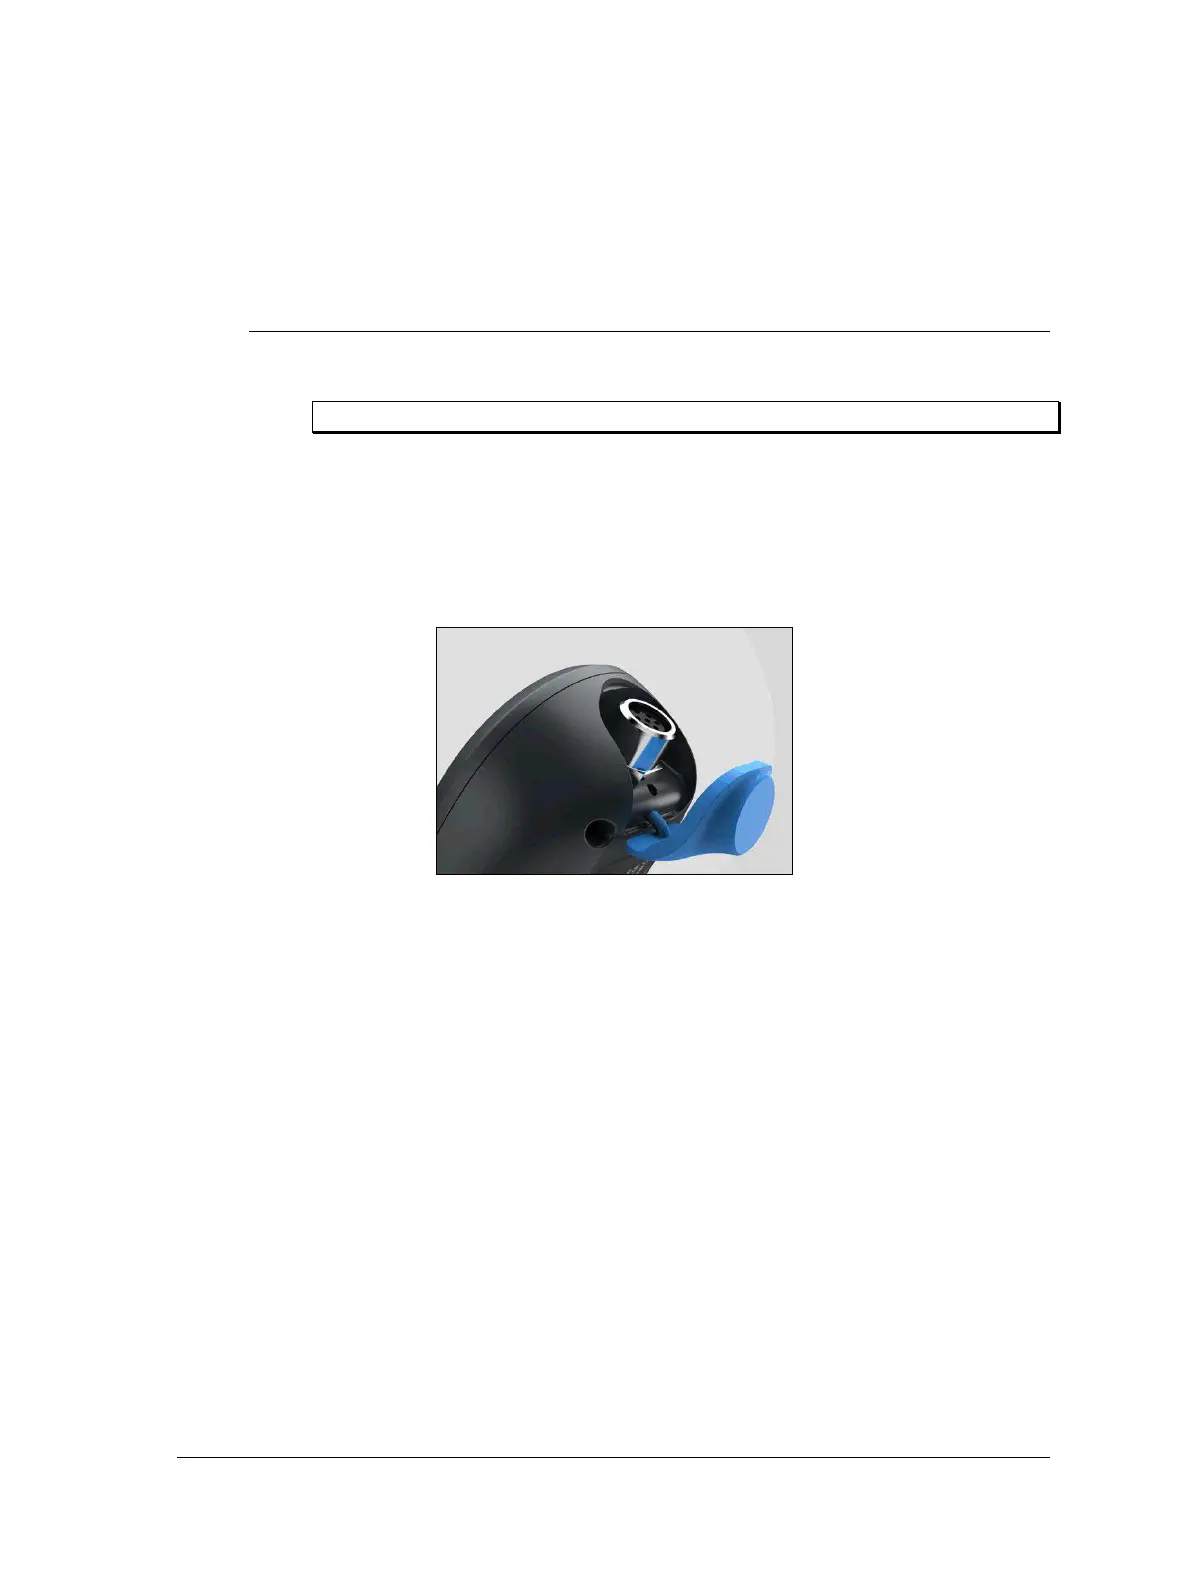
The sensor’s only external connector is the 6-pin “back” connector. The connector
provides charging power. The connector is IP67-rated and the energy available via this
connector is limited.
Figure 3 – 1.
External sensor connector.
To charge the battery:
Connect the charger to an AC outlet (if necessary, use regional AC outlet adapters).
Align, connect and tighten the charger’s cable to the sensor’s external 6-pin
connector.
The battery LED will display red when the battery is charging. The battery will be
fully charged after approximately four hours. The battery LED will display green
when the battery is fully charged.
Once the battery is fully charged, the sensor is ready for operation. With normal use,
the estimated battery life is eight hours. The battery LED will blink red when the power
level is low. If the battery level becomes too low, the sensor will automatically power
itself off to prevent battery damage.
Connect the sensor to its power supply/battery charger whenever you
do not intend to resume operations in the immediate future.