12
3. Set static IP in the 192.168.131.xxx subnet
(For more information, see the Web GUI Instructional Manual).
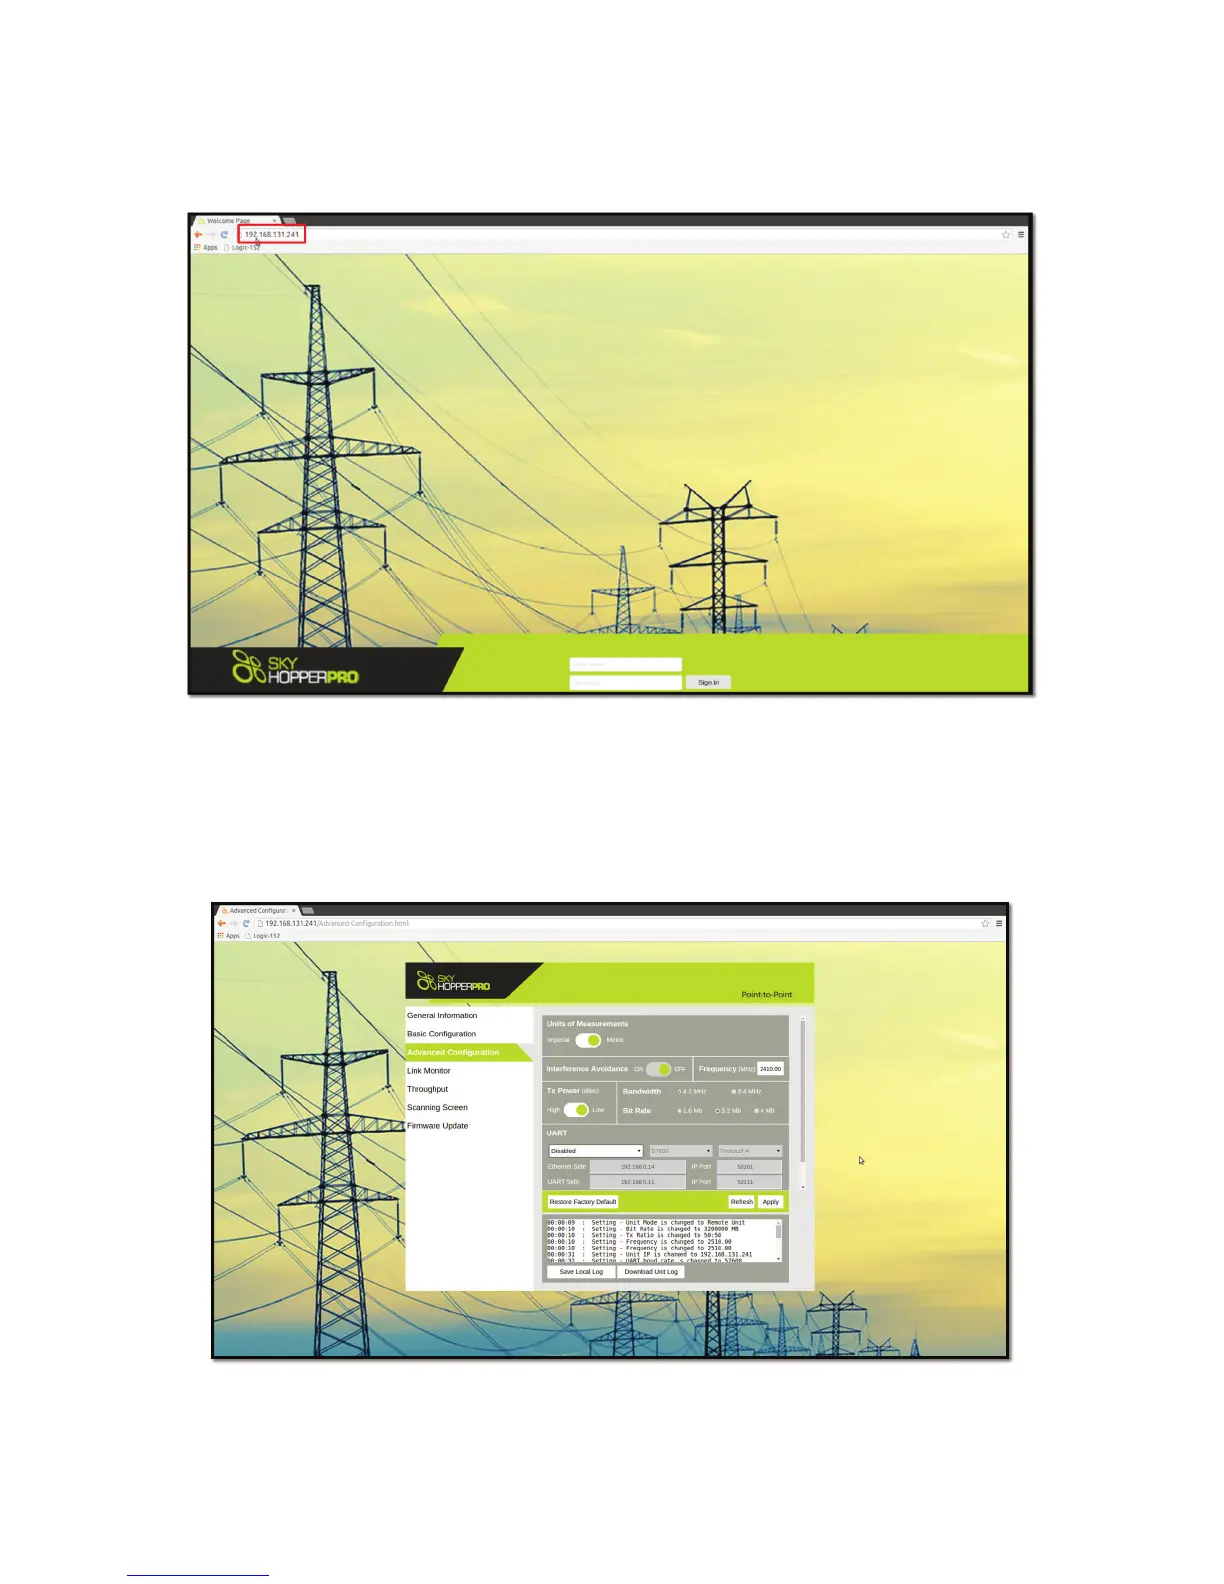
4. Using the Web GUI: Open a web browser installed on your PC / laptop (Chrome, Firefox, Internet Explorer, etc.) and
input in the address line: 192.168.131.241. That should connect you to the Web GUI interface, as shown on Figure 6:
Figure 6: Web GUI main screen
5. To change the frequency to the required frequency, click on “Advanced Con guration” (third tab on the left corner) and on the
“Frequency” line and write the desired frequency within the frequency range set in your unit.
6. Set the pro le as required (RF bandwidth, bitrate and ratio) and click on the “Apply” button as shown on Figure 7. The
unit will reboot.
7. Repeat stages 1-4 with the 2nd unit.
Figure 7: Web GUI “Advanced con guration” screen
► NOTE – A PTP setup requires 2 SkyHopper PRO units con gured with same frequency and pro le.