18
Appendix D – Setting up a Pixhawk based system
In this section we will describe how to setup a network for a drone using a Pixhawk ight controller.
The Pixhawk ight controller uses a UART interface and runs the MAVlink protocol over it. SkyHopper PRO has an RS232 inter-
face which is similar in its word structure to RS232 but there is a difference in the voltage levels.
D. 1. SkyHopper Setup
The rst stage is to setup the SkyHopper link to enable the UART interface on the link. The con guration should be setup on
both units (Remote/Aerial and Controller/Ground).
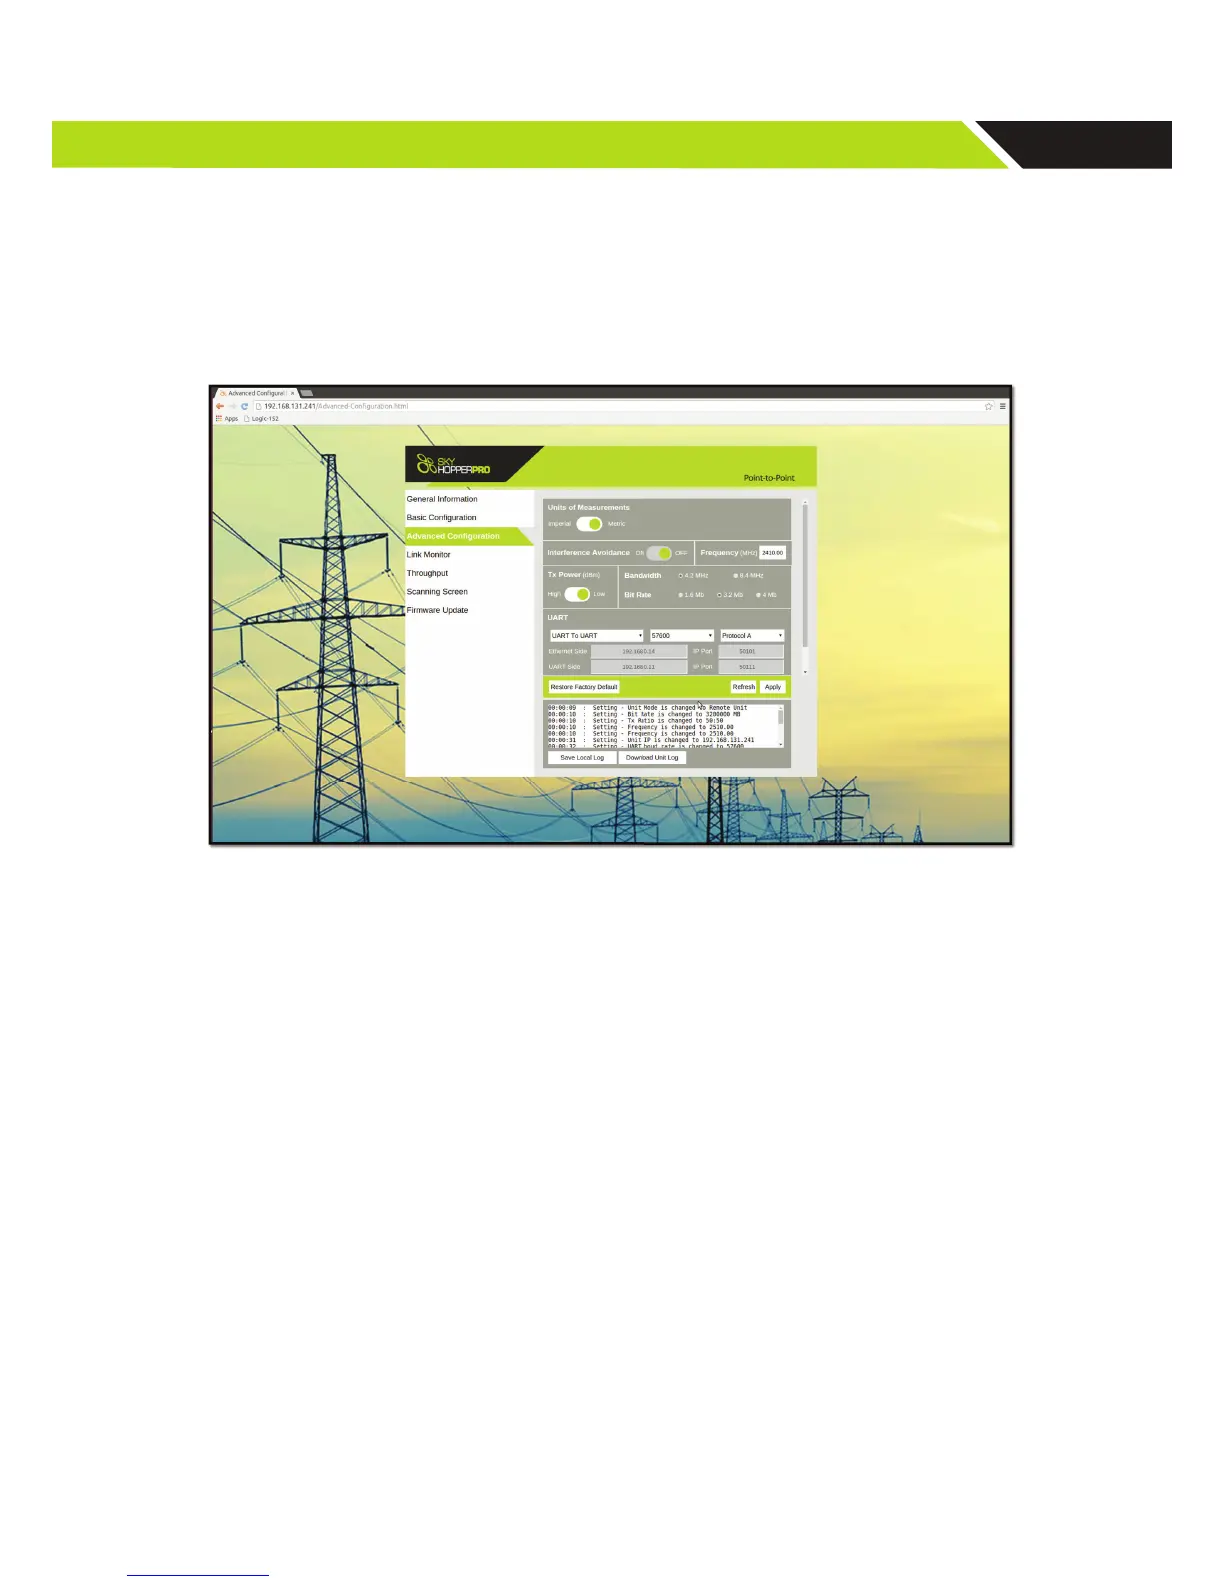
Figure 10: WebGUI advanced con guration
In the advanced con guration screen:
1. Go to the UART section
2. Enable the UART and choose UART-to-UART
3. Setup the Baud rate to 57600
4. Choose protocol C
5. Reboot the unit
6. Repeat on both Remote and Controller units
D.2. Physical Connection
After the units are con gured, the Pixhawk ight controller should be connected to the unit.
On the remote (Aerial) unit Use the Pixhawk adapter accessory which can be purchased on our website and connect it to
the serial cable provided with the SkyHopper PRO unit. Connect the adapter to the Pixhawk ight controller and the serial
cable to the unit.
On the controller (Ground) unit, connect the D-Type/9-pin accessory adapter to the serial cable supplied and connect the
cable to the unit. If the Tablet/PC has a serial port, connect it directly, if not, a USB-RS232 adapter should be used.
D.3. UART to Ethernet
There is an option to con gure the system to work with a UART-to-Ethernet con guration, which eliminates the use of the
serial cable on the Ground Unit.
Please refer to the UART-to-Ethernet Connection Guide online at www.skyhopper.biz/prosupport.