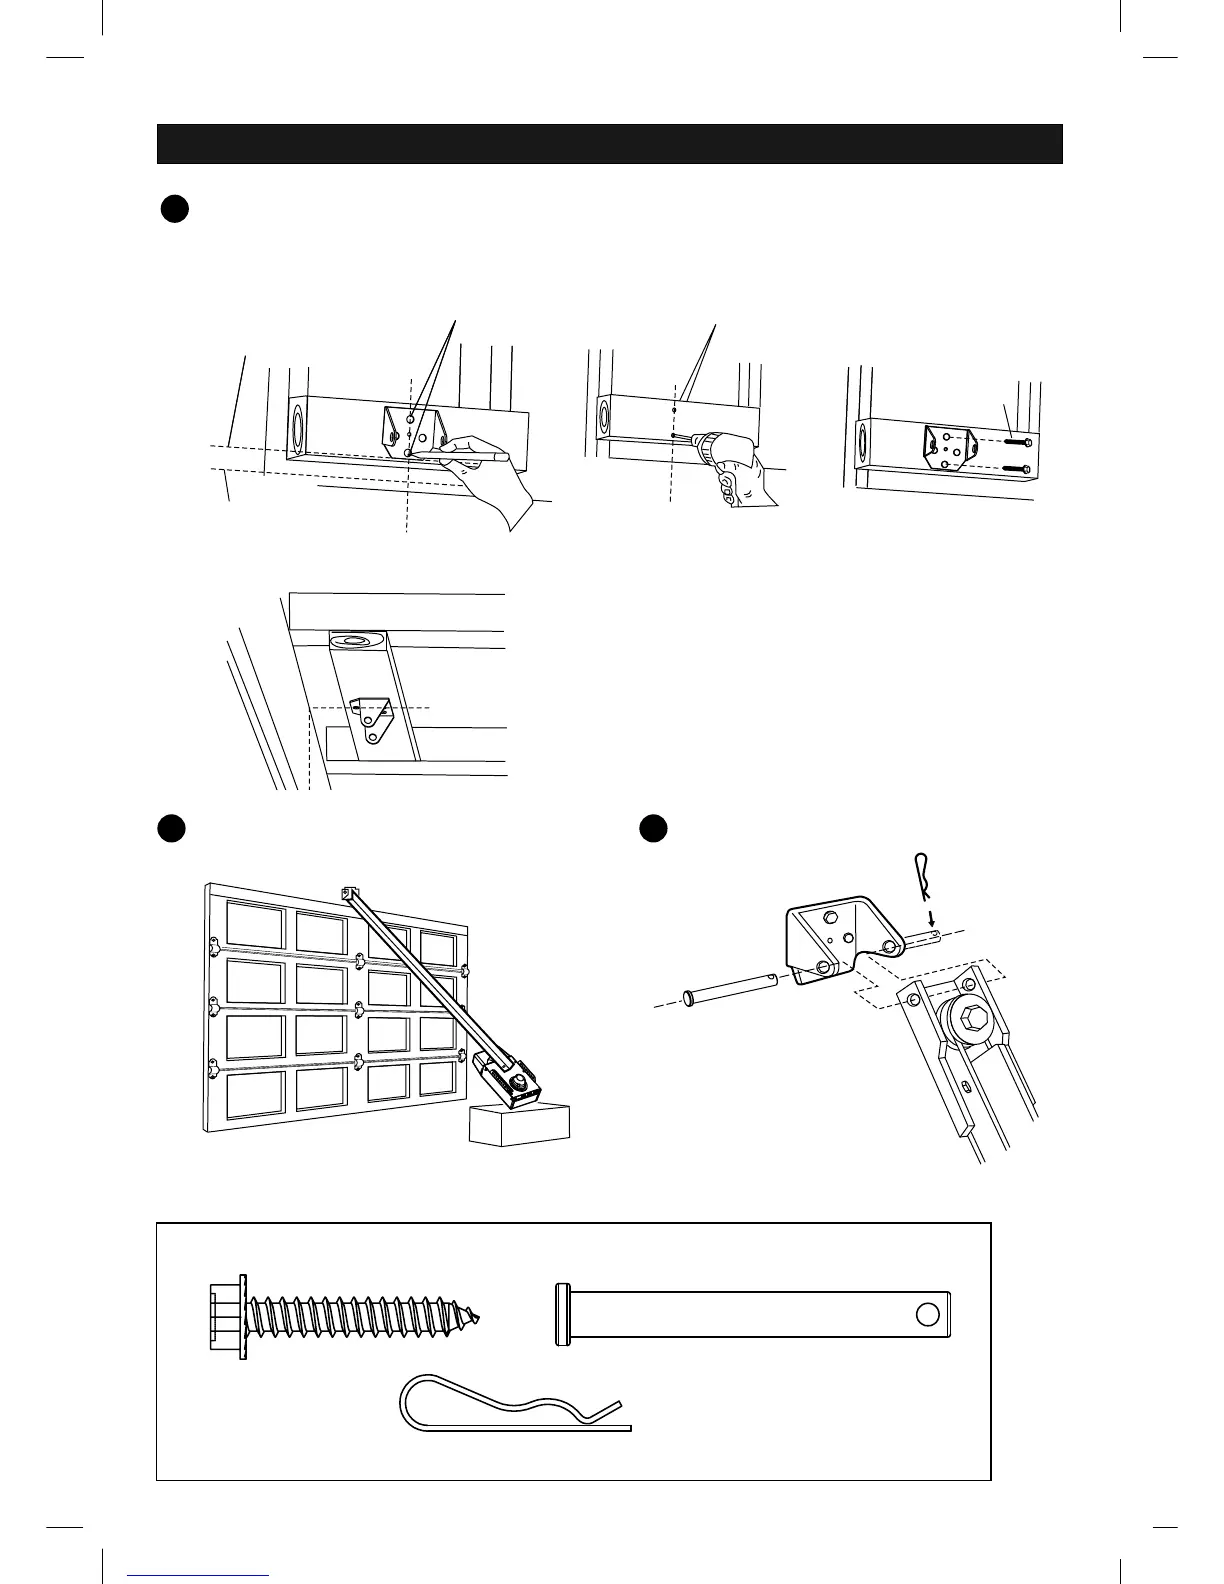
Attach the Header Bracket
INSTALL THE HEADER BRACKET
Place the bottom edge of the bracket on the line marked
above the highest point of travel.
Note the orientation of the header bracket, do not mount it upside down.
Ceiling Installation
The header bracket may be mounted to the ceiling if there is
minimal clearance above the door. If so, extend the centerline
to the ceiling. The back edge of the bracket must not be further
than 5” from the header wall.
1-1/4” Above (Sectional Door)
7” Above (Jamb Door)
Highest Point
of Travel
Mark the 2 holes
with a pencil.
Drill Two 3/16”
Pilot Hole
Attach the header
bracket with 2 lag
screws provided
14
Actual Size
B1
B6
B5
-9-
Position the opener on the floor with
packaging material as protective base.
Position the pulley bracket
against the header bracket
Position the opener
5
Connect the T-Rail to the Header Bracket
6
Align the bracket holes and join
with a clevis pin and hitch pin
as shown
B1x2
B6x1
B5x1