-5-
1
2
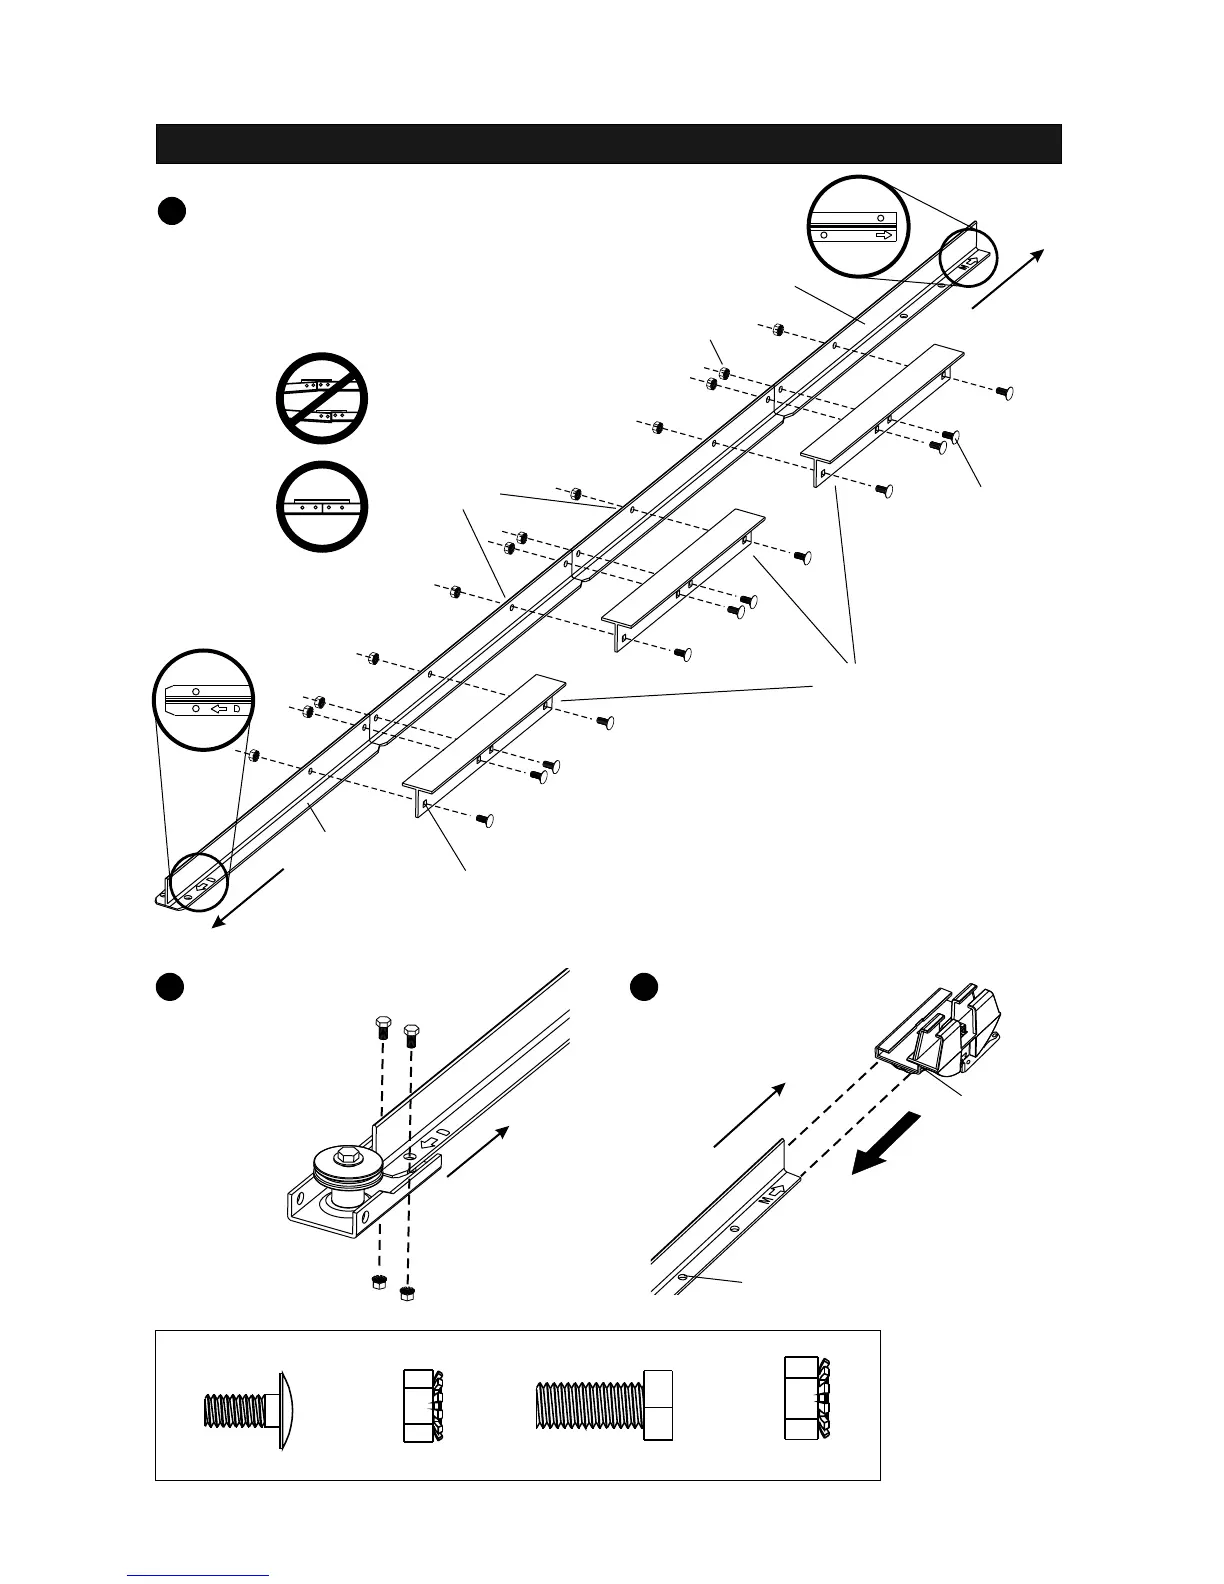
Ensure the square bolt necks are seated
into the square holes
Please note the arrow
& “D” marking, indicates
this side to the door
Please note the arrow
& “M” marking, indicates
this side to the motor
unit
Rail Coupler
To
Motor Unit
To
Motor Unit
(Back)
Stop Bolt
Hole
T-rail
(back)
T-rail
(Front)
T-rail
(center)
A2x12
A1x12
To Door
Connect the T-Rail Sections
Attach the Pulley Bracket
Align the 4 T-Rail sections on the floor.
Connect these rails together with the rail
couplers as shown
All rail pieces must be aligned properly
Attach the Pulley
Bracket Assembly
to the end of the
front rail with
2 nuts and bolts
Align the Pulley
Bracket & Rail
A3x2
Actual Size
A4x2
A1
Ensure this side
of the trolley is on
the stop bolt hole
side of the rail
Slide the trolley from
the back of the T-rail
assembly
3
Install the Trolley
ASSEMBLE THE T-RAIL
A2 A3 A4