GB 12
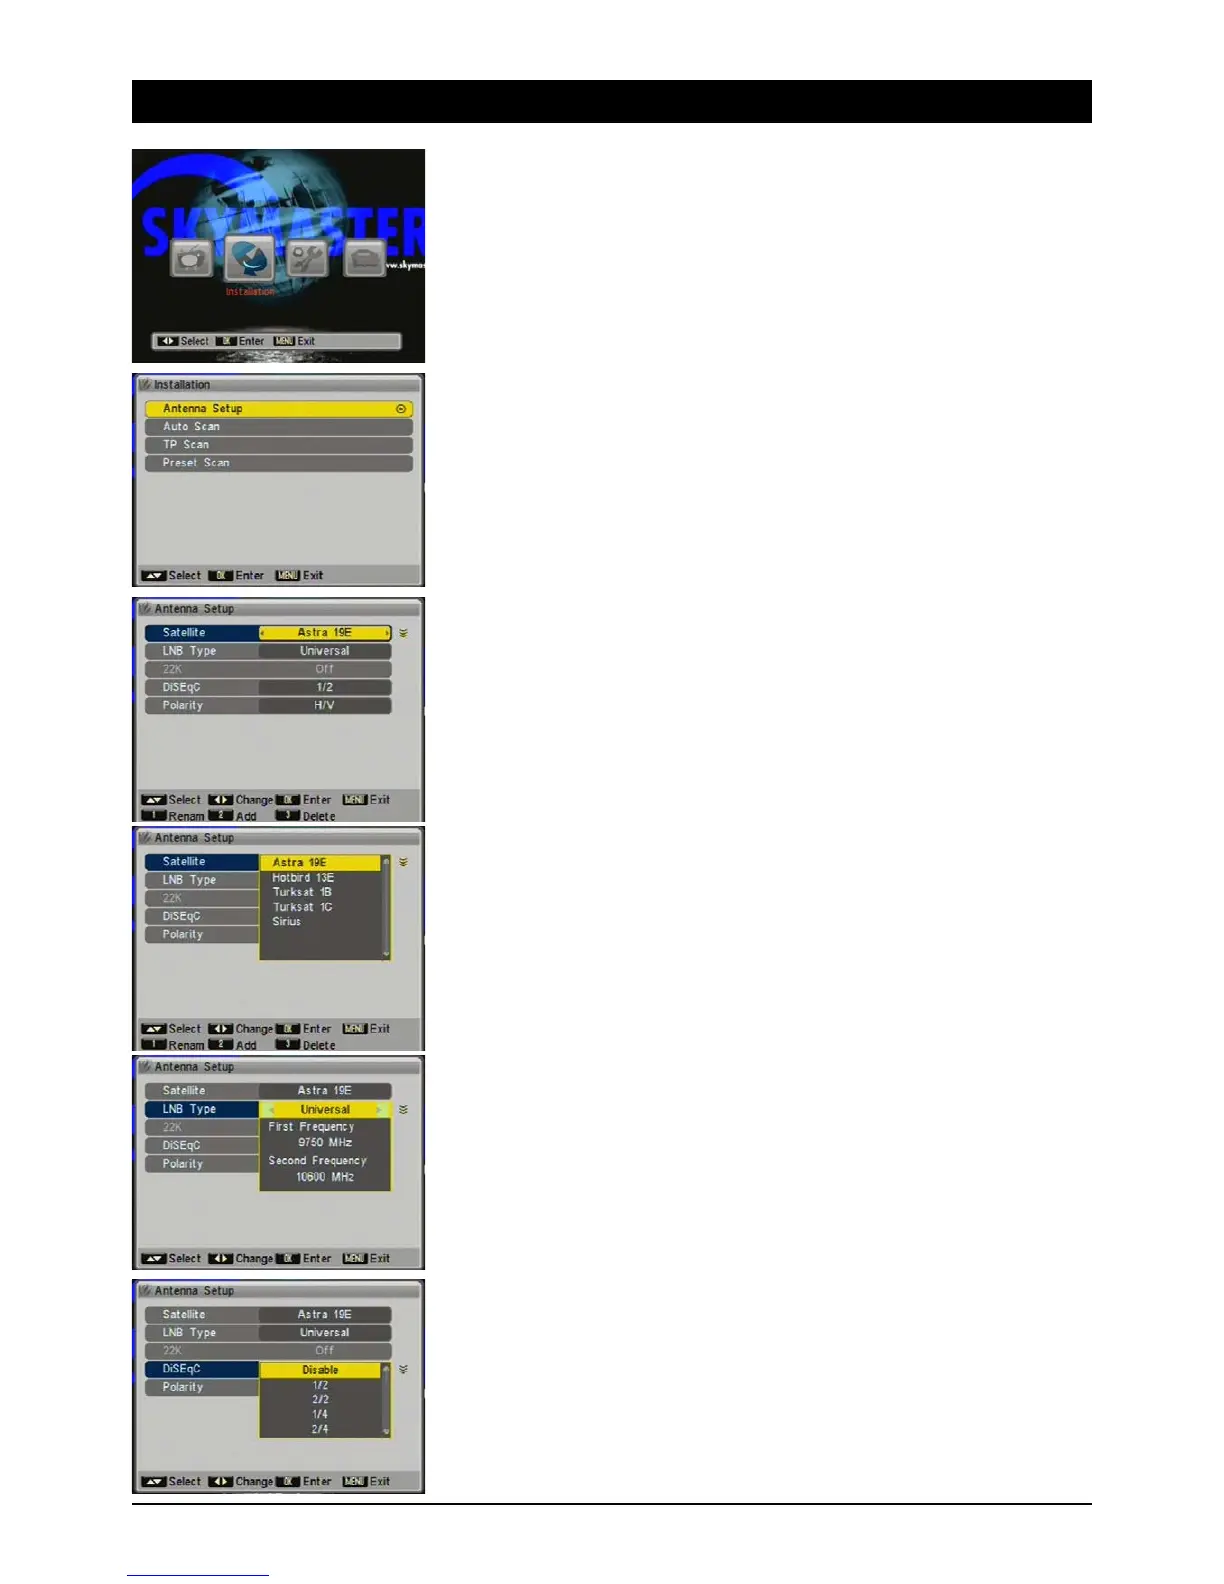
7. The OSD menu – reception
2. Reception
In the Reception menu you will find all the settings you require to tune to the satellite system and
store channels.
2.1 Antenna tuning
In order for the search function to work properly, you have to tune the receiver to your antenna.
2.1.1 Satellite
To select the satellite you want press [OK]. You also have the options of renaming the satellite
(button [1]), adding a new satellite (button [2]) or deleting a satellite position (button [3]).
Renaming: Select the satellite position from the list and press [1]. Choose the letters and figures
with the control buttons and confirm them one after the other with the OK button on the remote
control.
Other important buttons on the on-screen keyboard:
Space: [SP]
Delete: [DEL]
Save name and quit keyboard: [OK]
2.1.2 LNB Type
Digital is almost always the right choice for all commercially available LNBs. You should only select
further settings if the installation instructions tell you expressly to do so. Log in as “User”, if you
have to enter LNB frequencies manually.
2.1.3 22 kHz
The 22 kHz signal is used to switch the digital LNB (out = low-band, 22 kHz = high-band). If you
have selected “Digital” as the LNB type, switching occurs automatically. If you do not have a
commercially available LNB, you have to adjust the settings manually at this point.
2.1.4 DiSEqC
DiSEqC allows you to receive several satellites. If you have two LNBs, for example, that are aimed
at two different satellites (ASTRA and HOTBIRD), you should use a DiSEqC switch. Choose the
1/2 setting for ASTRA and 2/2 for HOTBIRD. You can control 2, 4, 8 or 16 port switches and
DiSEqC capable multiple switches. Note: on some DiSEqC switches the connections are marked
with letters (A, B, C, D...) instead of numbers. However, the sequence is the same.