Page 16
NOTE
•Recheck the mounting plate to make
sure it is absolutely level. In most
cases, releveling the mounting plate will
solve any drifting problems.
•If the lighthead sticks or is difficult to
move, before making any adjustments,
lubricate the BOM needle bearings with
a Teflon type spray lubricant such as
TRI-FLOW (available from Richardson-
Vicks, Inc., Memphis, TN) or equivalent.
See figure 4-10. After spraying, rotate
the lighthead several times in both
directions and recheck for proper
tension.
BOM
VST
ADJUSTMENT
HOLE
BEFORE
PENCIL
MARKS
PIN
PUNCH
AFTER
CHROME
PLUG
BOM
Figure 4-10 . BOM Lubrication
c. If releveling the mounting plate or lubricating
the BOM needle bearings does not correct the
problem, an adjustment may be required. This
adjustment is made by increasing or decreasing
the bearing preload. Refer to figure 4-11 and
proceed as follows:
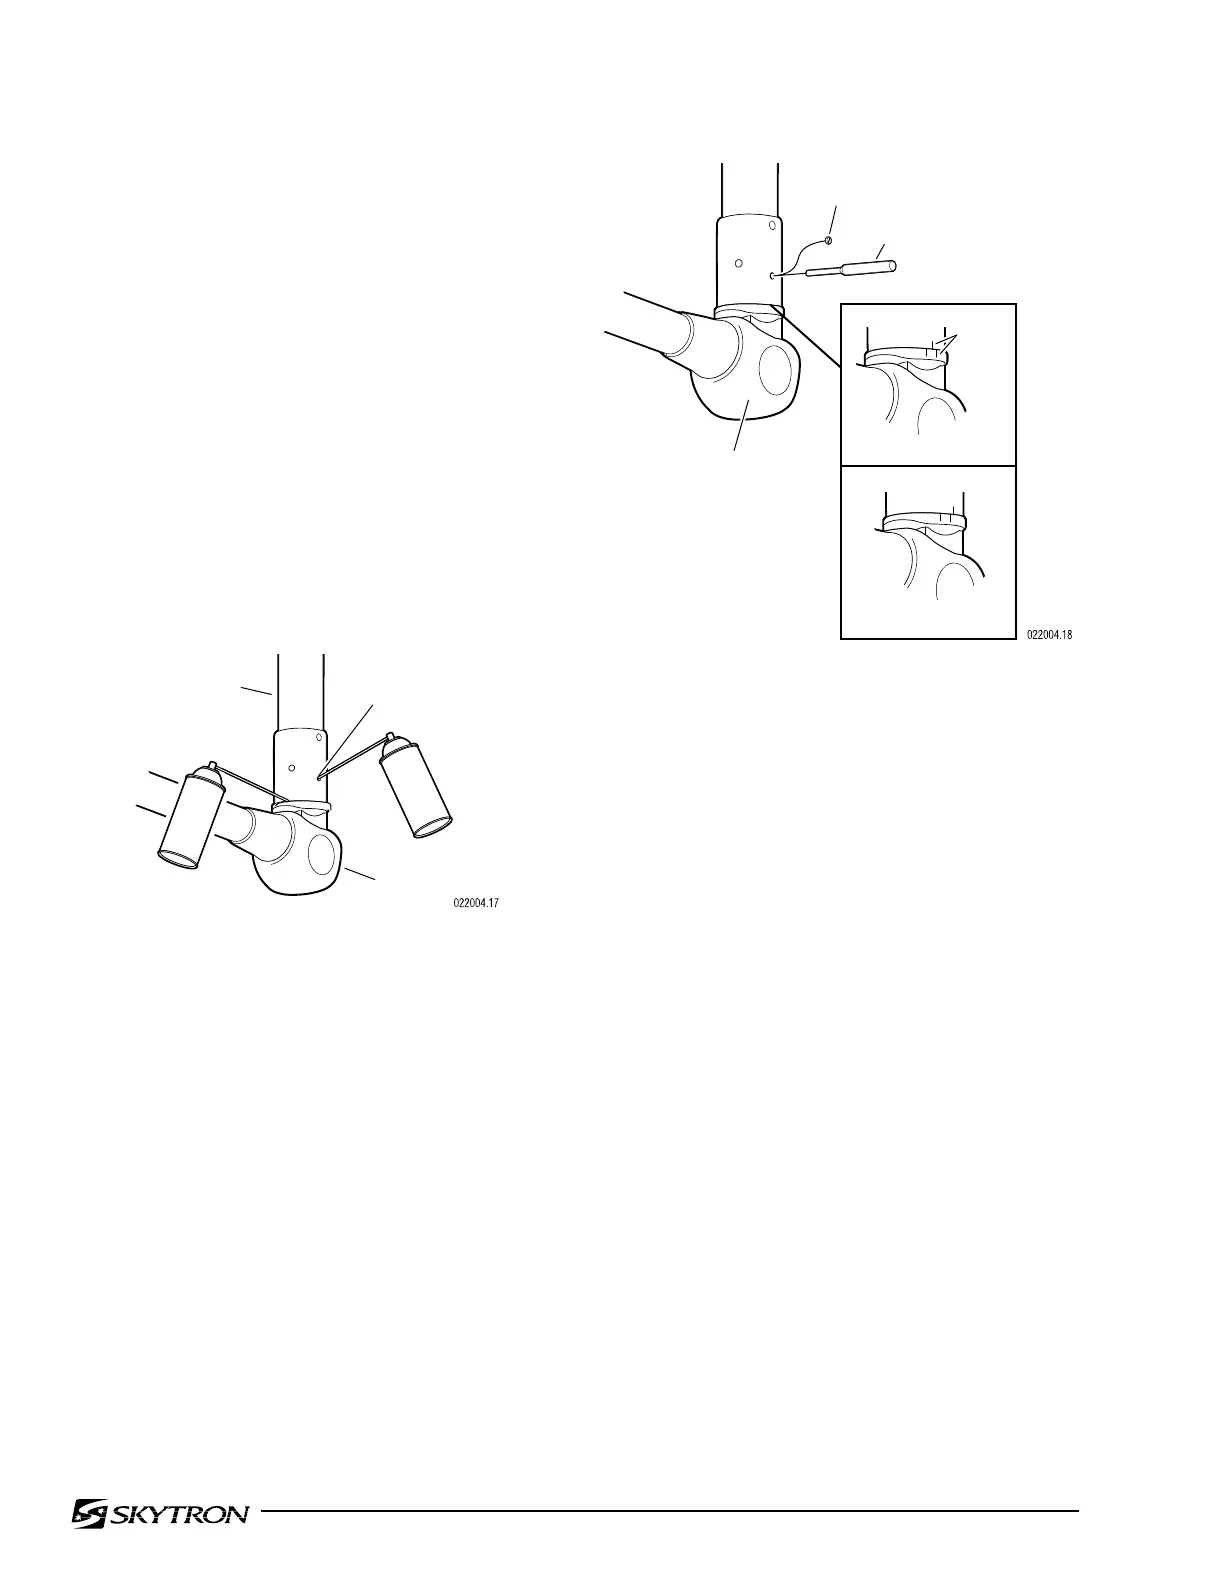
d. Locate the adjustment hole. This hole is
located just beneath the lower VST screws in the
BOM and has a slotted head chrome plug in it.
e. Remove the chrome plug, rotate the lighthead
around the Balance Mechanism until any set screws are
visible through the adjustment hole and loosen them.
Figure 4-11. Horizontal Rotation Adjustment
f. Continue to rotate the lighthead until a hole in
the nut is visible through the adjustment hole. Insert
a pin punch through the adjustment hole and into
the hole in the nut.
g. To determine the amount of adjustment,
rotate the lighthead so the pin punch is touching one
side of the adjustment hole and use a pencil to mark
a reference line as shown in figure 4-11. Rotate the
lighthead so the pin punch is touching the other
side of the adjustment hole and mark another
reference line as shown in figure 4-11.
h. With the nut held captive by the pin punch,
rotate the lighthead so that the pencil marks are
approximately 1/8" apart. Turn the lighthead clock-
wise (viewed from the bottom) to increase the
tension and counterclockwise to decrease the
tension. In some cases it may require considerable
force on the lighthead to make this adjustment.
i. Remove the pin punch and check the lighthead
for proper tension. Repeat adjustment procedure if
necessary. When proper adjustment has been
achieved, tighten the set screws and install the
chrome plug.

 Loading...


