16
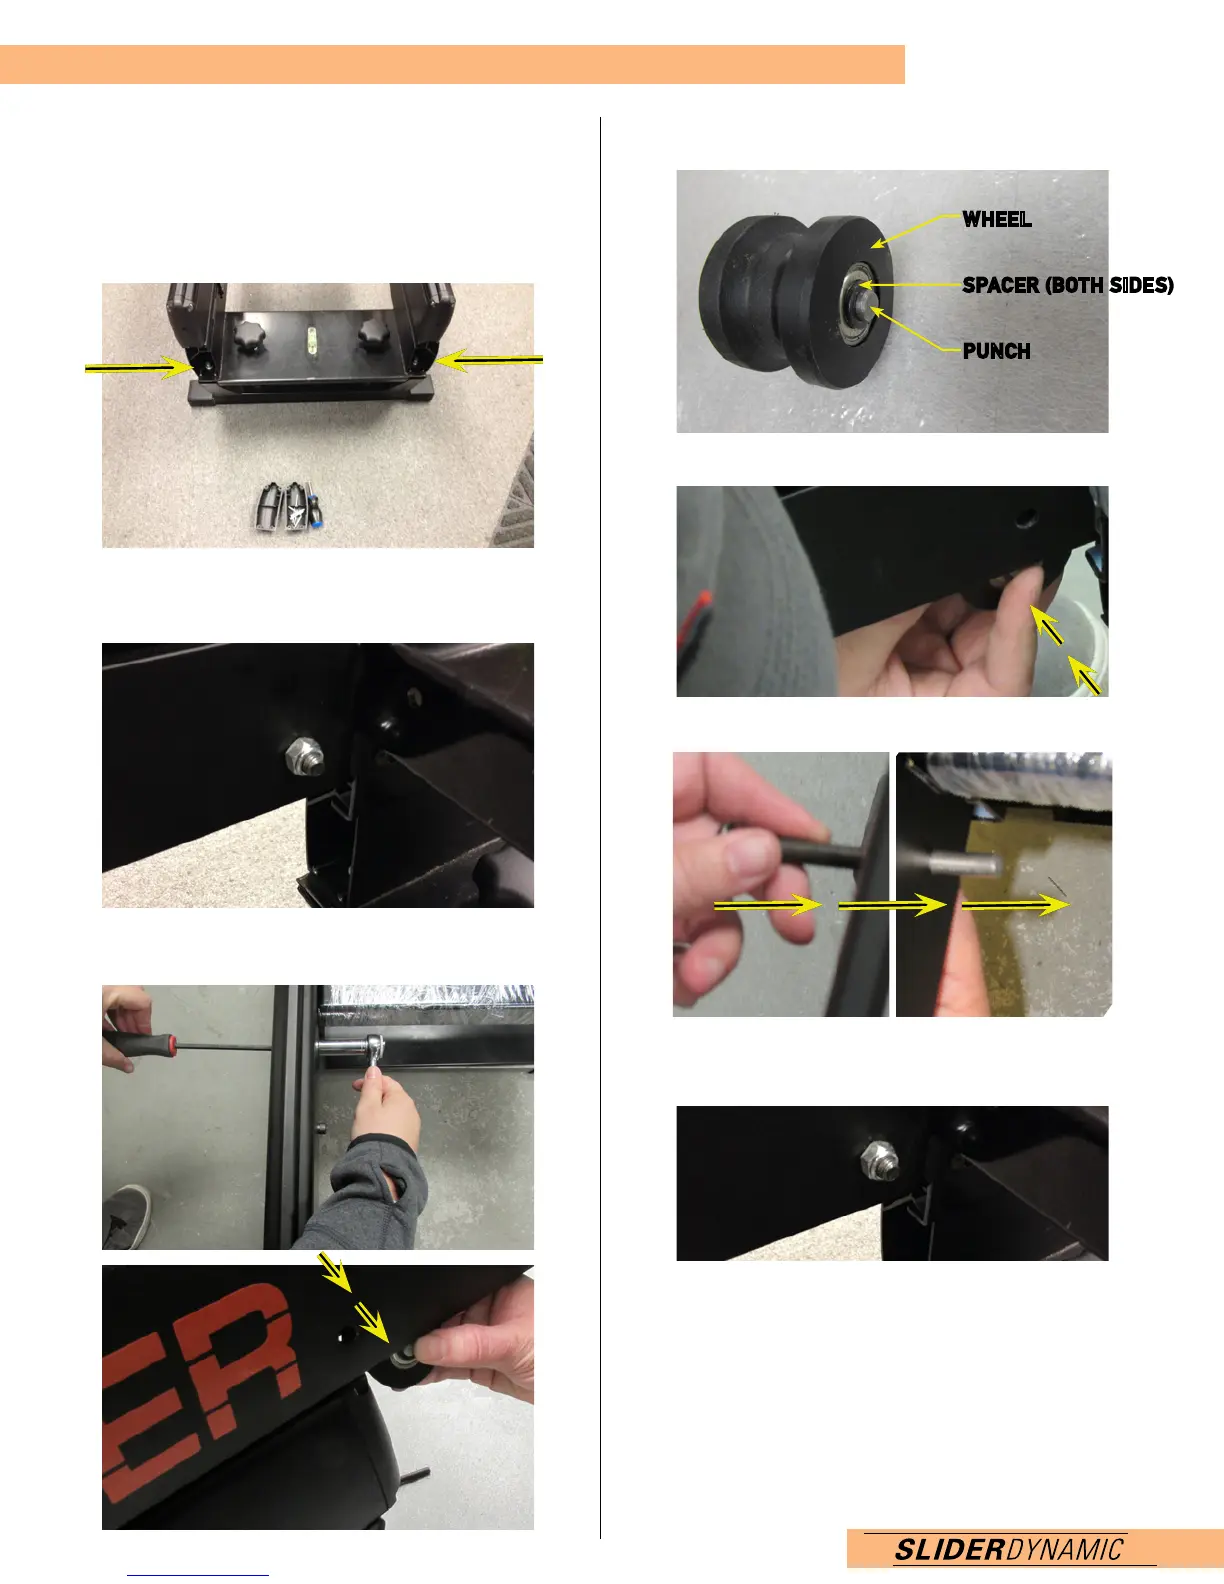
REPLACING THE RAIL WHEELS
TOOLS NEEDED:
5MM ALLEN KEY
10MM WRENCH
1. Remove the rear base rail end caps.
2. Remove the bumpers.
3. Slide rail back until wheels are exposed.
4. Using a 5mm Allen Key and a 10mm wrench, remove
the wheels.
5. Assemble the wheel (spacers on the outside and punch
through the middle).
6. Insert the wheel from underneath the top rail.
7. Slide the bolt through the wheel, knocking the punch out.
8. Screw the nut onto the bolt. Tighten with wrenches.
Make sure the wheel can spin (the thread of the bolt
needs to come past the nut to lock).
9. Repeat the above steps on the other side. Return the
bumpers and covers.
10. Replace the front wheels. Remove the front base rail
covers and bumpers and slide the machine forward so the
wheels are accessible.
11. Repeat Steps 4-9
12. Your Slider’s wheels should now be replaced. Test row to
make sure rails are sliding properly.
wheel
spacer (both sides)
punch