SL-10N Cloud
27 28
Volume setting
Volume 10
CancelOK
6.8. Reboot
Swipe any direction across the screen to enable tool bar and press icon
. Then choose one of three
actions below:
Power o − turn monitor power off;
Reboot − monitor reboot;
Logout − logout current authorized user.
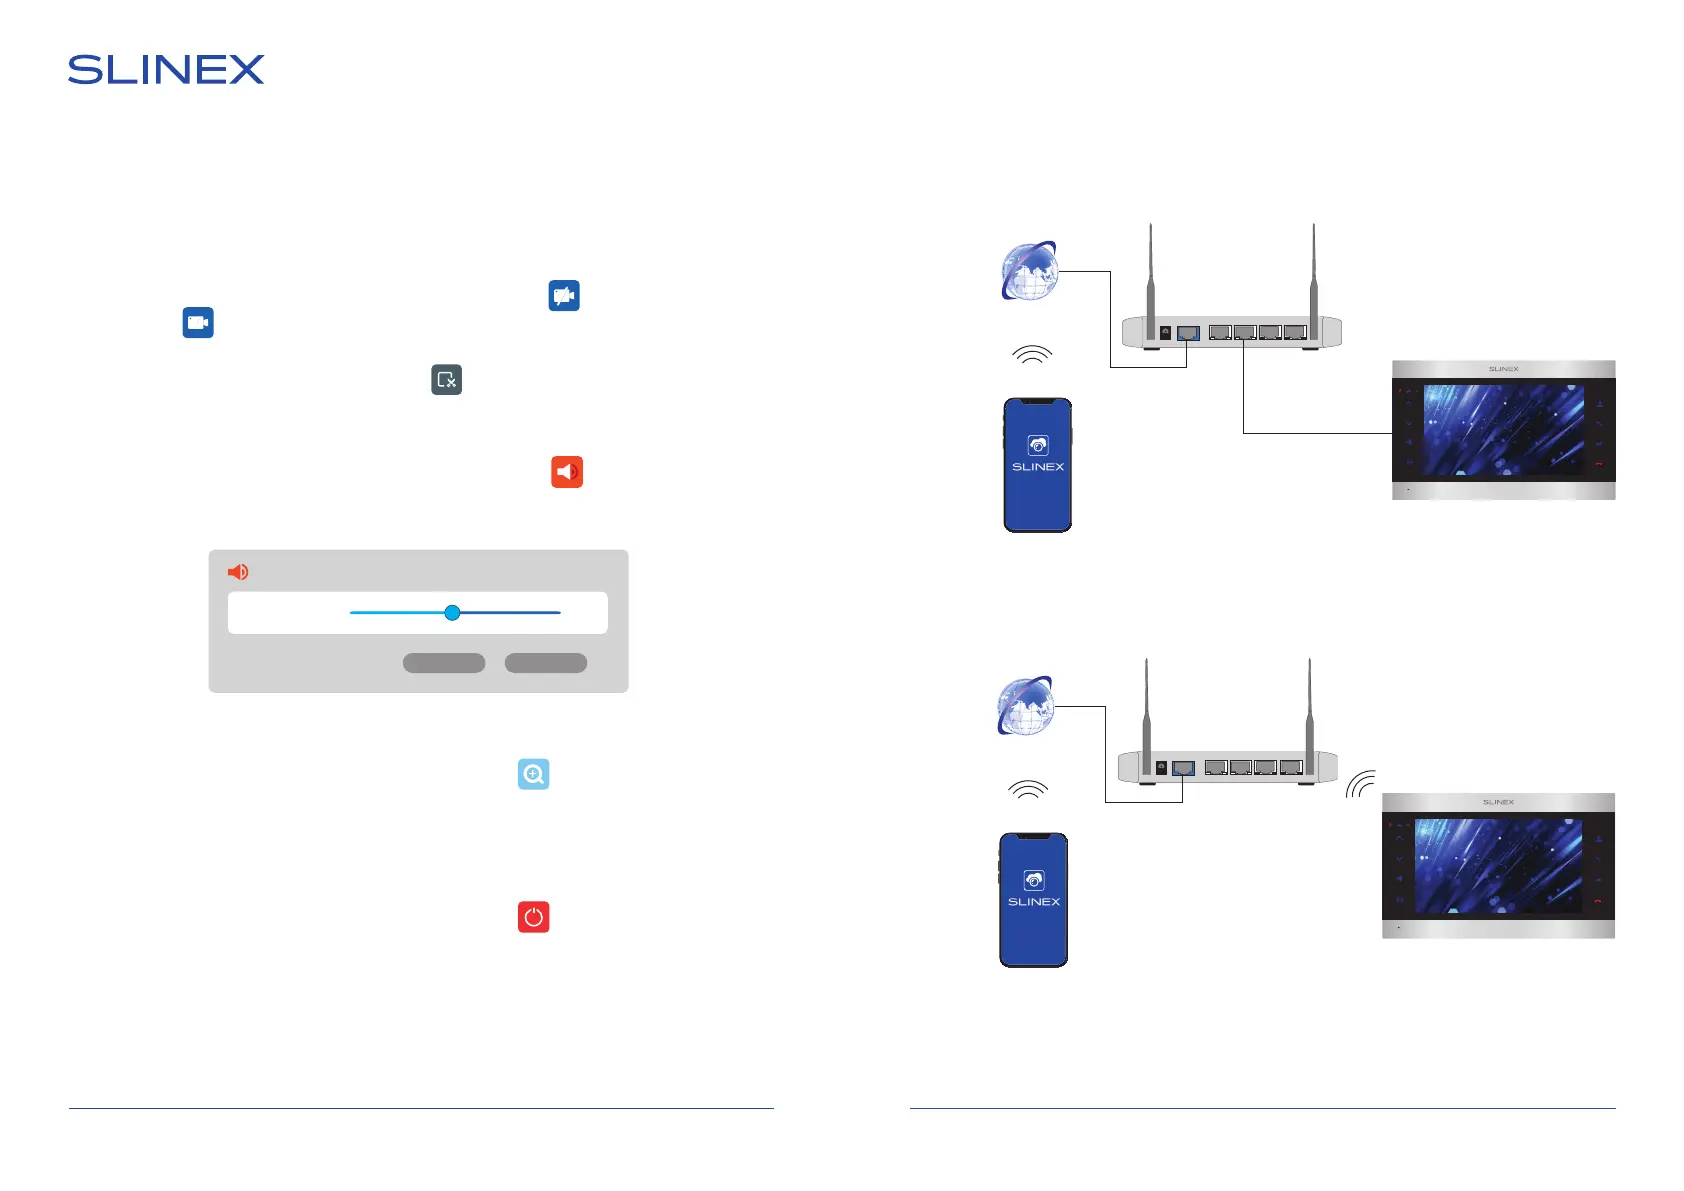
7. Network connection diagrams
Diagram 1. SL-10N Cloud wired network connection.
WAN 1 2 3 4
Android / iOS
Smart call
Internet
3G / Wi-Fi
Router
Diagram 2. SL-10N Cloud wireless Wi-Fi network connection.
Internet
Router
SL-10N Cloud
6.5. Manual snapshot/video recording
There two types of recording in the monitor – manual recording or schedule-based recording (including
motion detection). Manual recording has more priority than schedule-based recording. In case manual
recording is initiated, schedule-based recording is paused until manual recording ends.
Schedule-based recording is described on the 22-23rd pages.
Swipe any direction across the screen to enable the toolbar, then press button to start manual
recording. Press button again to stop manual recording. In quad mode you can enable/disable
recording only for the channel, from which tool bar was activated.
The same way you can make a snapshots by pressing icon on the tool bar.
6.6. Volume control
Swipe any direction across the screen to enable the tool bar, then press icon to enter volume
control bar. Choose desired volume and press «OK» button to save settings or «Cancel» button to discard
changes.
6.7. Image zooming
Swipe any direction across the screen to enable tool bar and press icon to activate zooming mode.
Hold and drag any part of the screen to mark zooming area. In zooming mode press and hold any part of
the screen to come back to the full screen mode.
WAN 1 2 3 4
Android / iOS
3G / Wi-Fi
SL-10N Cloud
Smart call