76
3.3
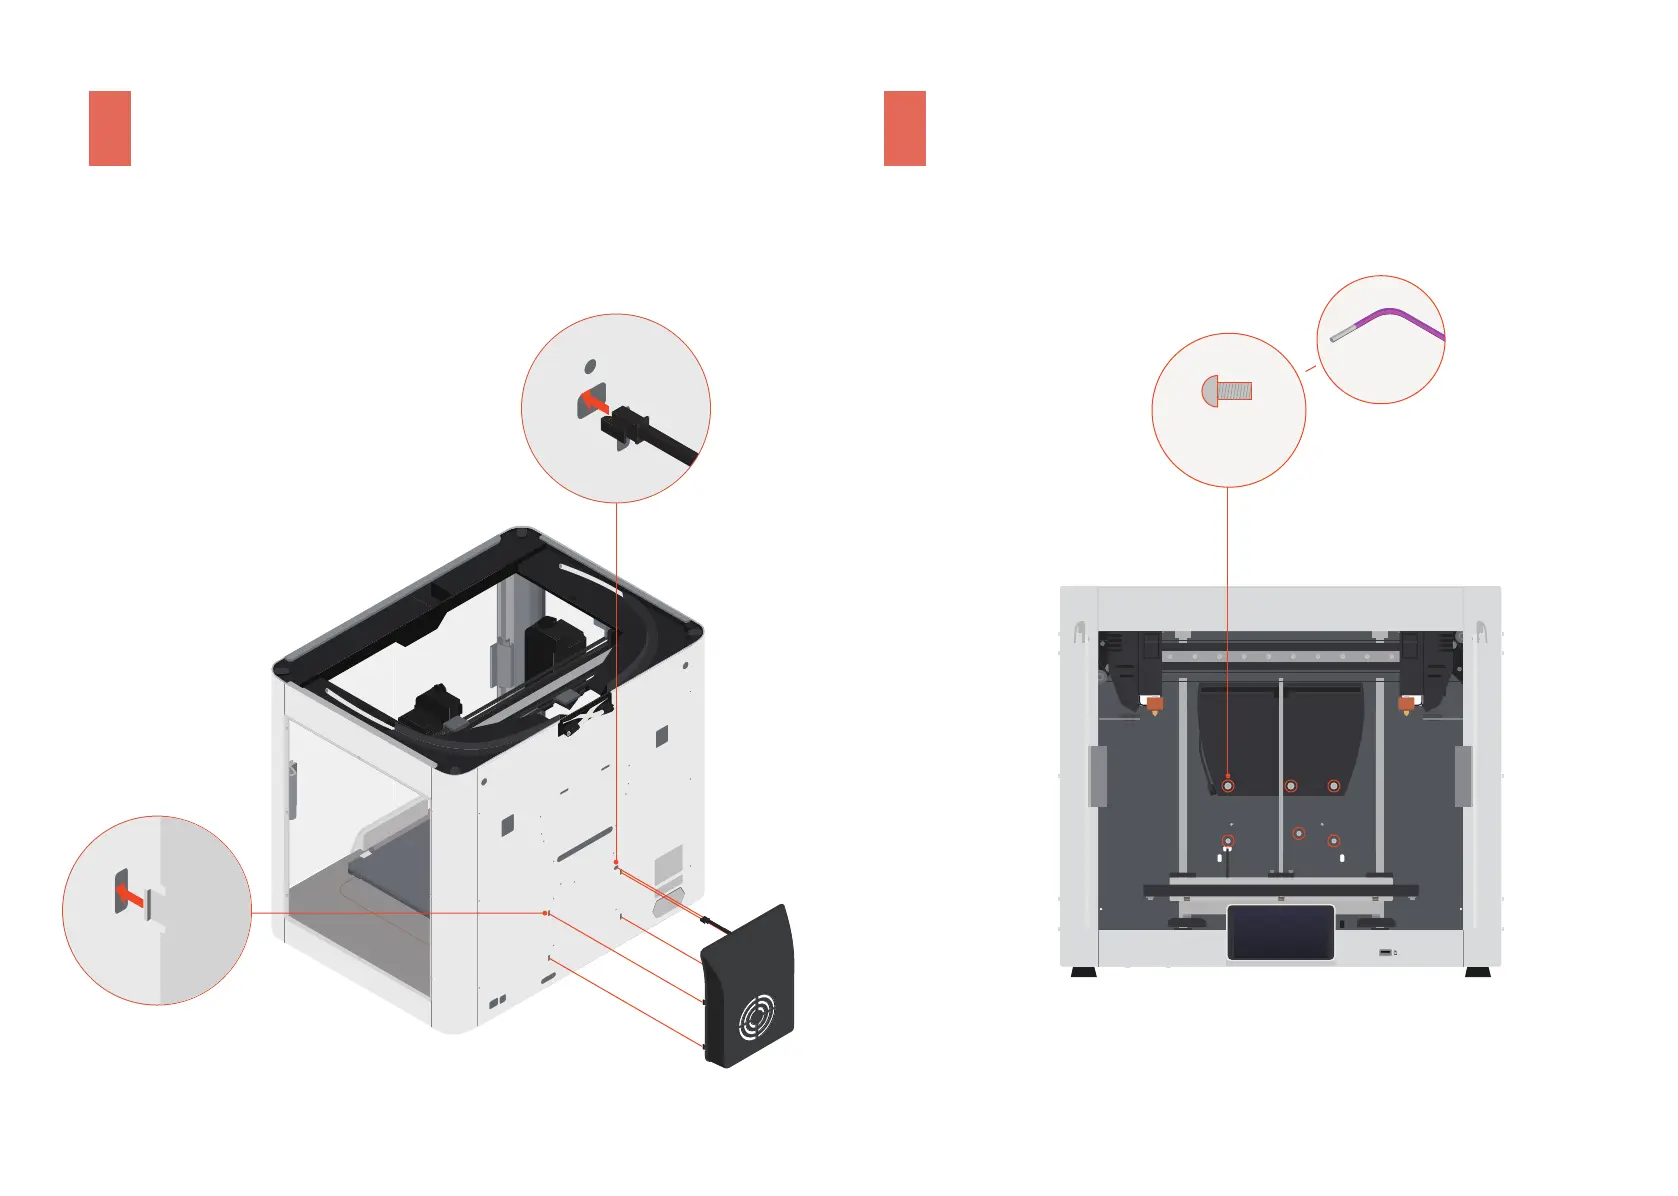
Open the front doors, and then install the screws.
3.2
Thread the connecting cable through the hole,
and then lock the Print Cooling Fan into place.
Führen Sie das Anschlusskabel durch das Loch und rasten Sie dann das Drucker-Kühlgebläse ein.
Faites passer le câble de connexion à travers le trou, puis fixez le ventilateur de refroidissement de l'impression en place.
Introduzca el cable de conexión por el orificio y encaje el ventilador de refrigeración de impresión en su lugar.
Infilare il cavo di connessione nel foro, quindi bloccare la ventola di raffreddamento della stampa in posizione.
将接线穿过孔位,然后将模型冷却风扇卡入背板。
接続ケーブルを穴に通し、プリント冷却ファンを所定の位置にロックします。
연결�케이블을�구멍에�끼운�다음�인쇄�냉각�팬을�제자리에�고정합니다.
1
2
Öffnen Sie die Fronttüren und installieren Sie dann die Schrauben.
Ouvrez les portes avant, puis installez les vis.
Abra las puertas frontales y coloque los tornillos.
Aprire le porte anteriori e installare le viti.
打开前门,然后固定螺丝。
フロントドアを開き、ネジを取り付けます。
전면�도어를�연�다음�나사를�장착합니다.
H2.0
M3 × 10
× 6