9
snom PA1+ User Manual Setting Up
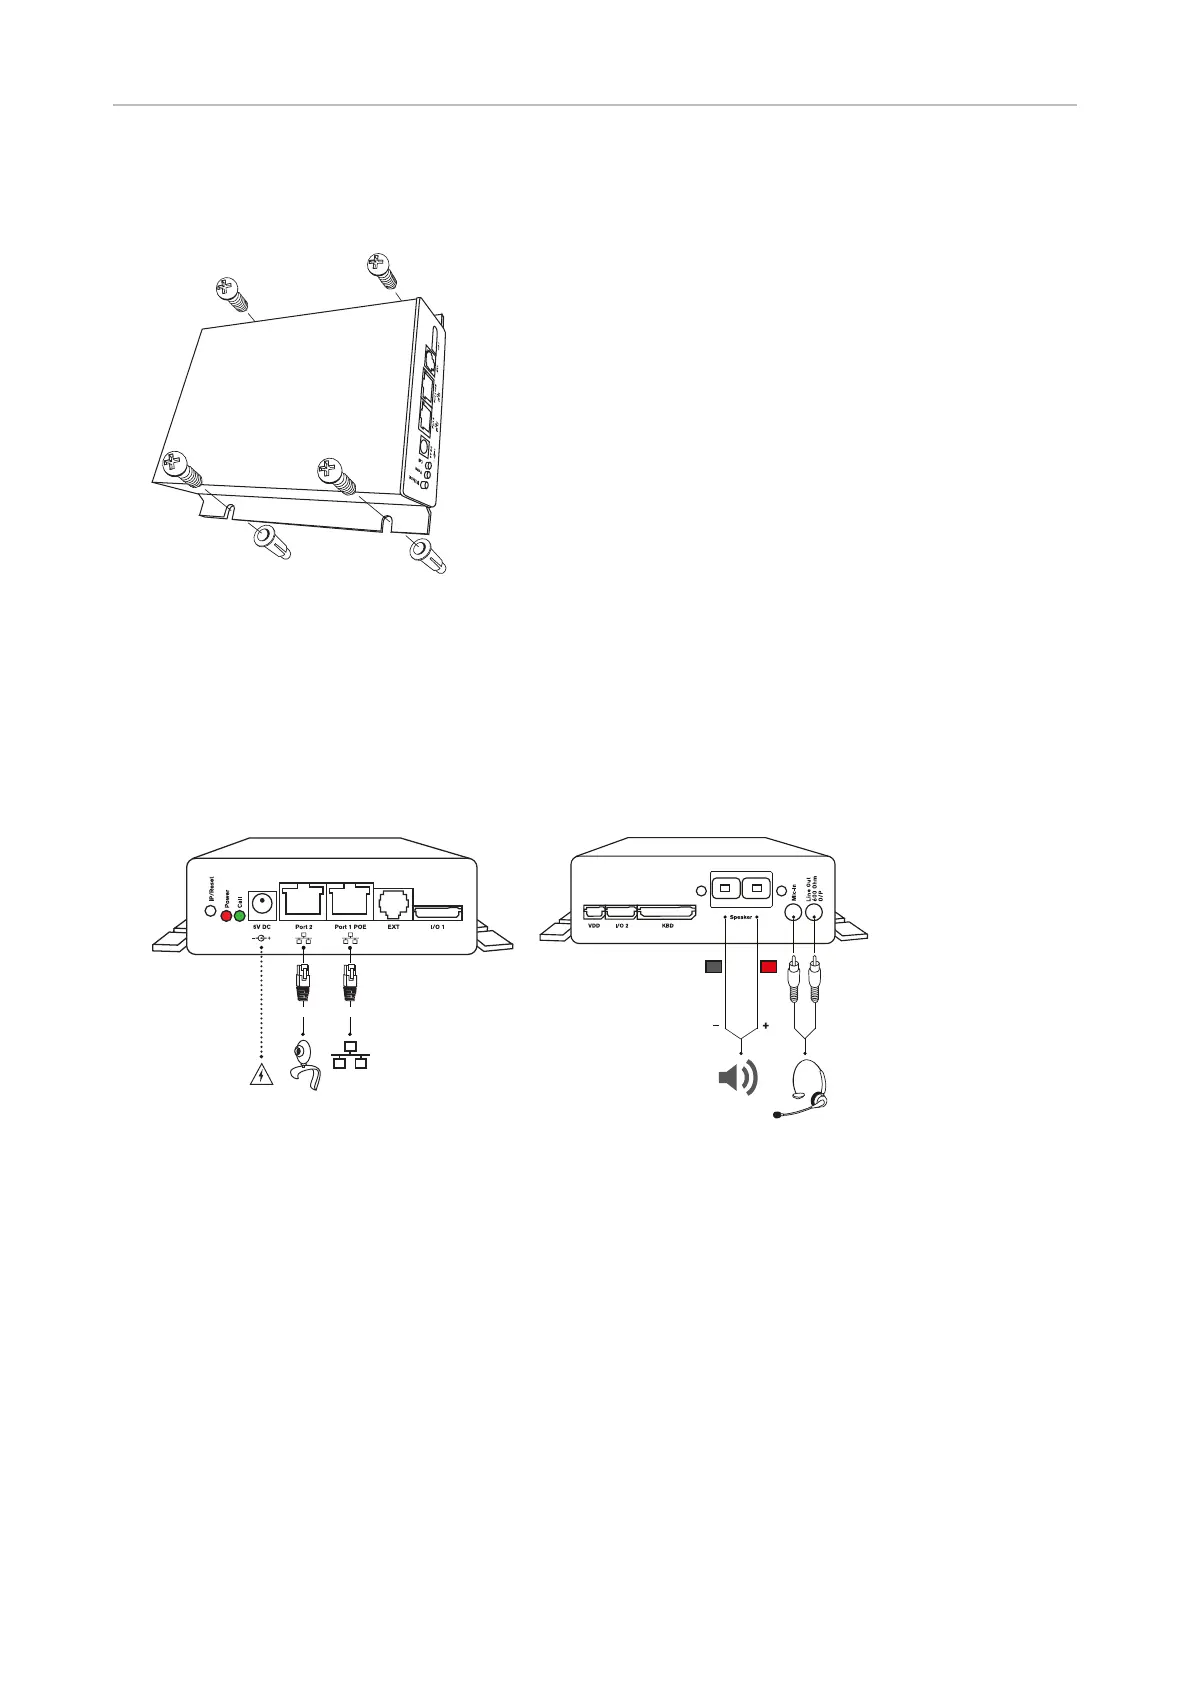
2. Drill the holes and insert the expansion anchors in the holes.
3. Place the Snom PA1+ on the wall with the cut-outs above the anchors as shown in Fig. 2.
Fig. 2
4. Place the screws in the anchors and tighten them evenly..
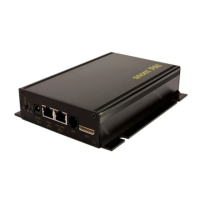
Connecting the PA1+
Low impedance connection (ex. 4–32 Ohm)
Fig. 1 Fig 2
1. Plug the Ethernet cable into the RJ45 connector labelled "Port 1PoE", as shown in Fig. 1. The
second RJ45 connector labelled "Port 2" is for daisy-chaining further Ethernet devices without the
need for another Ethernet cable.
If no PoE available: Connect a Snom-approved 5V 10W power supply to the power
connector labelled "5V DC".
2. Connect the loudspeaker wires to the speaker terminals labelled "Speaker", as shown in Fig. 2.
Connect the "+" wire with the red terminal, connect the "-" wire with the black terminal.
Note: If you want to use a headset during the setup:
Connect the headset's microphone plug to the jack labelled "Mic-In".
Connect the headset's speaker plug to the jack labelled "Line Out".