11
Installation and Operation
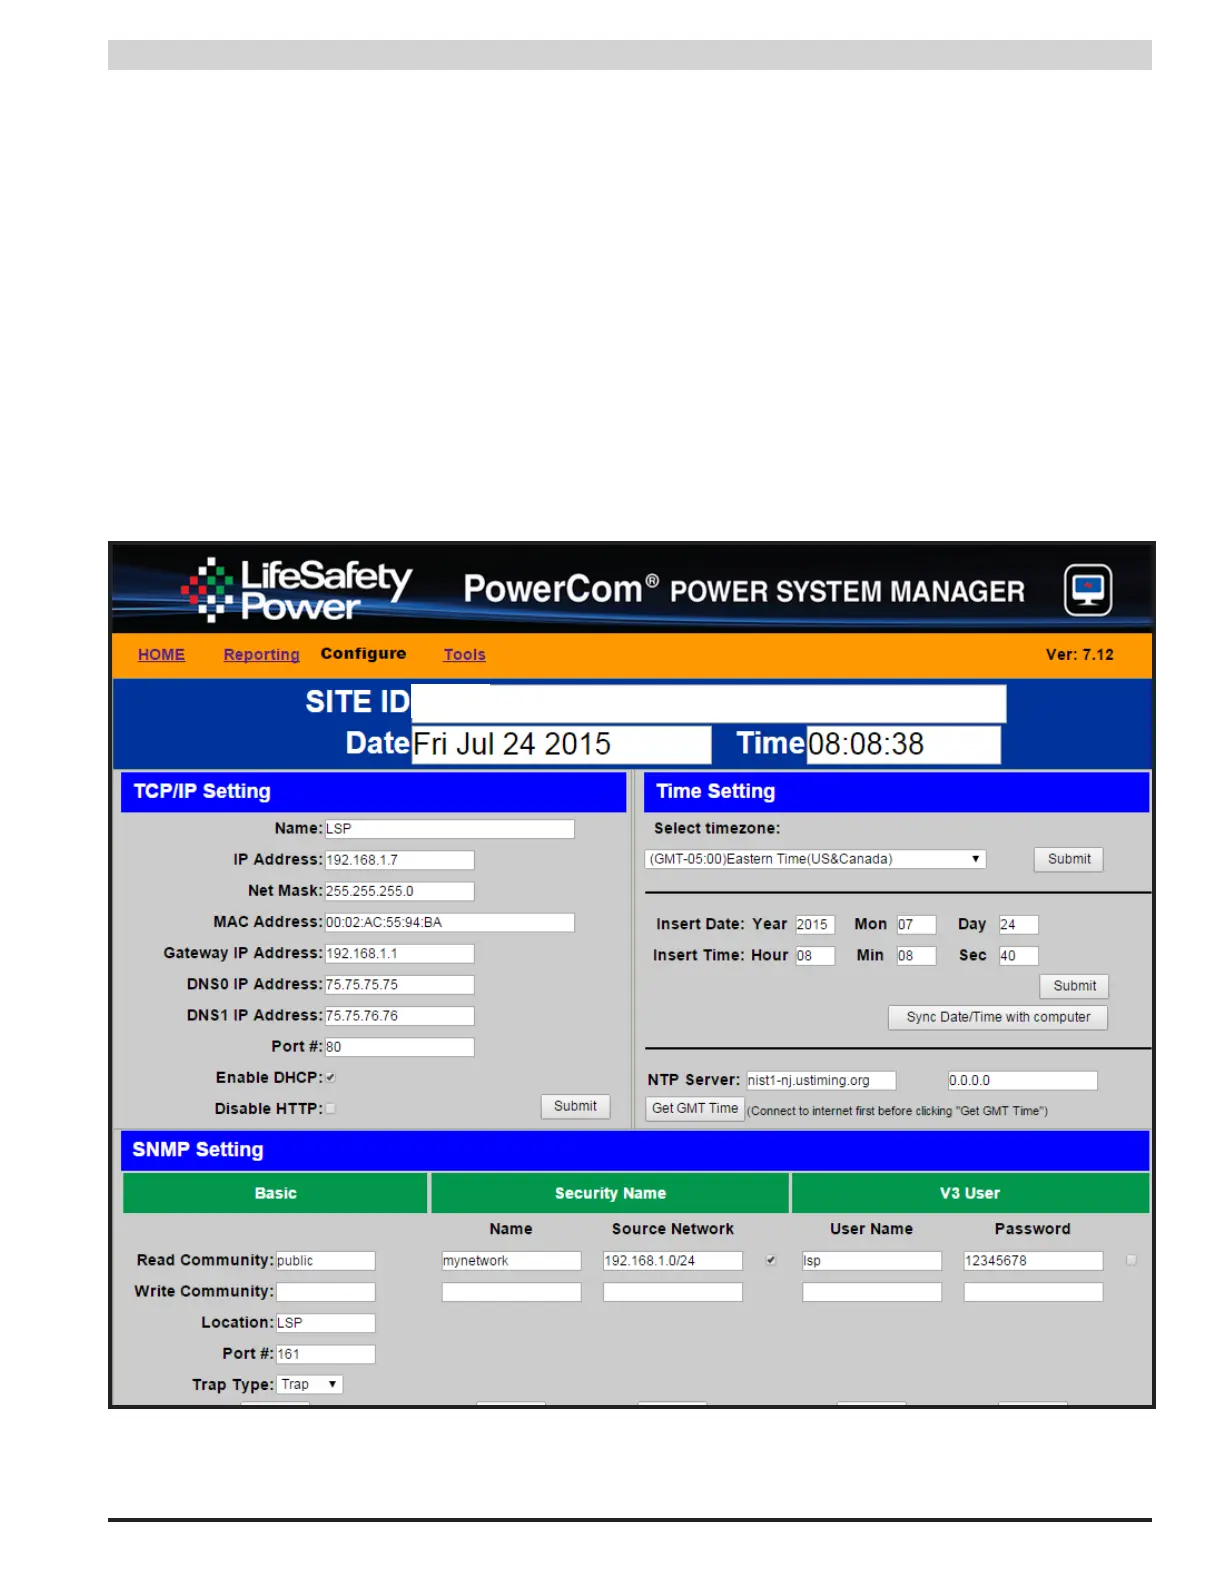
2.2.2 Configuring the TCP/IP Settings
In the orange menu bar at the top of the browser screen (Figure 2.4), click the "Configure" link. In the TCP/IP Setting block of the
Configuration screen (See Figure 2.5), set the name to any meaningful name of your choice and set the first three numbers of the
IP address to match the subnet of the network the PSX-NL4 will be connected to. Set the fourth value of the IP address to a number
between 0 and 255 which is not being used by any other device on the subnet. Follow the example below to complete the remainder
of the TCP/IP settings. Consult your IT department for information on these settings.
i Note The PSX-NL4 has DHCP enabled by default. If the PSX-NL4 is connected to a DHCP network, the DHCP server will automati-
cally configure the TCP/IP settings. Note that you will need the Network Scan tool available at http://www.lifesafetypower.com/
support/software-firmware-downloads to locate the PSX-NL4's IP address before logging into the PSX-NL4 board.
The port number used by the PSX-NL4 can also be set in the Port# field. By default the PSX-NL4 is set to use port 80. To disable HTTP
access and only allow access via HTTPS, check the "Disable HTTP" selection..
After completing the TCP/IP settings, click the "Submit" button in the bottom right corner of the TCP/IP Setting box. Note that the new
TCP/IP settings will not take effect until the PSX-NL4 is rebooted or power to the PSX-NL4 is cycled.
To access the PSX-NL4 board from outside the installation site's firewall, the firewall must have the ports used by the PSX-NL4 for
http/https, and SNMP (if used) open. See your IT department for firewall port opening details.
Figure 2.5 - Typical Configure Page (top portion)