Features
5
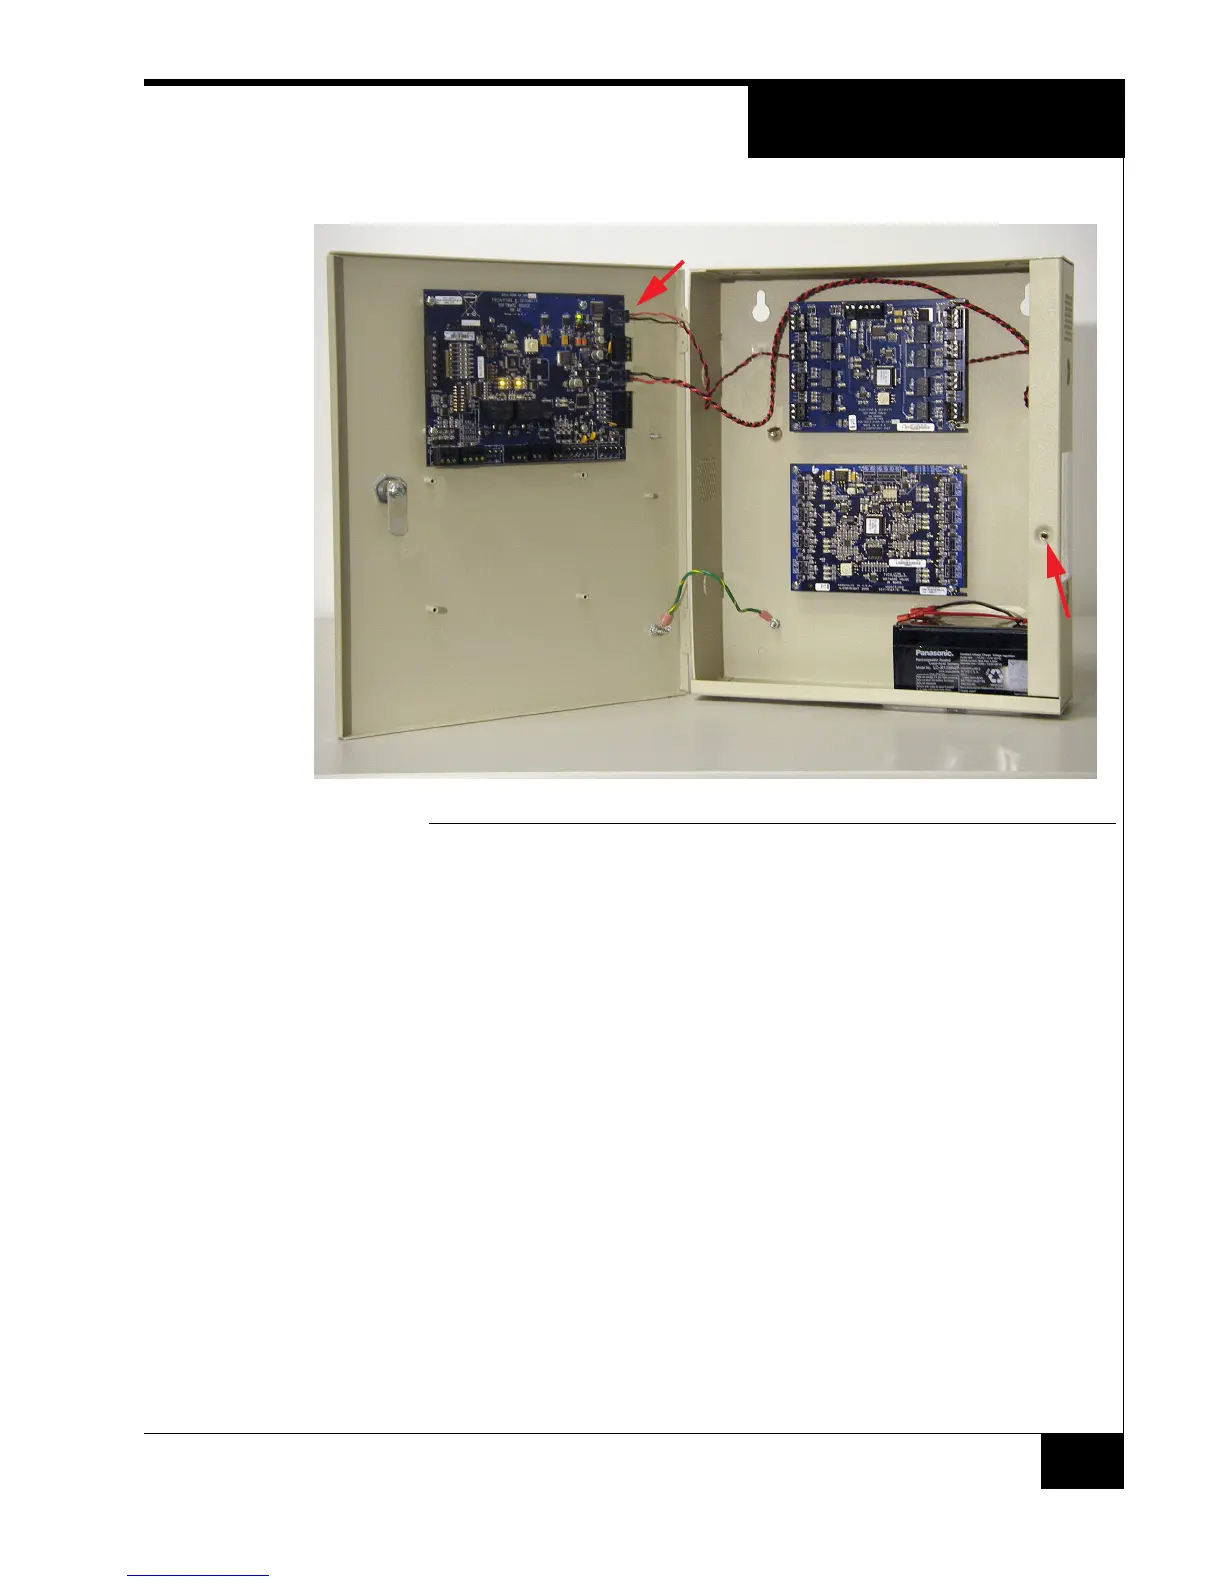
FIGURE 2. RM-DCM-2 with RM-4E, R/8, I/8, and Battery
Tamper Switch
The RM-DCM-2 provides a tamper switch as part of the enclosure.
1. Verify or connect the normally closed tamper switch in the enclosure to the
2-pin connector labeled TAMPER (SW2) on the RM-4E board. See Figure 2.
2. Verify or set DIP switch SW5-4 (Tamper Override) to Off (Closed) on the
RM-4E. See Figure 5.
3. To configure the tamper:
C•CURE 800 - use the Reader Configuration Advanced dialog box.
C•CURE 9000 - use the Reader I/O tab.
NOTE The switch is normally closed so that when the door is closed the tamper
is secure. If the door is forced, the switch will open causing an alarm
event.
NOTE The tamper switch must be connected to comply with UL requirements.
Tamper Input (SW2)
Tamper Switch