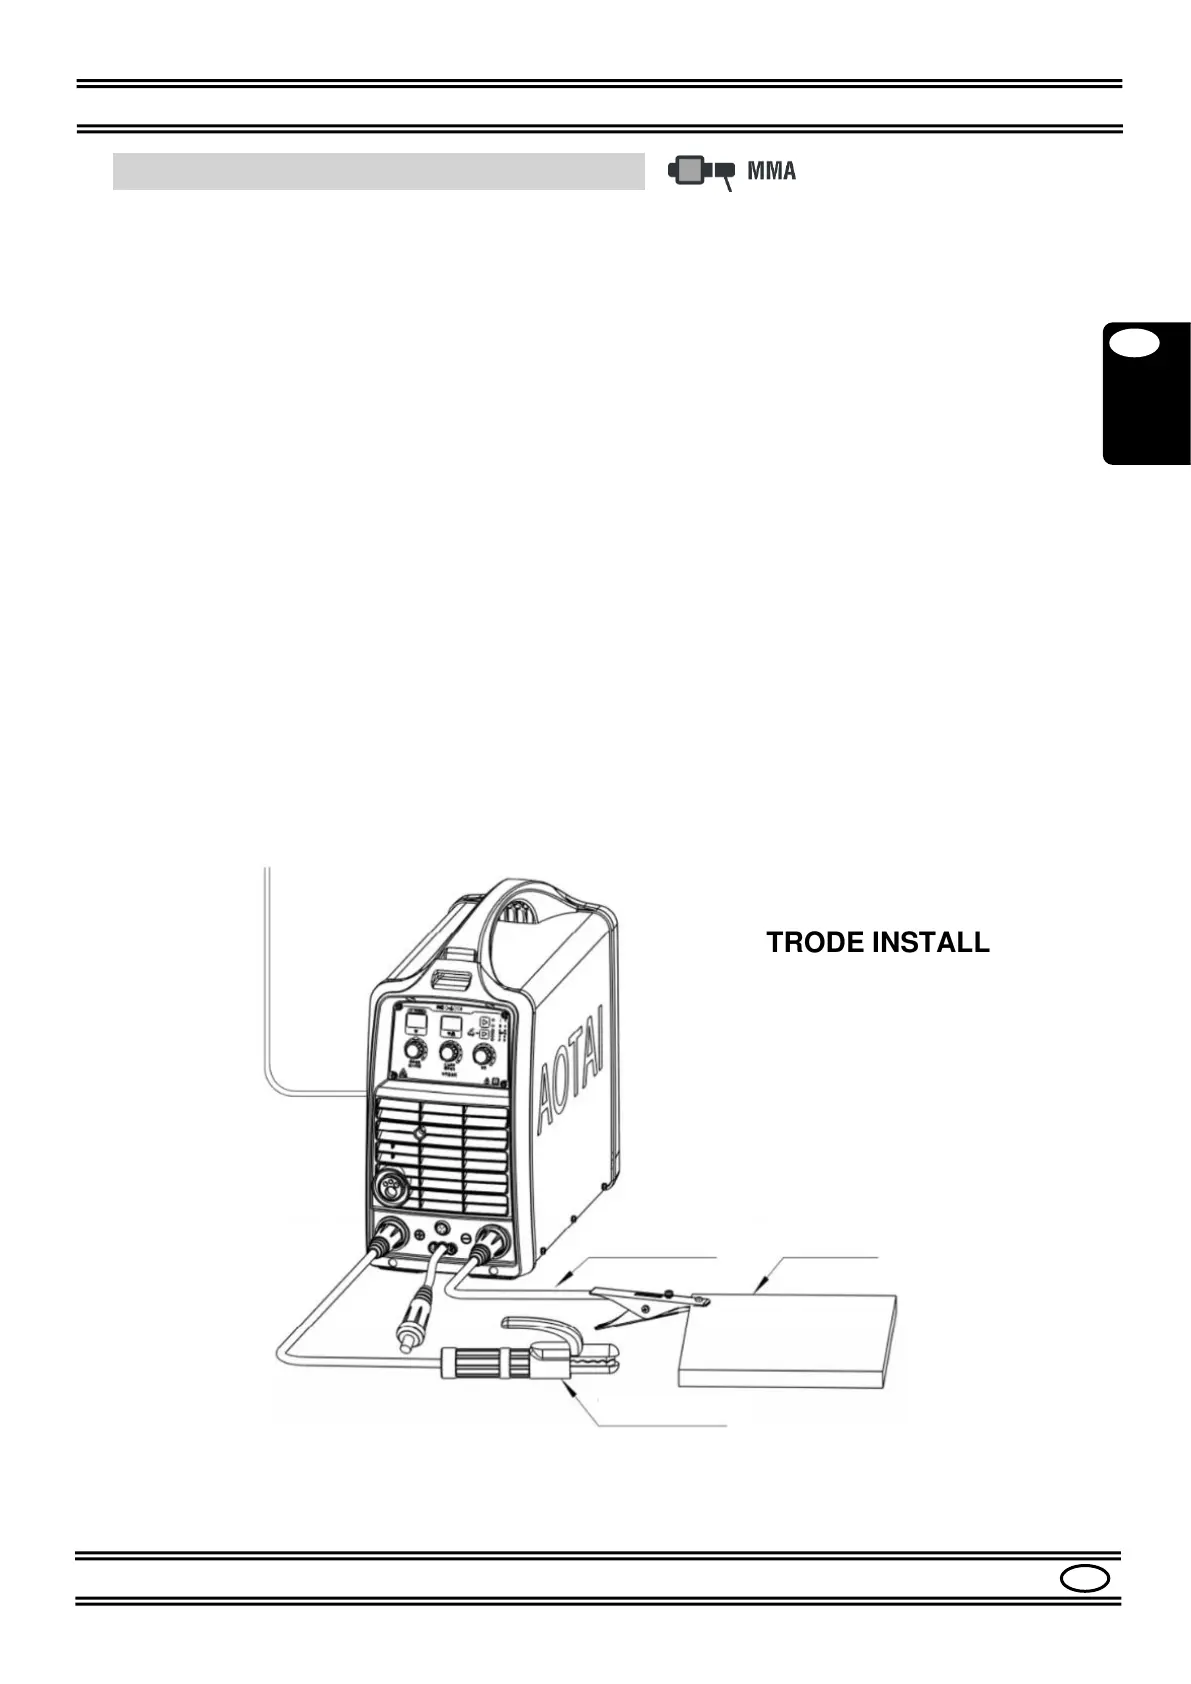
7.2 (MMA) ELETTRODE Installation
Please refer to the Figures 1, 2, 3, 4.
- Make sure the switch (9) is in the "0" position.
- Connect the ELECTRODE HOLDER to the socket (5) (+) of the machine.
- Connect the GROUND CABLE to the socket (3) (-) of the machine.
(If you want to use electrodes with inverted polarity, connect the ELECTRODE HOLDER
CLAMP to the socket (3) (-) and GROUND CABLE to the socket (5) (+)).
- Secure the other end of the ground cable to the workpiece, making sure there is good
electrical contact.
- Turn on the machine with the switch (9).
- Press the MODE button (18) to select the MMA mode.
- Set the welding current with the CURRENT knob (20).
The current is shown on display.
Generally, the welding values are as listed below:
Ф electrode (MMA) 2.0 60-100A
Ф electrode (MMA) 2.5 80-120A
Ф electrode (MMA) 3.25 110-150A
Ф electrode (MMA) 4.0 140-180A
Ф electrode (MMA) 5.0 180-220A
- Adjust the Arc Force value according to the type of electrode in use; see Par. 8.1.
- The machine is now ready to weld.