Figure 38: Conduit nuts
7. Remove the screws securing the inverter to the mounting bracket and remove the
inverter from the mounting bracket.
NOTE
If you remove the old inverter and do not immediately install a new one, use
insulation tape to isolate each of the AC and DC wires
8. Place the new inverter on the mounting bracket; insert the screws securing the
inverter to the mounting bracket.
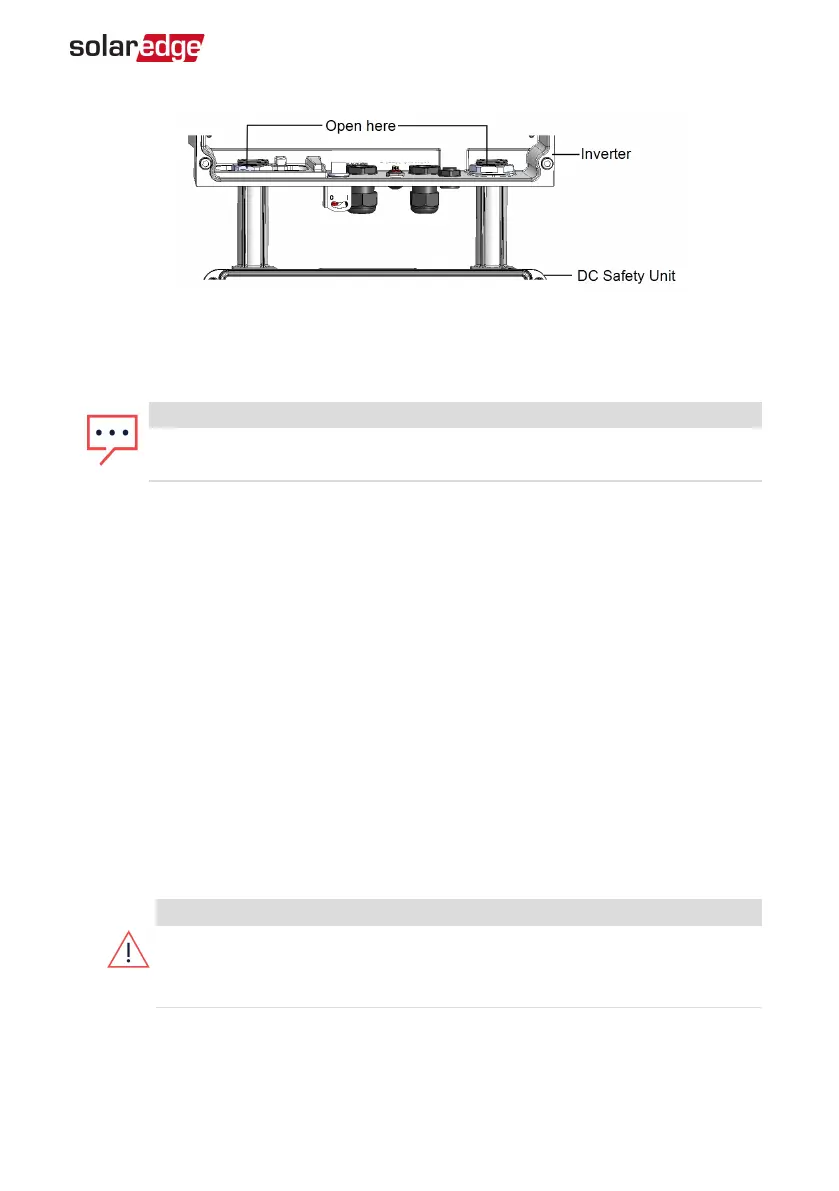
9. For inverters with a Connection Unit, screwthe two conduit nuts in the inverter
securing the DC Safety Unit to the inverter.
10. Connect all the wires to the inverter: Follow the instructions of
Installing the Inverter
on page 25 and
Commissioning the Installation
on page 35.
11. Close the DC Safety Unit cover (if applicable) and the inverter cover.
Replacing the DC Safety Unit
Removing the DC Safety Unit
1. Turn OFF the inverter ON/OFF switch, and wait until the LCD indicates that the DC
voltage is safe (<50V), or wait five minutes before continuing to the next step.
WARNING!
If you cannot see the inverter panel, or if a malfunction is indicated on the
LCD panel, wait five minutes for the input capacitors of the inverter to
discharge.
2. Turn OFF the DC Safety Unit and the AC breaker of the distribution panel.
3. Open the inverter cover.
Appendix F: Replacing and Adding System Components 93
Three Phase System MAN-01-00507-4.2