Chapter 5: Commissioning the Installation
This chapter describes how to activate the system, pair the poweroptimizers to the
inverter and verify the proper functioning of the system.
Step 1: Activating the System
1. Verify that the inverter ON/OFF switch is OFF.
2. Verify that the DC Safety Unit (if applicable) is in the OFF position.
3.
Remove the inverter cover: Open the inverter cover’s six Allen screws and carefully
pull the cover horizontally before lowering it.
WARNING!
ELECTRICAL SHOCK HAZARD. Do not touch uninsulated wires when the
inverter cover is removed.
Activate the inverter:
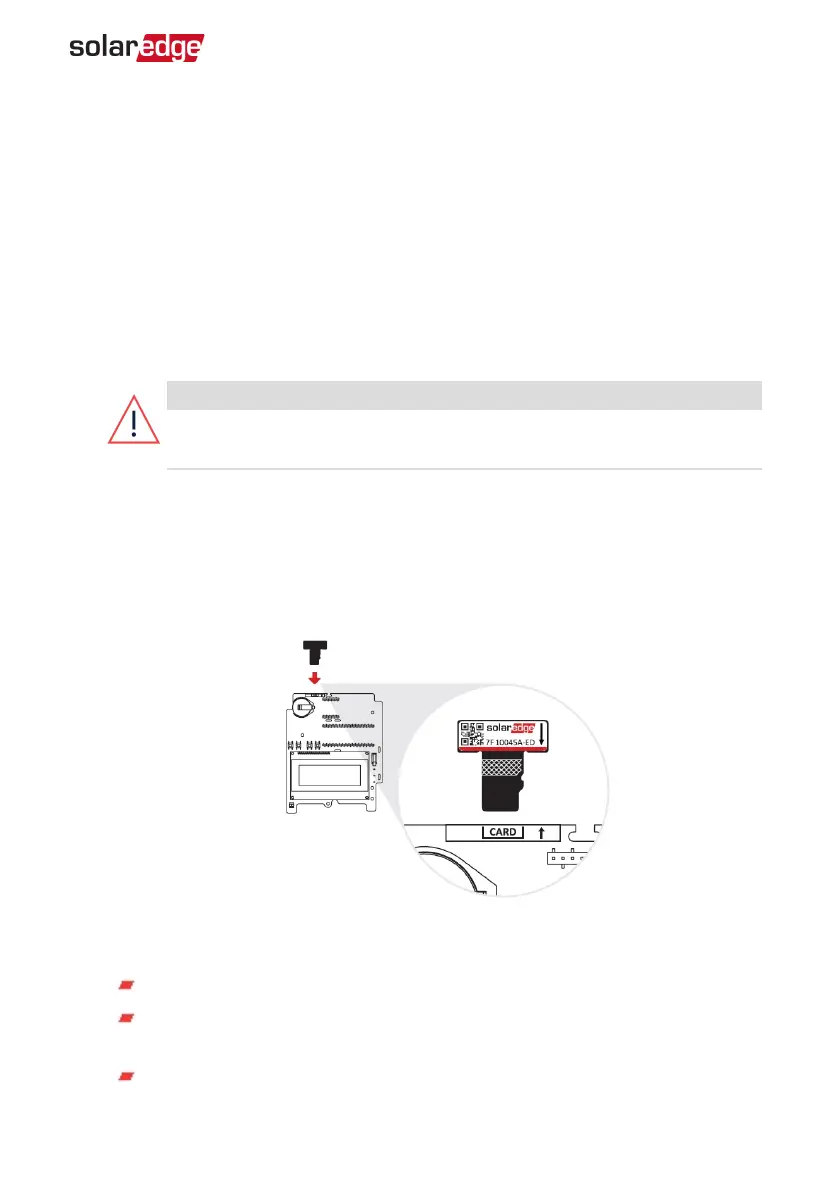
a. Verify that the card S/N matches the inverter S/N.
b. Insert the card into the "CARD" slot on the communication board.
c. Turn ON the AC switch of the main circuit board.
d. LCD shows: Running Script...è Done!
Figure 16: Activation card
If LCDshows: Failed:
Turn AC OFF and ON (reset), and repeat the activation process.
Use the activation code that appears on the certification inverter label to
manually activate the inverter.
If the problem persists, contact SolarEdge Support.
Chapter 5: Commissioning the Installation 35
Three Phase System MAN-01-00507-4.2