44
Electrical Connection
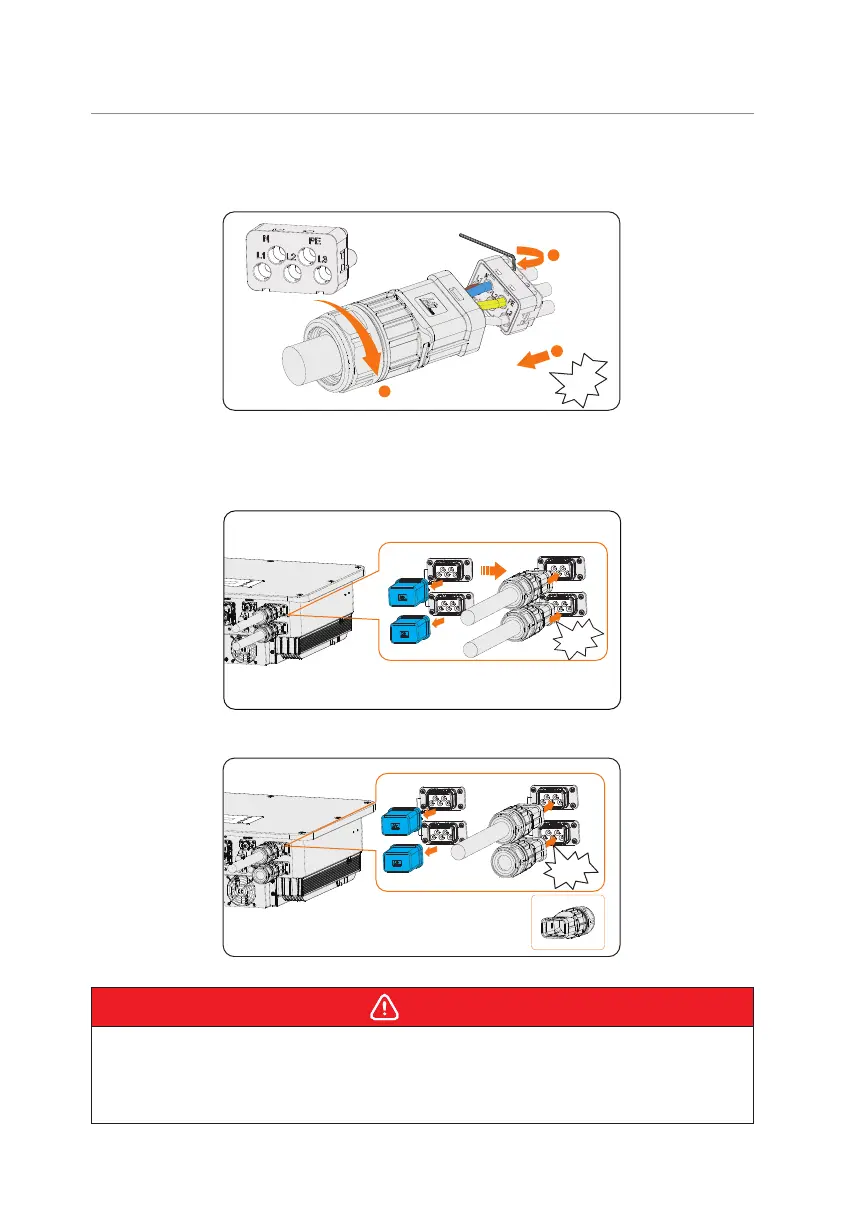
Step 5: Insert the crimped conductors L1, L2, L3, N, and grounding conductor into the
terminal block according to the labeling and tighten the terminal block screws.
1
2
3
Click!
Figure 8-12 Assembling the AC connector
Step 6: Remove the AC terminal caps and plug the assembled AC connectors into Grid
terminal and EPS terminal correspondingly.
Click!
Figure 8-13 Installing the AC connector to inverter
Click!
Figure 8-14 The EPS terminal is not connected
DANGER!
• Before powering on the inverter, make sure the AC connectors are properly installed
on the Grid and EPS terminal. Even if the EPS terminal is not wired, it is still necessary
to install the AC connectors correctly. Otherwise, electrical shock may be caused by
high voltage, resulting in serious personal injury or death.

 Loading...