EasyManuals Logo

Solax X1 Series User Manual

Solax X1 Series
49 pages
To Next Page IconTo Next Page
To Previous Page IconTo Previous Page
Page #13 background imageLoading...
Page #13 background image
Installation
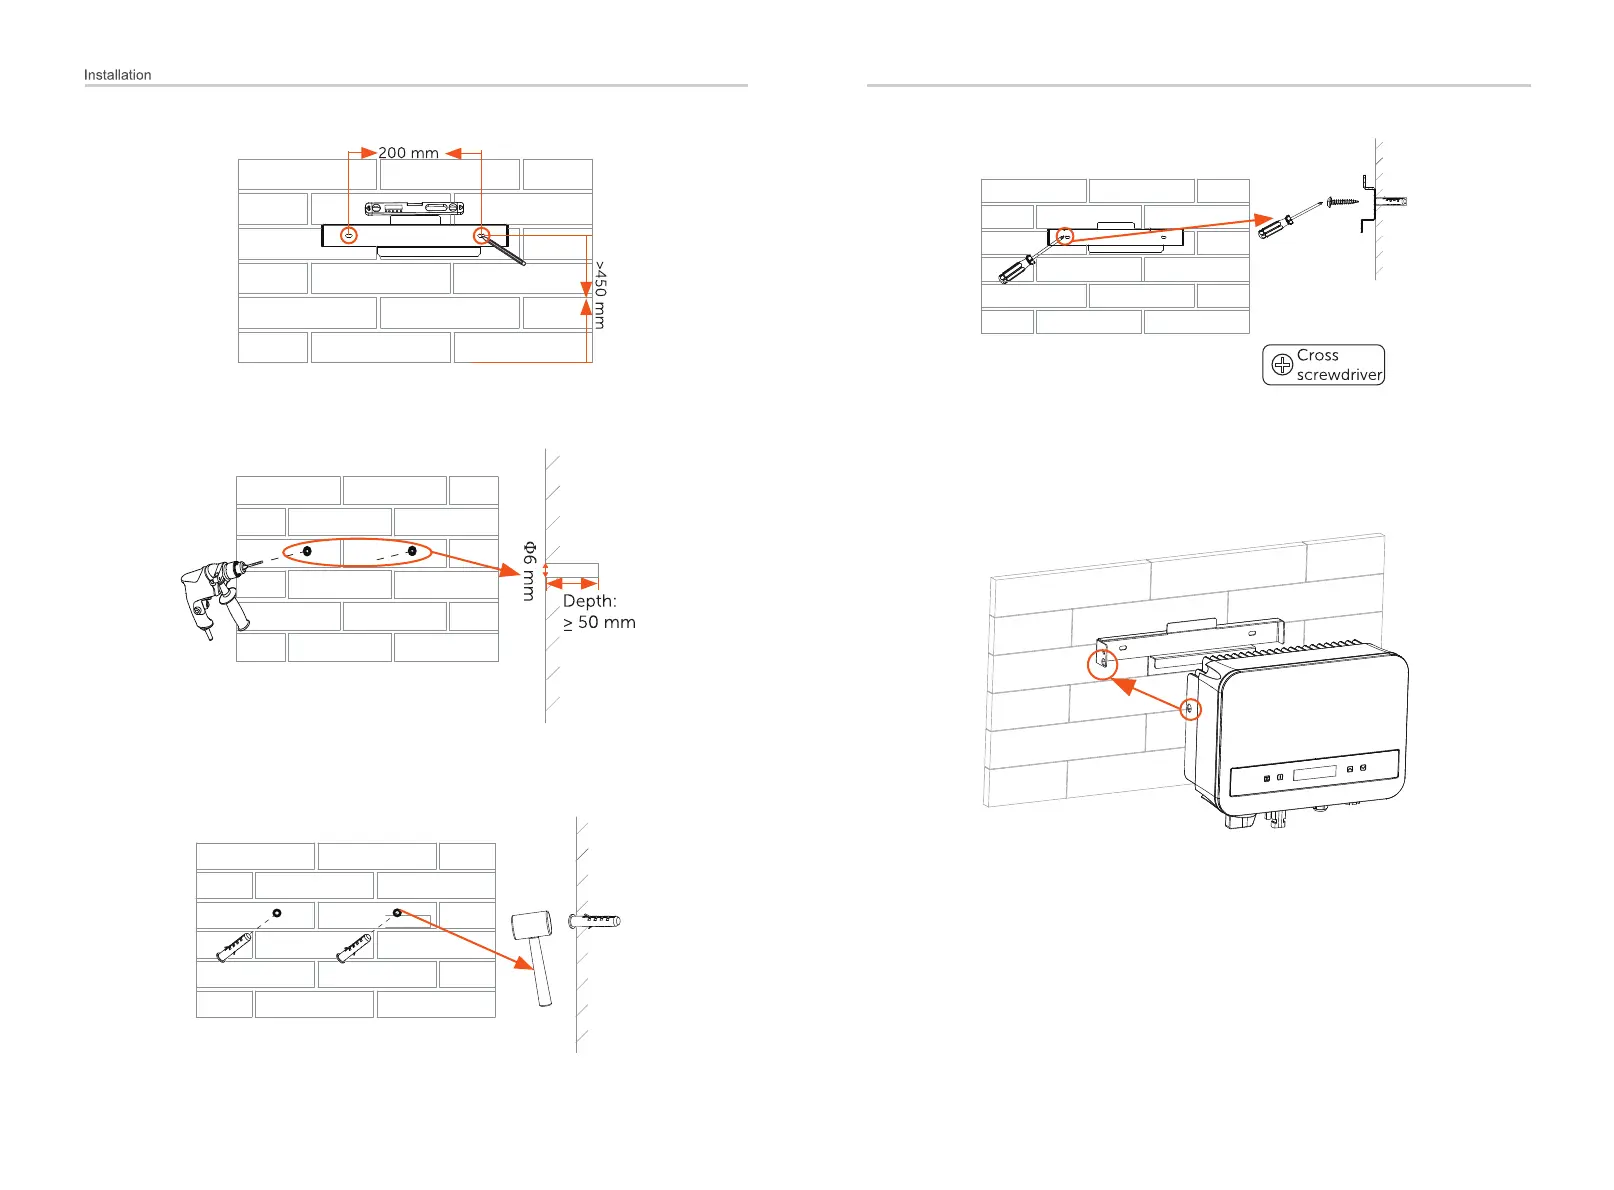
c) Insert the expansion tubes in the holes using the mallet, place the
wall bracket and use self-tapping screws to tighten the bracket.
20
21
b) Drill holes with the drill (hole diameter: 6mm), make sure the
holes are deep enough (at least 50 mm) for installation.
e) Screw down the M5*L8 screw on the left side of the inverter.
Step 2: Match the inverter with wall bracket
Ø
d) Hang the inverter over the bracket, move the inverter close to it,
slightly lay down the inverter, and make sure the mounting bar on
the back are fixed well with the groove on the bracket.

Other manuals for Solax X1 Series

Questions and Answers:

Question and Answer IconNeed help?

Do you have a question about the Solax X1 Series and is the answer not in the manual?

Solax X1 Series Specifications

General IconGeneral
Number of MPPTs2
Protection RatingIP65
Max. DC Voltage550V
Max. PV Input Voltage550V
Max. PV Input Power6000W
Max. Input Current11A
Rated Output Power5000W
Max. Output Power5500W
Nominal Output Voltage230V
Output Frequency50Hz/60Hz
European Efficiency97.0%
Weight18kg
Operating Temperature-25°C to 60°C
CoolingNatural
CommunicationWiFi

Related product manuals