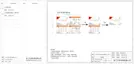
EasyManuals Logo

Solax X1 Series User Manual

Solax X1 Series
49 pages
To Next Page IconTo Next Page
To Previous Page IconTo Previous Page
Page #12 background imageLoading...
Page #12 background image
Position Min.size
Left
300 mm
300 mm
300 mm
300 mm
300 mm
Right
Top
Bottom
Front
Table2 Available Space Size
Available Space Size
300 mm
300 mm
300 mm
300 mm
300 mm
NOTE!
Avoid installing in the confined space!
18
19
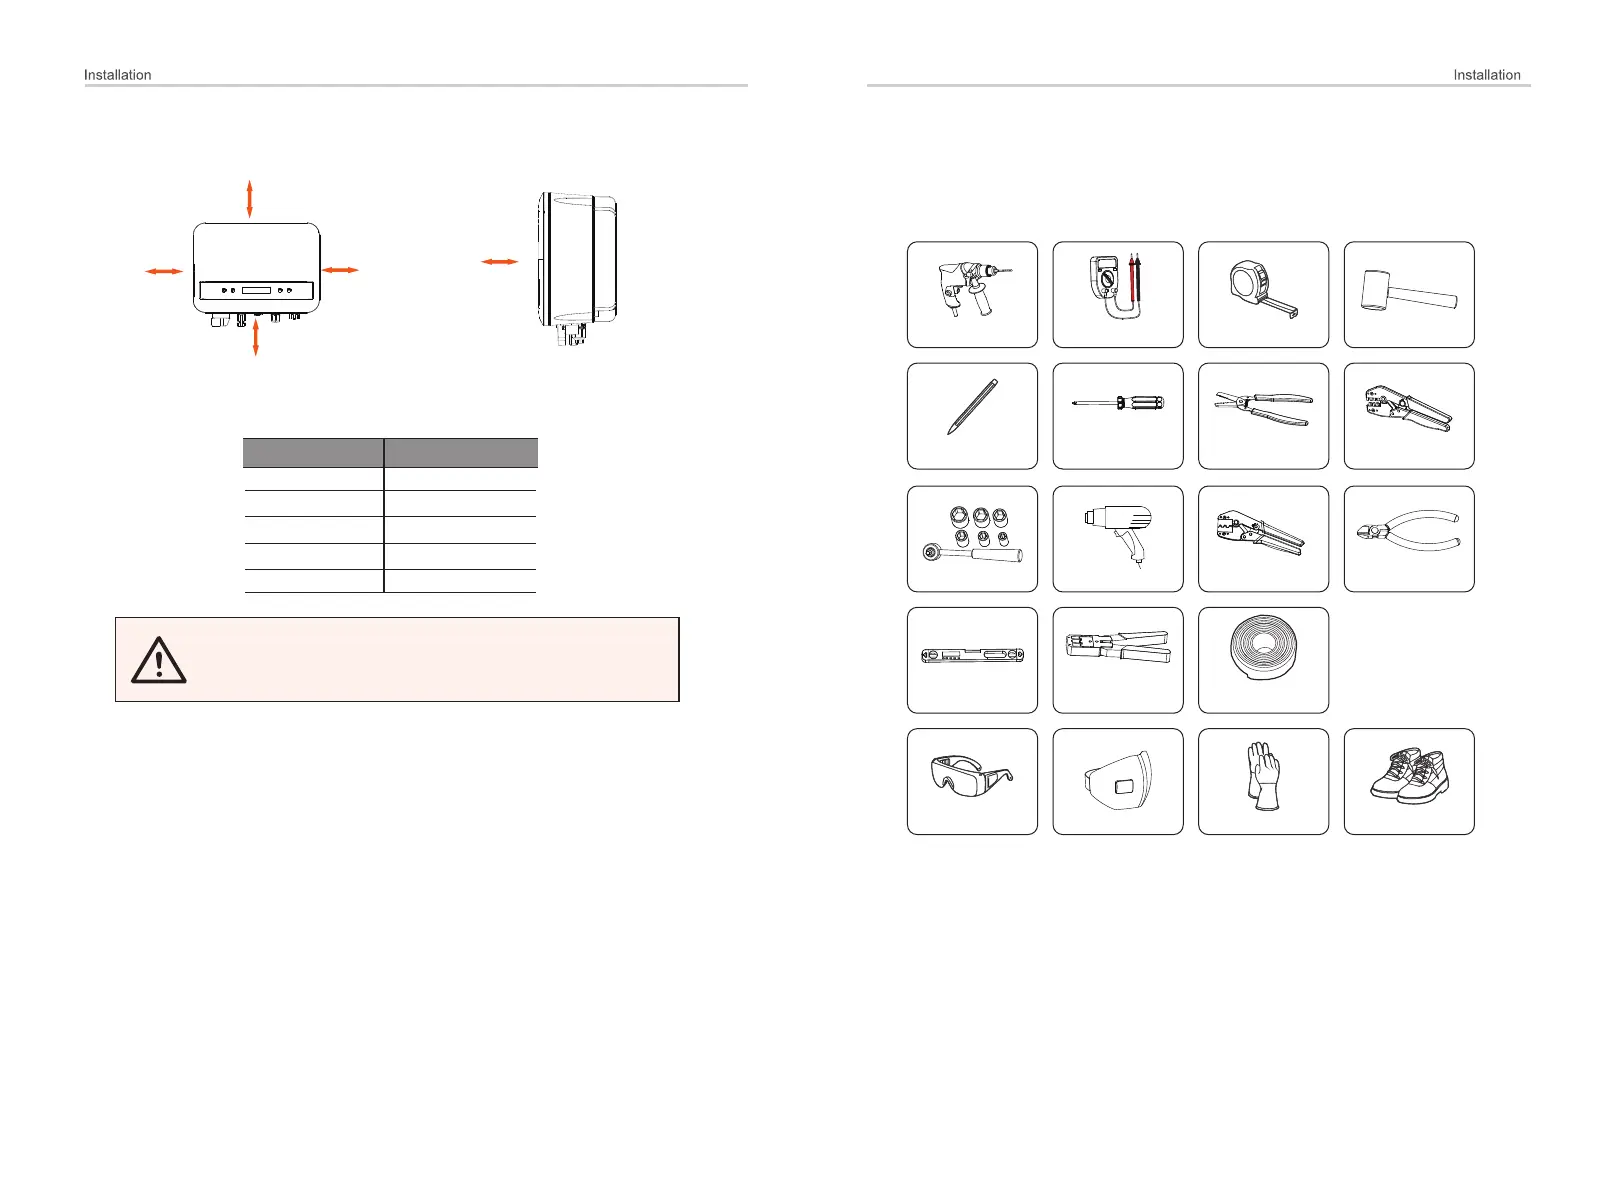
5.4 Installation Steps
Preparation
Tools below are needed before installation.
Ø
Step 1: Screw the wall bracket on the wall
Ø
a) Use the wall bracket as a template to mark the position of the 2
holes on the wall.
Drill
Multimeter
Measuring tape
Mallet
Marker
Cross screwdriver
Wire stripper
Crimping tool
Torque wrench
(10 mm)
Hot-air blower
MC4 crimping tool
Diagonal pliers
Spirit level
Crimping tool
for RJ45
Heat shrinking
tube (5 mm)
Safety goggles
Anti-dust mask
Safety gloves Safety boots

Other manuals for Solax X1 Series

Questions and Answers:

Question and Answer IconNeed help?

Do you have a question about the Solax X1 Series and is the answer not in the manual?

Solax X1 Series Specifications

General IconGeneral
Number of MPPTs2
Protection RatingIP65
Max. DC Voltage550V
Max. PV Input Voltage550V
Max. PV Input Power6000W
Max. Input Current11A
Rated Output Power5000W
Max. Output Power5500W
Nominal Output Voltage230V
Output Frequency50Hz/60Hz
European Efficiency97.0%
Weight18kg
Operating Temperature-25°C to 60°C
CoolingNatural
CommunicationWiFi

Related product manuals