2
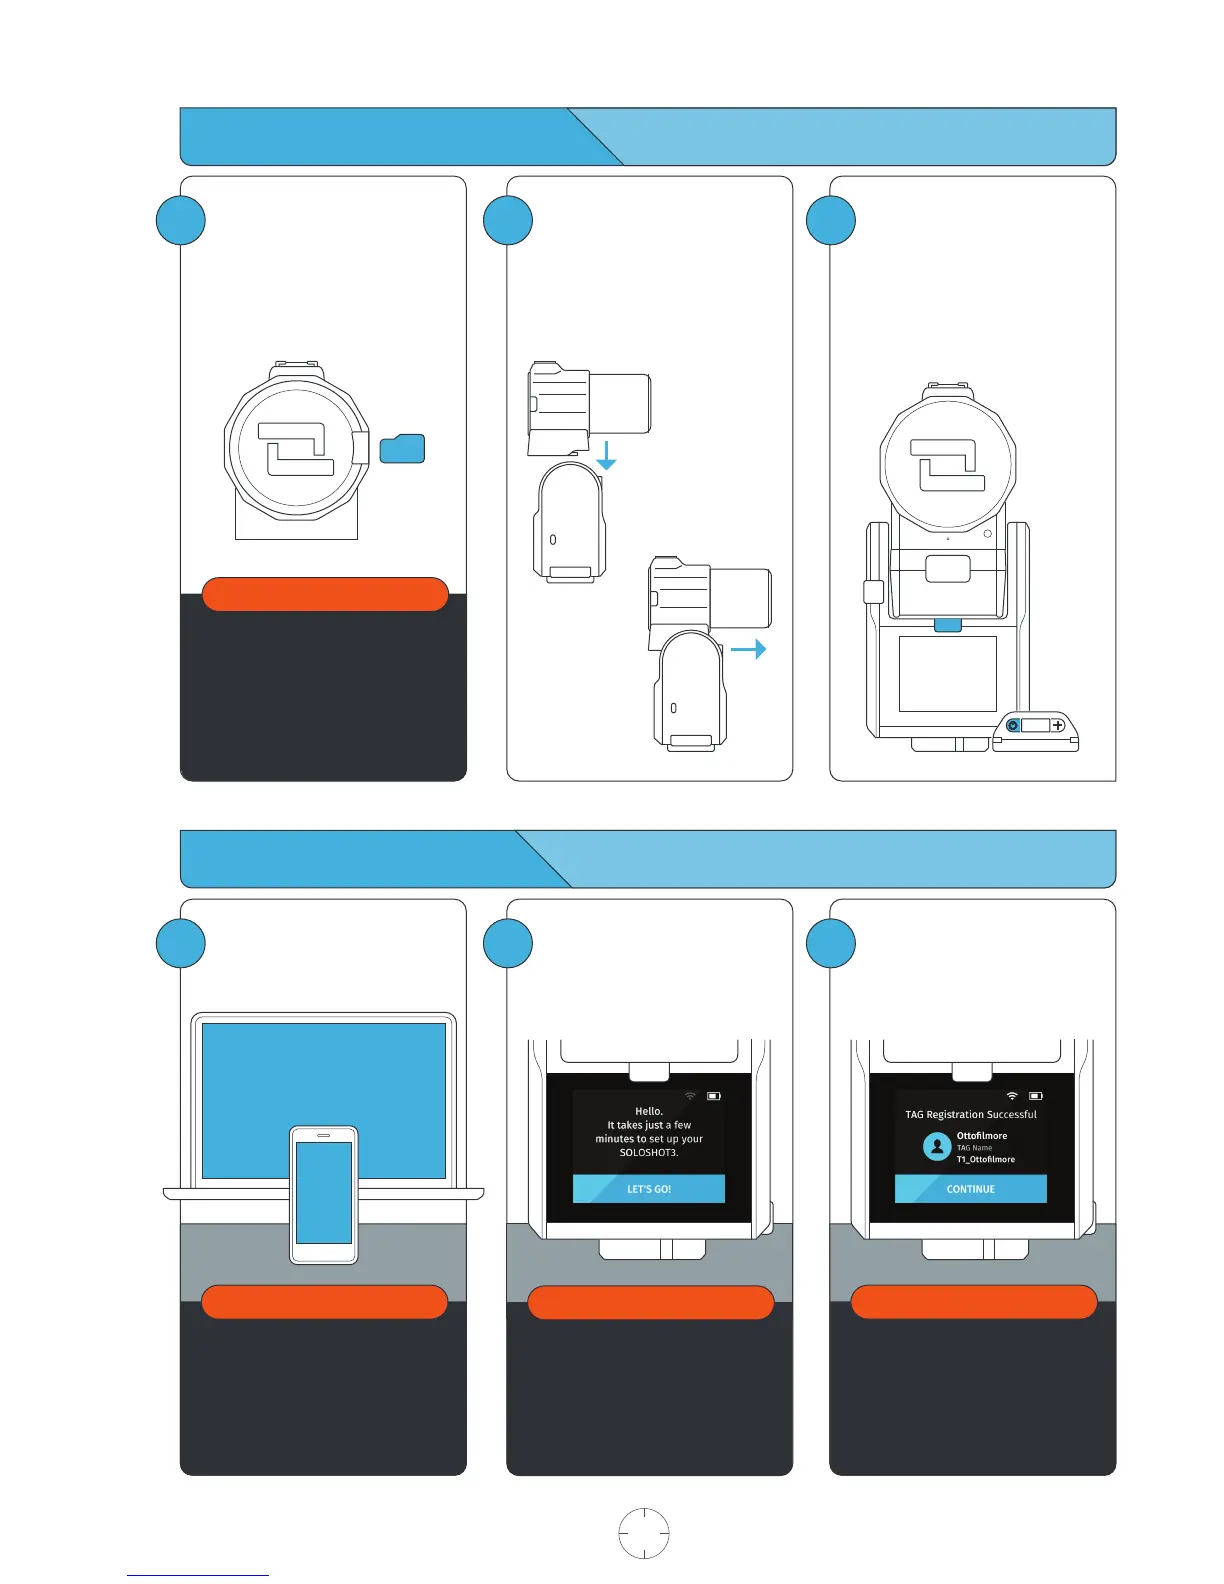
Dock the OpticX Camera to the
Base by guiding it down onto the
tilt drum from above, and then
pushing it forward until it securely
clicks into place.
Preparing your SOLOSHOT3
Insert an approved Micro SD
Card into the side of the
OpticX Camera.
You will hear a click when fully
inserted.
1
Your SD card will be completely
erased. Make sure to save any
content that you don’t want erased!
Visit soloshot.com/sd-card for a
list of compatible SD cards.
IMPORTANT
3
To power on Base, press and
hold the POWER button for
3 seconds.
To power on Tag, press the
POWER button.
Update and Registration
1
Create a SOLOSHOT account at
soloshot.com/ss3setup.
2
Power on the Base and follow the
on-screen instructions to update
your device.
IMPORTANT
Your SOLOSHOT3 must be upright
and level upon start-up and
updating software. It’s recommend
it be connected to a tripod during
this process.
3
IMPORTANT
The screen will be blank for up to
one minute during certain steps
of the update process. DO NOT
power down device during
update.
After registering your Tags, you
are prompted to select the
tracking preferences of the Tag.
Continue on next page
USER MANUAL 04 SOLOSHOT.COM
IMPORTANT
A SOLOSHOT account is required
before setup of your SOLOSHOT3.