Determine Cycle Time
1. Use the Required CFM and Delivered CFM from the above steps to determine the Cycle Time from Table 3.
2. The values highlighted in gray cannot be set due to the maximum 60 minute Cycle Time. A second ventilation device
(i.e., bigger duct or second duct) will be required to meet ventilation needs.
Table 3. Cycle Time Setting (minutes) for Airow Delivered vs. Airow Required for 1 Hour Cycle
CFM Delivered
CFM Required
20 30 40 50 60 70 80 90 100
60 20 30 40 50 60 70 80 90 100
80 15 25 30 40 45 55 60 70 75
100 15 20 25 30 35 40 50 55 60
120 10 15 20 25 30 35 40 45 50
140 10 15 15 20 25 30 35 40 45
160 10 10 15 20 25 25 30 35 40
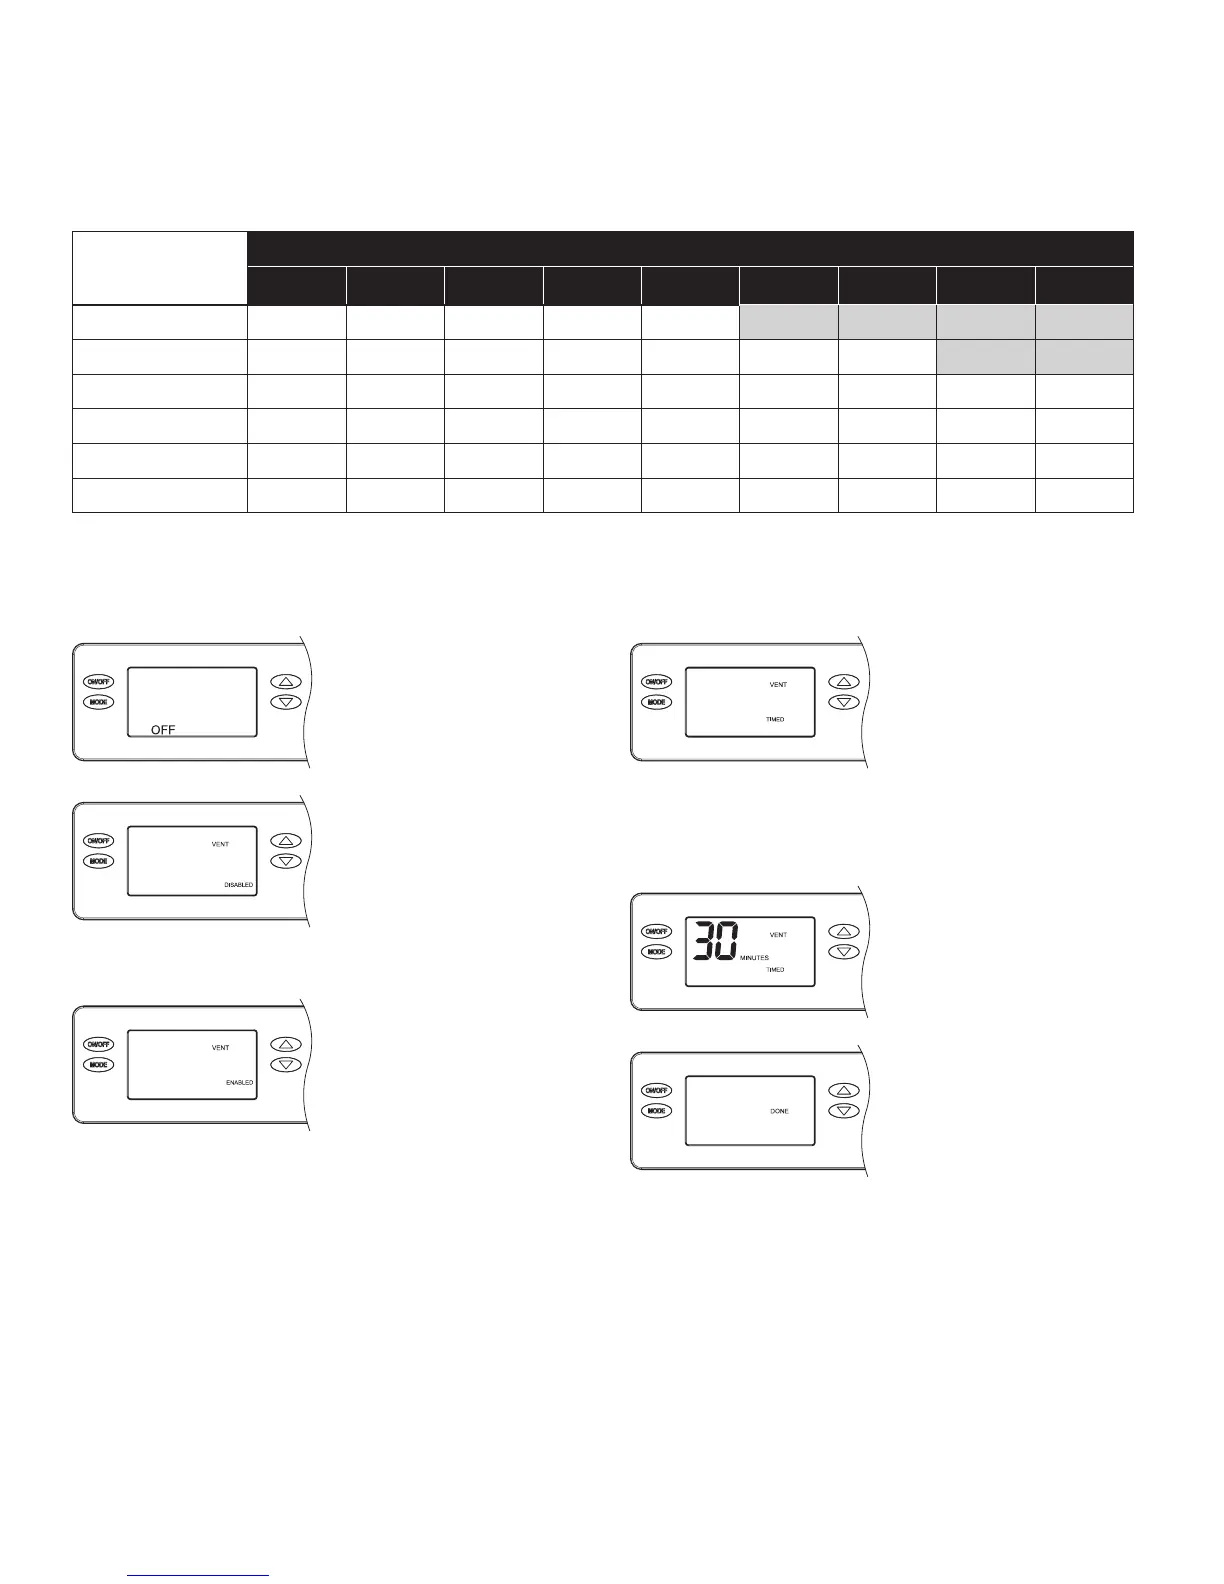
INSTALLER SETTINGS
With the dehumidier
power switch on, press the
ON/OFF button to turn the
dehumidier off.
Press and hold the MODE
button for 3 seconds
to access the installer
settings menu. Press
and release the MODE
button repeatedly until the
VENT DISABLED screen
appears.
Press the UP or DOWN
button to ENABLE
ventilation, then press the
MODE button to set Timed
or Auto ventilation.
Press the UP or DOWN
to toggle between VENT
TIMED, VENT AUTO-B,
VENT AUTO-C and VENT
AUTO-D (refer to page
16 for a description of
each). Press the MODE
button to select the desired
ventilation method and
adjust the ventilation time.
Press the UP or DOWN
button to set the desired
amount of ventilation time
per hour from
0 to 60 minutes.
To complete, press the
MODE button repeatedly
until DONE appears on the
display.
18