CLIP OFF
PLASTIC STRAP
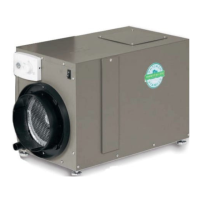
REMOVE SHIPPING BRACKET
90-1908
IMPORTANT
Cut the strap securing the compressor shipping support
bracket and remove the strap and shipping bracket.
See Figure 1.
Set Up Dehumidier for Installation
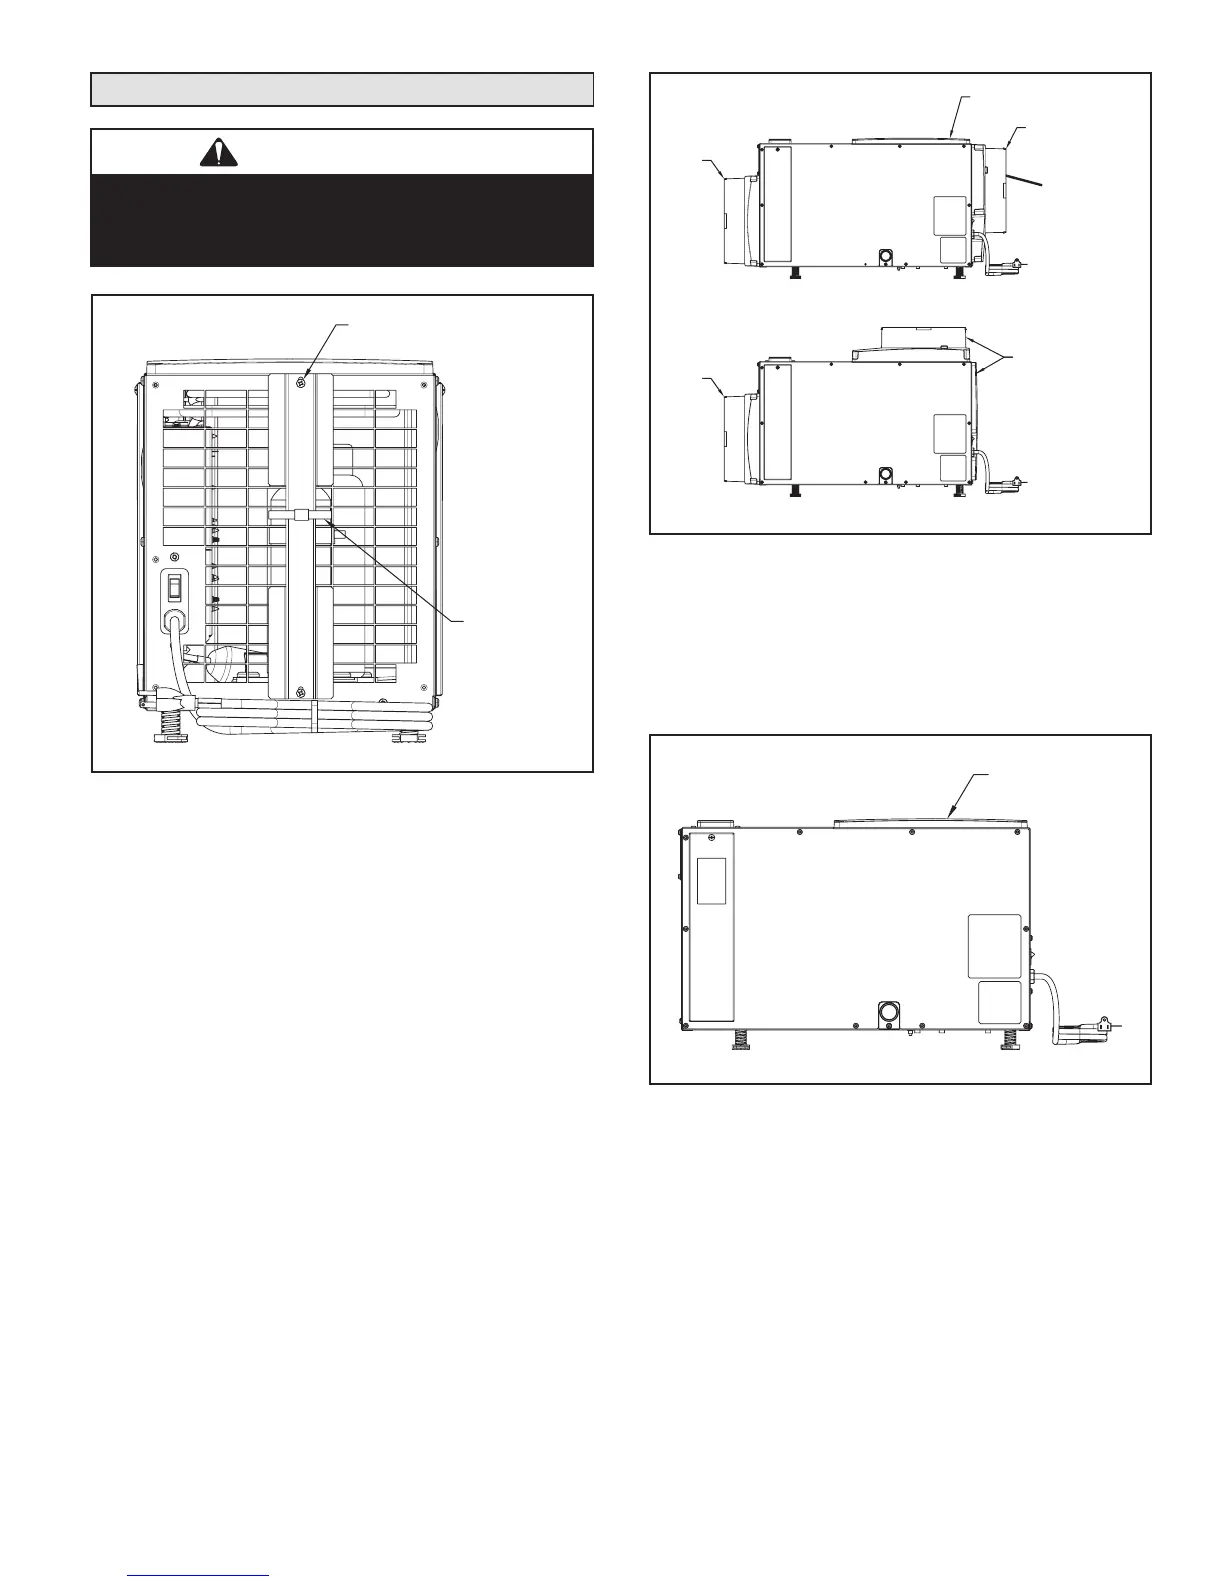
DUCT COLLARS
Standard Basement and Attic Installations
(Fully Ducted)
• Use the screws in the parts bag to attach the duct collars
to the inlet and outlet of the dehumidier. The outlet collar
has a backow damper.
• The outlet duct collar may be attached to the top or end
of the unit. Move the outlet cover to the location not being
used. See Figure 2.
• Make sure there are no bends in the duct coming off the
outlet for a minimum of 4". This will ensure that the duct
will not interfere with the backow damper function.
Figure 1. Remove Shipping Bracket
Figure 2. Fully Ducted Installations
OUTLET COVER
OUTLET DUCT
COLLAR W/BACK
DRAFT DAMPER
MOVE OUTLET
COVER AND
INSTALL OUTLET
DUCT COLLAR TO
TOP DISCHARGE
LOCATION
INLET
DUCT
COLLAR
INLET
DUCT
COLLAR
END DISCHARGE
TOP DISCHARGE
90-1909
Crawl Space, Sealed Attics or Basement Installations
If dehumidifying the space in which the dehumidier is
installed, the duct collars do not need to be installed. Leave
the outlet cover on top of the unit. See Figure 3.
Figure 3. Non-ducted Installations
OUTLET COVER
90-1911
3