1 A CD, installed with Wideband Test Terminal (WTT) and DASCAL Software is
supplied to assist with the upgrade of the DAS firmware.
2 Connect the Dual Test Cable to the Transponder as detailed in Step 3.
3 Connect the CPU and DAS connectors to comms ports on the PC.
OPERATING THE EQUIPMENT
DAS Firmware Upgrade Procedure
STEP 8
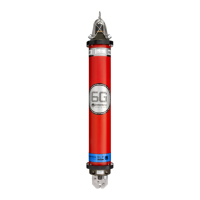
5 An Enter Serial COM port screen will appear. From the drop down menu select
the correct Serial COM port for the CPU connection. Click OK.
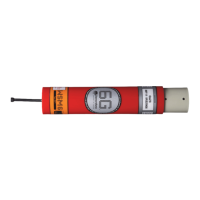
6 On the WTT, select the Options tab.
7 Select the DASCAL tab. Click ON.
Make a note of which comms port each connector is connected to.
2 NOTE
4 Double click on the WTT icon to run the WTT software.