Precautions
l
Choose the installation location carefully so
that the unit will not interfere with normal
driving operations
l
Avoid installing the unit in areas subject to
dust, dirt, excessive vibration, or high
temperatures, such as in direct sunlight or near
heater ducts
l
Use only the supplied mounting hardware for
a safe and secure installation
Mounting angle adjustment
Adjust the mounting angle to less than 20”
How to detach and attach the
front panel (a)
Before installing the unit, detach the front
panel
O-A To detach
Before detaching the front panel, be sure to
press (OFF) Press (OPEN), then slide the front
panel to the right side, and pull out the left side
O-B To attach
Place the hole @ in the front panel onto the
spindle @ on the unit as illustrated, then push
the left side in
Mounting example (a)
Installation in the dashboard
Note
When installing this unit: Depending on car
type, the mounting angle may not allow the
front panel to open easily In such a case,
remove the silver screw 8 shown below
When screwing it on again, first lock the lever
@ Attaching the screw without doing so may
cause the unit to break
Mounting the unit in a Japanese
car (HI
You may not be able to install this unit in some
makes of Japanese cars In such a case, consult
your Sony dealer
Note
To prevent malfunction, install on/y with the
supplied screws @
Warning when installing in a car
without ACC (accessory)
position on the ignition key
switch
Be sure to press (OFF) on the unit for two
seconds to turn off the clock display after
turning off the engine
When you press (OFF) only momentarily, the
clock display does not turn off and this causes
battery wear
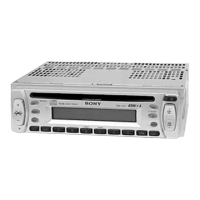
RESET button
When the installation and connections are
completed, be sure to press the RESET button
with a ball-point pen, etc