29
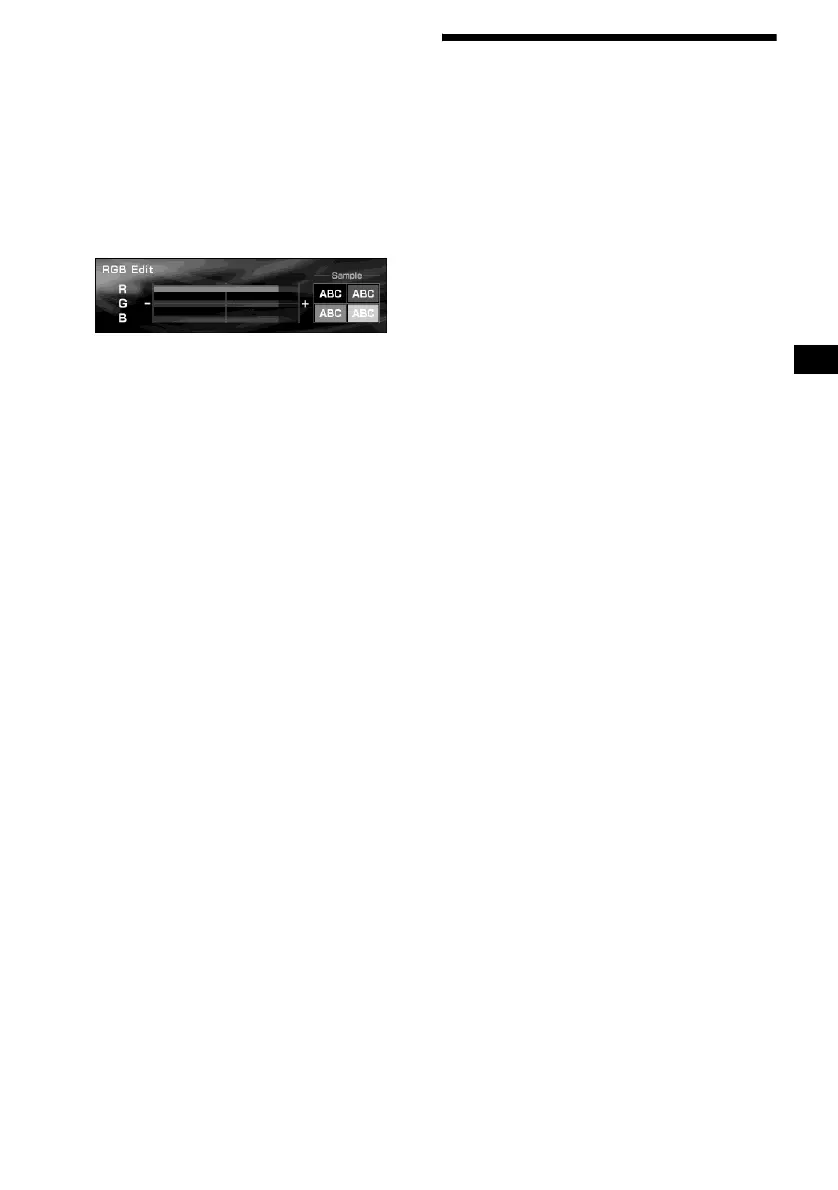
Adjusting the character colour
1 Press (MENU).
2 Press < or , repeatedly to select
“Display,” then press (ENTER).
3 Press < or , repeatedly to select
“Char Color,” then press (ENTER).
4 Press < or , repeatedly to select
“Custom,” then press (ENTER).
The RGB edit display appears.
5 Adjust the colour levels.
1 Press M or m repeatedly to select
“R”(Red), “G”(Green) or “B”(Blue).
2 Press < or , repeatedly to adjust
the colour level, then press
(ENTER).
3 Repeat steps 1 and 2 to adjust all
the colour levels.
The confirmation display appears after
adjusting “B,” then press (ENTER).
6 Press < or , repeatedly to select
“YES,” then press (ENTER).
“Complete” appears, and the display returns
to the main menu.
To return to the former colour levels, select
“NO,” then press (ENTER).
7 Press (MENU).
The display returns to the normal display.
Changing the display image
automatically
— Auto Image
You can change the display image automatically
at a specified speed.
1 Press (MENU).
2 Press < or , repeatedly to select
“Display,” then press (ENTER).
3 Press < or , repeatedly to select
“Auto Image,” then press (ENTER).
4 Press < or , repeatedly to select the
desired speed, “FAST,” “MIDDLE,” or
“SLOW,” then press (ENTER).
5 Press (MENU).
The display returns to the normal display.
To cancel the image change, select “OFF” in step
4.