G)Press <J/t>//:)JV to select an image area,
then press ENTER.
The index view is displayed.
®Press
<J/t>//:)JV
to
select the desired
image, then press ENTER.
The window used for adjusting the
image is displayed.
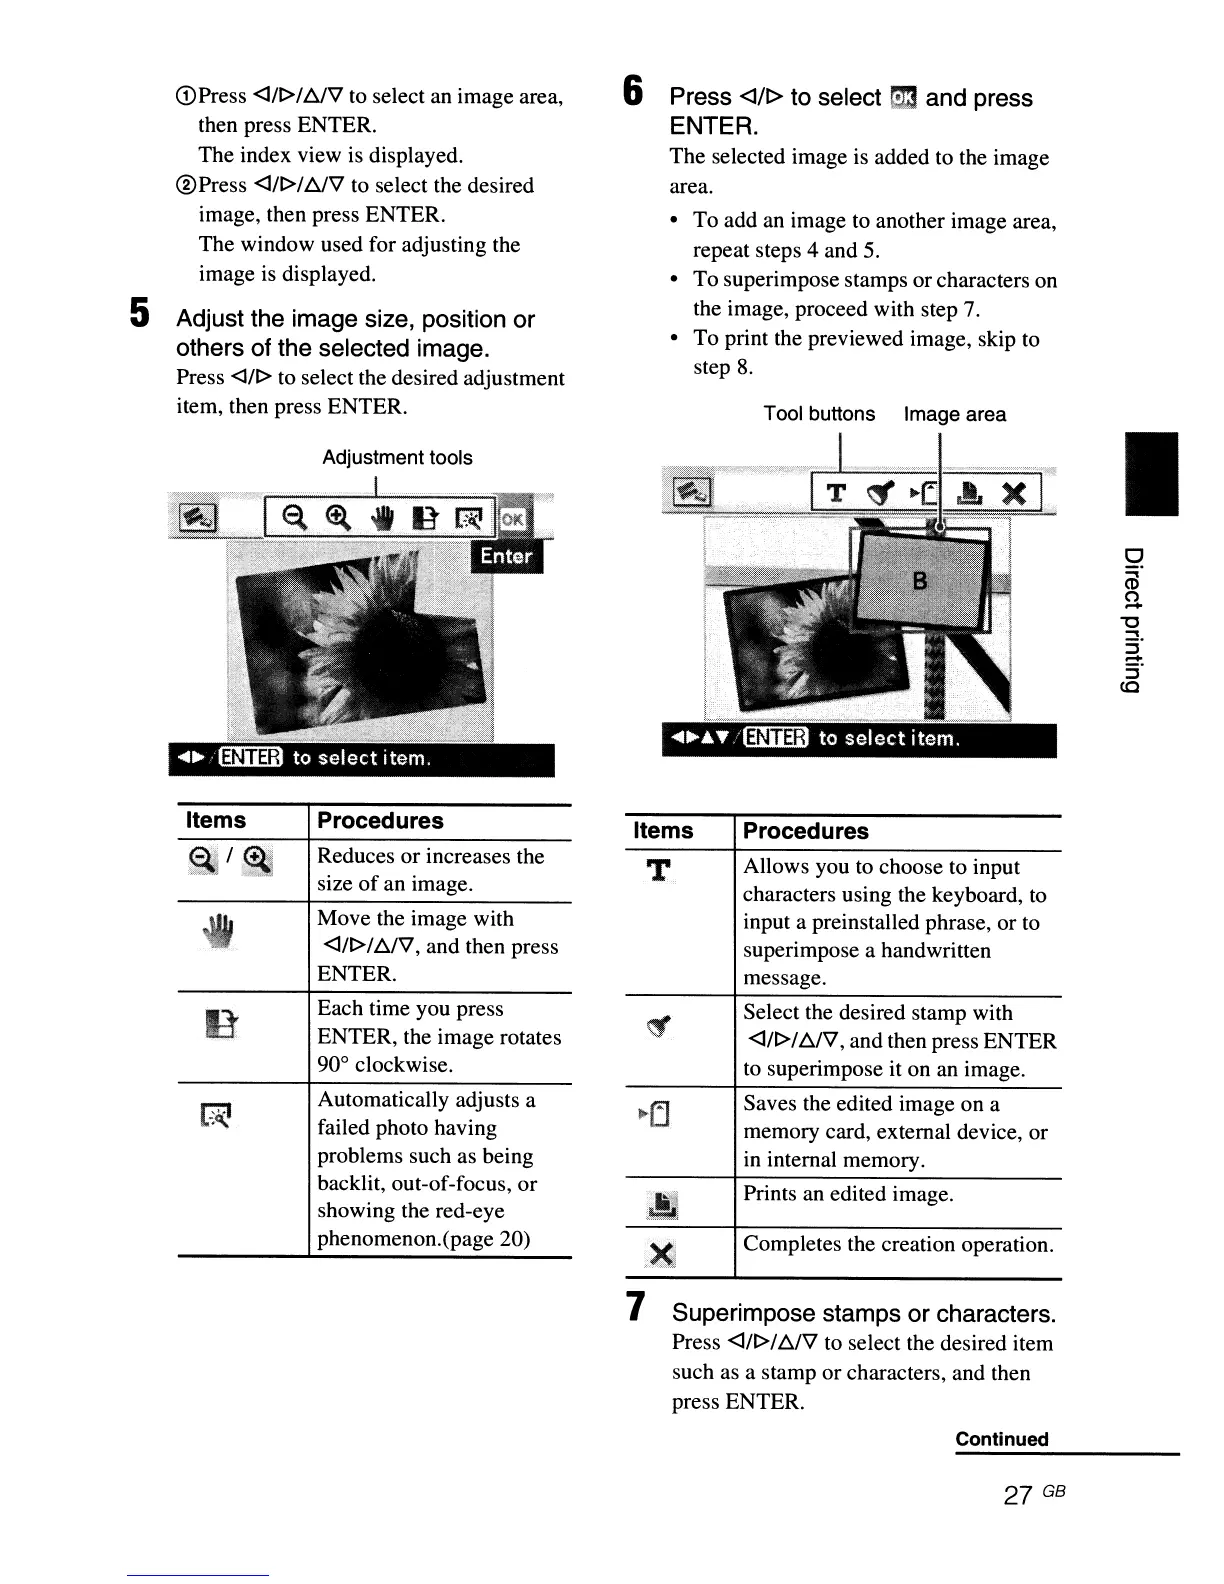
5 Adjust the image size, position
or
others of the selected image.
Press <l/t>
to
select the desired adjustment
item, then press ENTER.
Adjustment tools
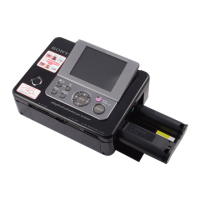
6 Press <J/t> to select
ri!3
and press
ENTER.
The selected image is added to the image
area.
• To add
an
image
to
another image area,
repeat steps 4 and
5.
• To superimpose stamps or characters on
the image, proceed with step
7.
• To print the previewed image, skip to
step
8.
Tool buttons Image area
I
Items
Procedures
Reduces or increases the
size
of
an image.
Move the image with
<J/t>/l::!./V, and then press
ENTER.
Each time you press
ENTER, the image rotates
90° clockwise.
Automatically adjusts a
failed photo having
problems such as being
backlit, out-of-focus,
or
showing the red-eye
phenomenon.(page 20)
Items
T
Procedures
Allows you to choose to input
characters using the keyboard,
to
input a preinstalled phrase, or to
superimpose a handwritten
message.
Select the desired stamp with
<J/t>/
l::!.l'V,
and then press ENTER
to superimpose it on an image.
Saves the edited image on a
memory card, external device, or
in internal memory.
Prints an edited image.
Completes the creation operation.
7 Superimpose stamps
or
characters.
Press <J/t>//:)JV to select the desired item
such as a stamp or characters, and then
press ENTER.
Continued
27
GB