I
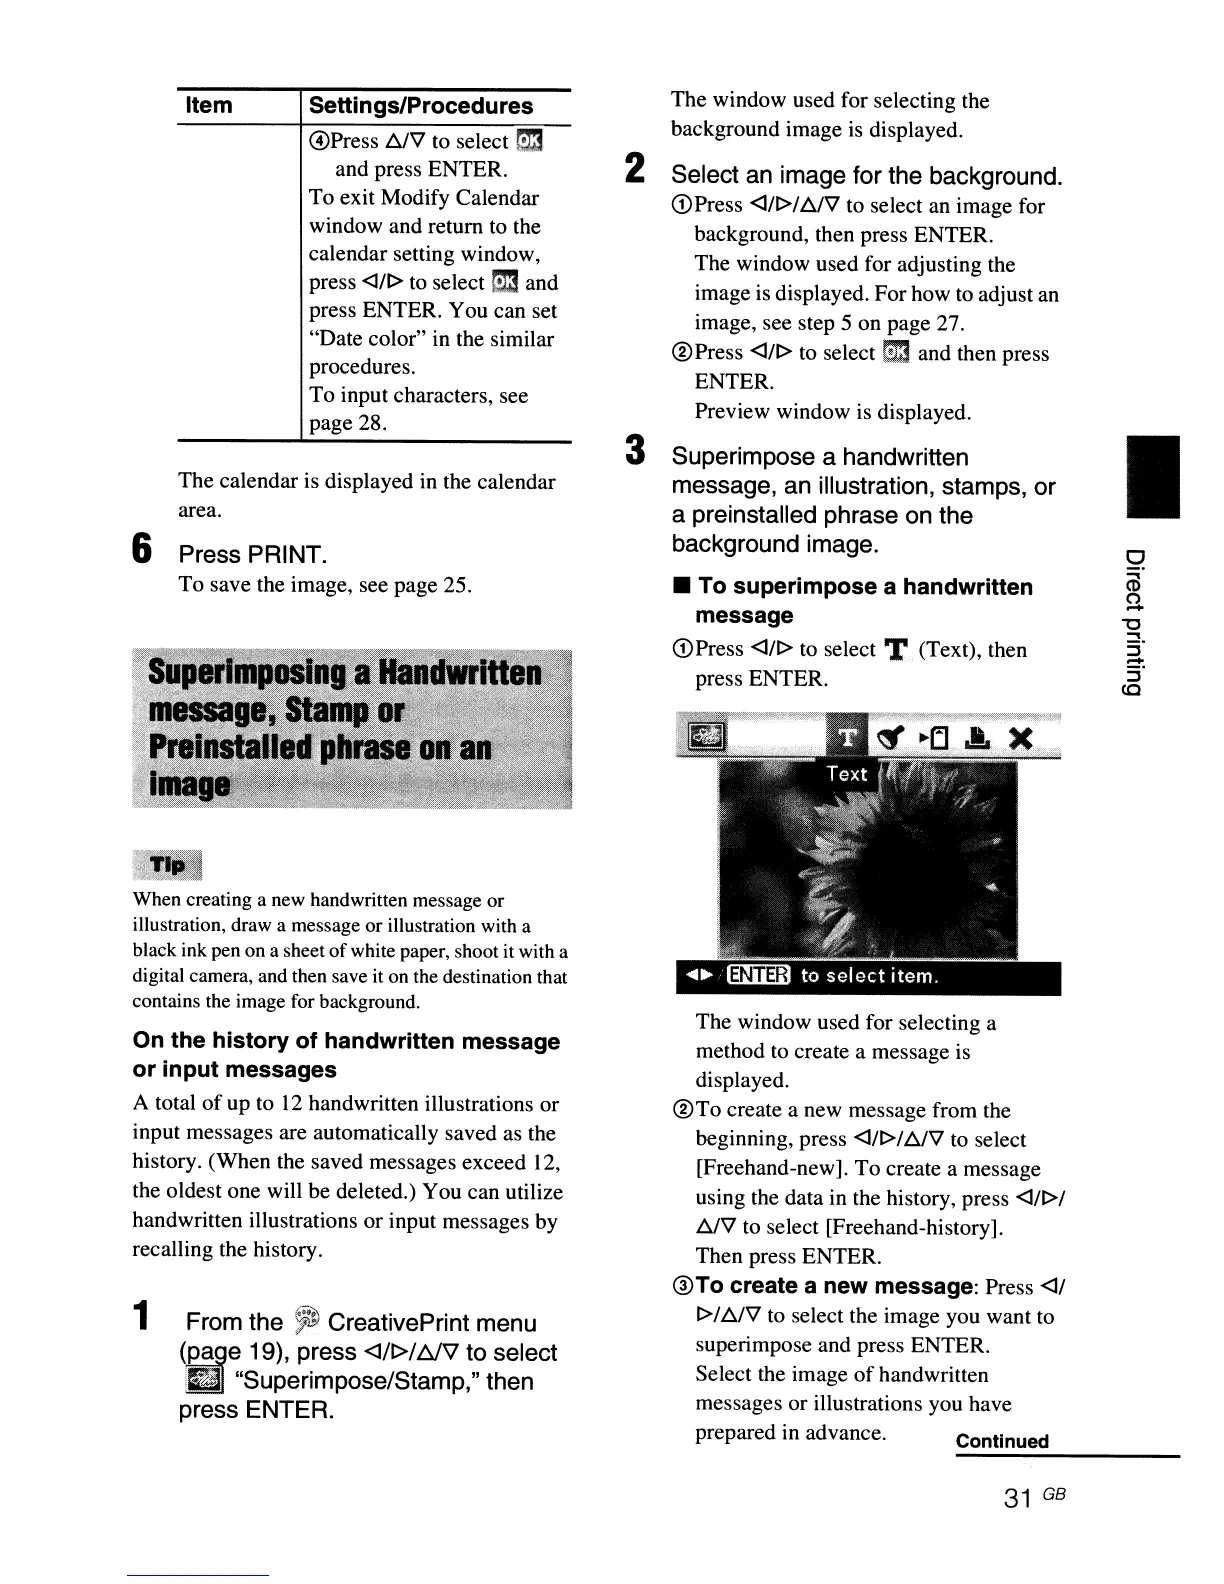
The window used for selecting a
method to create a message is
displayed.
®To
create a new message from the
beginning, press
<J/l>If)jV
to
select
[Freehand-new].
To
create a message
using the data in the history, press
<JIl>l
b,./V
to
select [Freehand-history].
Then press ENTER.
@To create a new message: Press
<JI
l>1
f)jV
to
select the image you want to
superimpose and press ENTER.
Select the image
of
handwritten
messages or illustrations you have
prepared in advance. Continued
..;;",;;,,;,;,;;,;,;,,;,;;;.:,..;;;....----
The window used for selecting the
background image
is
displayed.
2 Select an image for the background.
G)
Press <JIl>l
b,./V
to select an image for
background, then press ENTER.
The window used for adjusting the
image
is
displayed. For how
to
adjust an
image, see step 5 on page 27.
® Press
<J/l>
to
select
r!3
and then press
ENTER.
Preview window is displayed.
3 Superimpose a handwritten
message, an illustration, stamps, or
a preinstalled phrase on the
background image.
• To
superimpose
a handwritten
message
G)Press <J/l>
to
select T (Text), then
press ENTER.
Press PRINT.
To save the image, see page 25.
The calendar is displayed in the calendar
area.
Item Settings/Procedures
@Press f)jV to select
r:m
and press ENTER.
To exit Modify Calendar
window and return
to
the
calendar setting window,
press
<l/l>
to
select
m:J
and
press ENTER. You can set
"Date color" in the similar
procedures.
To input characters, see
page 28.
On the
history
of
handwritten message
or
input
messages
A total
of
up to
12
handwritten illustrations or
input messages are automatically saved
as
the
history. (When the saved messages exceed
12,
the oldest one will be deleted.) You can utilize
handwritten illustrations or input messages by
recalling the history.
When creating a new handwritten message or
illustration, draw a message or illustration with a
black ink pen on a sheet
of
white paper, shoot it with a
digital camera, and then save it on the destination that
contains the image for background.
1 From the
~
CreativePrint menu
(IBe
19), press <J/t>/NV to select
im
"Superimpose/Stamp," then
press ENTER.
6
31
GB