33
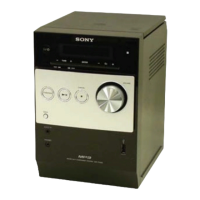
HCD-FX900W
(2) Select “2. Drive Manual Operation” by pressing the 2 “R”
button on the remote commander. The screen will appear as
shown.
(3) Select “3. Manual Adjustment” by pressing the 3 “R” button
on the remote commander. The screen will appear as shown.
(4)Select “6.IOP” by pressing the 6 “R” button on the remote
commander.
(5) Wait until a hexadecimal number appear.
(6) Convert each data from hexadecimal to decimal using
conversion table.
(7) Please find the label on the rear of the BU (Base Unit).
The default IOP value is written in the label.
(8) Subtract between these two values.
(9) If the remainder is smaller than 93 (decimal), then it is OK.
However if the value is higher than 93, then the BU is defective
and need to be change.
(10) Press the RETURN “R” button to return back to previous
menu.
(11) Press the 0 “R” button to return to Top Menu and power
off the DVD Player.
Drive Manual Operation
1. Servo Control
2. Track/Layer Jump
3. Manual Adjustment
4. Tray Aging Mode
5. MIRR time adjust
0. Return to top Menu
Manual Adjust
1. Track Balance Adjust:
2. Track Gain Adjust:
3. Focus Balance Adjust:
4. Focus Gain Adjust:
5. Eq boost Adjust:
6. Iop:
7. TRV. Level:
8. S curve(FE) Level:
9. RFL(PI) Level:
0. MIRR Time:
o O Change Value
[RETURN] Return to previous menu
Manual Adjust
1. Track Balance Adjust:
2. Track Gain Adjust:
3. Focus Balance Adjust:
4. Focus Gain Adjust:
5. Eq Boost Adjust:
6. Iop. 5B:
7. TRV. Level:
8. S curve(FE) Level:
9. RFL(PI) Level:
0. MIRR Time:
Change Value
[0] Return to previous menu
DVD SECTION
8-1. GENERAL DESCRIPTION
The IOP measurement allows you to make diagnosis and adjustment
simply by using the remote commander and monitor TV. The
instructions, diagnosis results, etc. are given on the on-screen display
(OSD).
Be sure to execute the IOP measurement when a BU (Base Unit) is
replaced.
8-2. HOW TO ENTER TEST MODE
Press three buttons x , A and VOLUME + simultaneously with
the DVD player in power on.
The Test Mode starts, then the menu shown below will be displayed
on the TV screen.
The menu above is the Remocon Diagnosis Menu screen which
consists of five main functions. At the bottom of the menu screen, the
model name and IF-con version. To exit from the Test Mode, press
the power button on the remote commander.
8-3. EXECUTING IOP MEASUREMENT
In order to execute IOP measurement, the following standard
procedures must be followed.
(1) In power on, press three buttons x , A and VOLUME +
simultaneously.
Remocon Diagnosis Menu
0. External Chip Check
1. Servo Parameter Check
2. Drive Manual Operation
3. Emergency History Check
4. Version Information
Model Name
IF-con : V
Syscon : Ver.
er. XX.XX (XXXX)
X.XXX
: GCX10FW_ XX
*
1
*1: Changes depending on destination
Remocon Diagnosis Menu
0. External Chip Check
1. Servo Parameter Check
2. Drive Manual Operation
3. Emergency History Check
4. Version information
Model Name
IF-con : Ver. XX.XX (XXXX)
Syscon : Ver. X.XXX
: GCX10FW_ XX
*
1
*1: Changes depending on destination
Ver. 1.1
 Loading...